
The Leica D-LUX 3 is a sleek and powerful compact camera, offering a 10-megapixel CCD sensor, 4x optical zoom, and image stabilization for sharp photos. Its user-friendly menu and manual adjustments make it ideal for photographers of all skill levels. The camera’s PDF manual is essential for unlocking its full potential, providing detailed instructions and troubleshooting tips to ensure optimal performance.
1.1 Overview of the Leica D-LUX 3 Camera
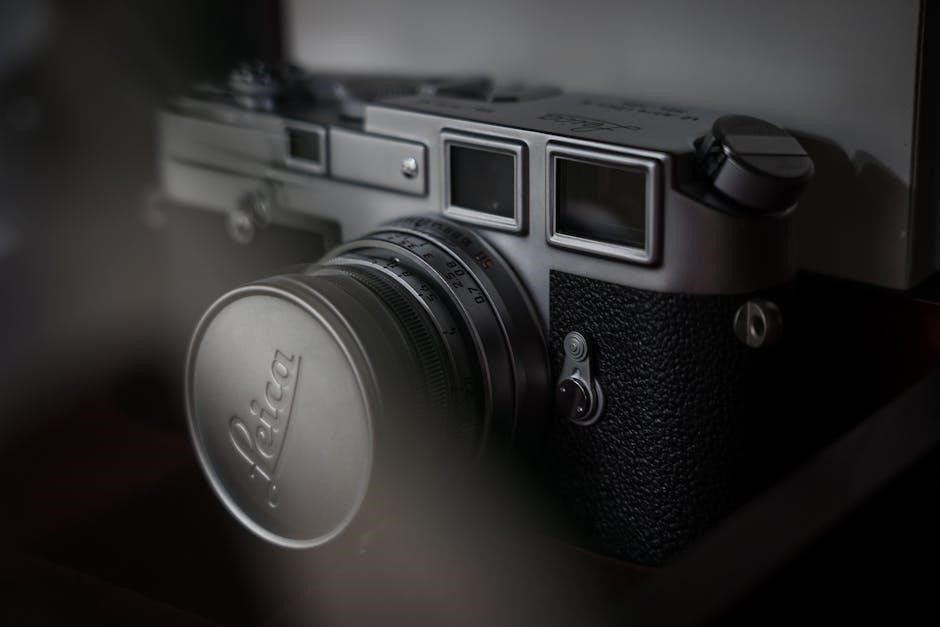
The Leica D-LUX 3 is a compact digital camera featuring a 10-megapixel CCD sensor, 4x optical zoom, and image stabilization. It offers a 16:9 aspect ratio, ISO sensitivity up to 400, and RAW image support. The camera is lightweight at 185g, with a 2.8-inch LCD screen and intuitive controls; Its sleek design and advanced features make it a versatile choice for photographers seeking high-quality images in various shooting conditions.
1.2 Importance of the User Manual for Optimal Use
The Leica D-LUX 3 manual is crucial for unlocking the camera’s full potential. It provides detailed instructions for understanding advanced features, troubleshooting common issues, and optimizing settings for superior image quality. Whether you’re a novice or an experienced photographer, the manual ensures you master the camera’s capabilities, from initial setup to advanced modes, helping you achieve professional results consistently.

Key Features and Specifications
The Leica D-LUX 3 boasts a 10-megapixel CCD sensor, 4x optical zoom, image stabilization, and a 16:9 aspect ratio. Its ISO range and noise reduction ensure crisp, high-quality images.
2.1 10-Megapixel CCD Sensor and Image Quality
The Leica D-LUX 3 features a 10-megapixel CCD sensor with 10.4 million total pixels, delivering high-resolution images with excellent detail and clarity. The camera supports multiple aspect ratios, including 16:9 and 3:2, offering flexibility in composition. With adjustable settings like contrast, saturation, and sharpness, users can tailor image quality to their preferences. The sensor’s performance, combined with noise reduction, ensures vibrant and professional-grade photos, making it ideal for enthusiasts and professionals alike.
2.2 4x Optical Zoom and 16:9 Aspect Ratio
The Leica D-LUX 3 boasts a 4x optical zoom, enabling close-up shots without sacrificing image quality. Its 16:9 aspect ratio offers a cinematic feel, ideal for wide-angle photography. The camera supports resolutions like 1920×1080 pixels, aligning with HDTV standards. This feature, combined with the 28mm wide-angle lens, provides versatility for capturing diverse scenes, from landscapes to portraits, with precise detail and clarity, guided by the manual’s expert instructions.
2.3 ISO Sensitivity and Noise Reduction
The Leica D-LUX 3 offers an ISO range of 80 to 400, providing flexibility in various lighting conditions. It features adjustable noise reduction settings, minimizing grain while preserving image detail. The manual details how to optimize ISO and noise reduction for low-light photography, ensuring crisp and clear results. This balance of sensitivity and noise control makes the camera versatile for both casual and professional use, as outlined in the user guide.
2.4 Image Stabilization for Sharp Photos
The Leica D-LUX 3 features image stabilization, reducing camera shake and blur, especially in low-light or zoomed shots. This technology ensures sharper images by compensating for hand movement. The manual details how to enable and utilize this feature effectively, enhancing overall photo clarity and user confidence in various shooting conditions.
Leica D-LUX 3 Manual PDF
The Leica D-LUX 3 manual is available as a free PDF download, providing detailed guidance on camera settings, features, and troubleshooting. It is in English and covers all aspects of camera operation, ensuring users can fully utilize its capabilities. The manual is essential for understanding and optimizing the camera’s performance, with clear instructions for beginners and advanced photographers alike.
3.1 Where to Download the Leica D-LUX 3 Manual
The Leica D-LUX 3 manual can be downloaded for free from trusted sources like Manuals.co.uk or Leica’s official website. It is available in PDF format and in English, ensuring easy access for users worldwide. The manual is highly rated, with an average of 9.4, and provides comprehensive guidance on camera settings and troubleshooting. Visit these sites to download and explore the manual effortlessly.
3.2 Contents of the Leica D-LUX 3 Manual
The Leica D-LUX 3 manual includes detailed instructions on camera setup, shooting modes, and advanced features like manual focus and ISO settings. It covers troubleshooting common issues, such as blurry photos and connectivity problems. The manual also provides specifications, maintenance tips, and guidance on transferring photos to computers. With 141 pages, it offers a thorough understanding of the camera’s functionality and customization options for optimal use.
3.3 Structure and Organization of the Manual
The Leica D-LUX 3 manual is meticulously organized into 141 pages, divided into clear sections like setup, shooting modes, and troubleshooting. It features a detailed table of contents, numbered pages, and logical flow. Key features are highlighted with bold text and bullet points for easy navigation. Diagrams and images assist in understanding complex settings, while clear headings ensure quick access to specific topics. The manual is comprehensive yet user-friendly, catering to photographers of all skill levels, and is available in English for easy download from the official Leica website.
Downloading and Installing the Manual
The Leica D-LUX 3 manual is available as a free PDF download from the Leica website. It’s easy to access and essential for understanding camera setup and features.
4.1 Step-by-Step Guide to Downloading the PDF
Visit the official Leica website or trusted third-party sites like Manuals.co.uk. Search for “Leica D-LUX 3 manual.” Select the PDF version, click download, and save the file. Ensure the manual is in English for clarity. The PDF is approximately 13 MB, so the download should be quick. Once downloaded, open the file using a PDF reader to access the guide.
4.2 Saving and Organizing the Manual for Easy Access
Save the PDF manual in a dedicated folder on your computer, such as “Camera Manuals” or “Leica D-LUX 3 Resources.” Name the file clearly, e.g., “Leica_D-LUX_3_Manual.pdf.” Consider adding it to cloud storage for remote access. Create a shortcut on your desktop for quick reference. For redundancy, backup the file to an external drive or email it to yourself; This ensures easy access and prevents loss of the manual.
4.3 Troubleshooting Common Download Issues
Common download issues include slow speeds or corrupted files. Ensure a stable internet connection and try using a different browser. If the file is incomplete, restart the download. Verify file integrity by checking the size matches the source. If problems persist, contact the website’s support team or seek alternative download sources to resolve the issue effectively.
Navigating the Leica D-LUX 3 Menu
The Leica D-LUX 3 menu is user-friendly, with clear sections for settings like exposure, ISO, and white balance. Its intuitive design helps users easily customize preferences and navigate features.
5.1 Understanding the Menu Layout
The Leica D-LUX 3 menu is logically organized into clear categories, including Shooting Mode, Setup, and Playback. Each section offers intuitive options for customizing settings like ISO, white balance, and image quality. The menu’s simplicity ensures quick access to essential controls, making it easy for users of all levels to navigate and adjust settings efficiently. This streamlined design enhances the overall user experience.
5.2 Customizing Settings for Personal Preference
Users can tailor the Leica D-LUX 3 to their preferences by adjusting ISO, white balance, and exposure compensation. The camera also allows customization of contrast, saturation, and sharpness. For advanced users, RAW file shooting is supported, enabling greater control during post-processing. These personalizations enhance creative control and ensure images align with individual photographic styles, making the camera versatile for diverse shooting needs and preferences.
Setting Up the Camera
Initial setup involves configuring date, time, and language settings. The camera’s intuitive design ensures easy navigation, with minimal manual adjustments required for a seamless user experience.
6.1 Initial Setup and Configuration
The Leica D-LUX 3’s initial setup is straightforward. Users can configure date, time, and language settings via the menu. The camera’s intuitive interface ensures easy navigation, with minimal manual adjustments needed. This setup process allows for a seamless user experience, making it accessible for photographers of all skill levels. The camera’s compact design and user-friendly features enhance its portability and ease of use.
6.2 Date, Time, and Language Settings
The Leica D-LUX 3 allows users to set the date, time, and language through its intuitive menu system; Accessing these settings ensures proper organization of photos and personalized navigation. The manual provides clear instructions for configuring these options, making the setup process quick and straightforward. This feature enhances user convenience, ensuring a seamless experience for photographers of all levels. The camera’s menu is designed for easy customization.

Advanced Features of the Leica D-LUX 3
The Leica D-LUX 3 offers advanced features like RAW file shooting, manual focus, exposure compensation, ISO adjustments, and white balance customization; It also includes a self-timer, burst mode, image stabilization, and a 16:9 aspect ratio option, enhancing photography options and image quality for versatile shooting scenarios.
7.1 Using Manual Focus and Exposure Compensation
Manual focus on the Leica D-LUX 3 is activated by switching the focus selector to MF mode. Use the control dial to adjust focus precisely. Exposure compensation is accessed via the +/- button, allowing adjustments to brightness. These features offer creative control, enabling customization of depth of field and lighting. The camera’s manual provides clear guidance on optimizing these settings for professional-quality results in various shooting conditions.
Manual focus on the Leica D-LUX 3 is activated by switching the focus selector to MF mode. Use the control dial to adjust focus precisely. Exposure compensation is accessed via the +/- button, allowing adjustments to brightness. These features offer creative control, enabling customization of depth of field and lighting. The camera’s manual provides clear guidance on optimizing these settings for professional-quality results in various shooting conditions.
7.2 Adjusting ISO and White Balance
The Leica D-LUX 3 allows users to adjust ISO settings (80, 100, 200, 400, Auto) via the ISO button on the rear. White Balance options include Auto, Daylight, Cloudy, Shadow, and Fluorescent settings, ensuring accurate color representation in various lighting conditions. The manual provides detailed guidance on optimizing these settings for different environments, helping users achieve precise control over image quality and color accuracy.
7.3 Utilizing the Self-Timer and Burst Mode
The Leica D-LUX 3 features a self-timer with 2 or 10-second delays, activated via the Drive button. Burst Mode enables rapid consecutive shooting, ideal for capturing dynamic moments. The manual details how to access these modes, ensuring users can make the most of the camera’s functionality for sharper group photos and fast-paced action shots.

Shooting Modes and Options
The Leica D-LUX 3 offers versatile shooting modes, including Auto, Macro, and Scene modes, tailored for various photography needs. The manual provides tips for optimizing Scene modes effectively.
8.1 Exploring Different Shooting Modes
The Leica D-LUX 3 offers a variety of shooting modes, including Auto, Manual, Scene, and Burst modes. Auto mode simplifies photography, while Manual mode provides creative control. Scene modes cater to specific conditions like portraits or landscapes. Burst mode captures rapid sequences, ideal for action shots. The manual guides users in selecting and optimizing these modes for diverse photography needs, ensuring versatility and precision in every shot.
8.2 Tips for Using Scene Modes Effectively
Scene modes on the Leica D-LUX 3 simplify photography by optimizing settings for specific scenarios. For portraits, use Face Detection to focus on subjects. In Landscape mode, enhance colors and details. Sports mode freezes action with faster shutter speeds. Night mode reduces noise in low-light conditions. Experiment with modes, adjust ISO and white balance as needed, and review results to refine your shots for the best outcomes.

Image Quality and Customization
The Leica D-LUX 3 delivers high-quality images with its 10-megapixel sensor, offering adjustable settings like contrast, saturation, and sharpness. RAW file support enhances post-processing flexibility for photographers.
9;1 Understanding Resolution and Aspect Ratio
The Leica D-LUX 3 offers a 10-megapixel CCD sensor, providing high-resolution images with options like 4224×2376 pixels in 16:9 aspect ratio or 3568×2376 pixels in 3:2. This flexibility allows photographers to choose formats that suit their creative needs, ensuring crisp details for both printing and digital use. The manual details how to adjust these settings for optimal image quality and composition, enhancing versatility in various shooting scenarios.
9.2 Adjusting Contrast, Saturation, and Sharpness
The Leica D-LUX 3 allows users to fine-tune contrast, saturation, and sharpness to enhance image aesthetics. Adjusting these settings enables photographers to refine details, add vibrancy to colors, and maintain clarity in both highlights and shadows. The manual provides clear guidance on accessing these controls, ensuring users can customize their images to achieve the desired visual impact and preserve the integrity of their photos.
Maintenance and Care
Regular cleaning of the lens and camera body ensures optimal performance. Update firmware for improved functionality. Refer to the manual for detailed maintenance and care instructions.
10.1 Cleaning the Lens and Camera Body
Regular cleaning of the Leica D-LUX 3’s lens and body is essential for maintaining image quality and longevity. Use a soft, dry cloth to wipe the lens and camera surfaces. Avoid harsh chemicals or abrasive materials that could damage the finish. For stubborn smudges, lightly dampen the cloth with distilled water, but ensure no moisture enters the camera. Refer to the manual for detailed cleaning procedures to prevent damage and ensure optimal performance.
10.2 Updating Firmware for Improved Performance
Updating the Leica D-LUX 3’s firmware enhances performance and adds new features. Download the latest firmware from Leica’s official website. Connect the camera to your computer via USB, following the manual’s instructions. Ensure the camera’s battery is fully charged and avoid interruptions during the update. After completion, restart the camera and verify the firmware version in the menu to confirm success.

Troubleshooting Common Issues
Troubleshooting common issues with the Leica D-LUX 3 often involves resolving blurry photos and connectivity problems. Consulting the manual provides step-by-step solutions for optimal camera performance.
11.1 Resolving Blurry Photos and Camera Shake
Blurry photos and camera shake can be resolved by using a tripod or increasing shutter speed. Enable image stabilization for sharper images. Adjusting ISO settings and using manual focus also helps. The Leica D-LUX 3 manual provides detailed troubleshooting steps for these common issues, ensuring clear and precise photography every time. Proper techniques and settings guidance are included to avoid such problems effectively.
11.2 Fixing Connectivity Problems
Connectivity issues with the Leica D-LUX 3 can often be resolved by ensuring proper USB cable connections and selecting the correct camera mode. Check the manual for troubleshooting steps, such as reinstalling drivers or updating firmware. Ensure the camera is properly connected to your computer and recognized by the operating system. Resetting the camera settings may also resolve transfer issues, as detailed in the PDF manual for optimal connectivity solutions.
Compatibility with Other Devices
The Leica D-LUX 3 supports USB 2.0, ensuring seamless connectivity with computers and other devices. It is compatible with memory cards and offers easy photo transfers via cable.
12.1 Transferring Photos to a Computer
Transferring photos from the Leica D-LUX 3 to a computer is straightforward using the USB 2.0 port. Connect the camera to your PC via the provided cable, and the device will be recognized automatically. You can also use the AV out feature for direct printing to PictBridge-compatible printers. For troubleshooting connectivity issues, refer to the manual for detailed instructions on driver installation and cable connections.
12.2 Using the Camera with Memory Cards
The Leica D-LUX 3 supports high-capacity SDHC memory cards, ensuring ample storage for high-resolution photos. Insert the card into the slot, and the camera will automatically detect it. For optimal performance, use a card with a high-speed rating. The manual recommends formatting the card in the camera for compatibility. Always store your memory cards in a protective case to prevent data loss and damage.
FAQs About the Leica D-LUX 3
Frequently asked questions include inquiries about manual downloads, image quality, ISO settings, and memory card compatibility. Answers provide clarity on these topics for optimal camera use.
13.1 Frequently Asked Questions by Users
Users often inquire about image quality, manual downloads, and ISO settings. Common questions include: “Where can I download the Leica D-LUX 3 manual?” and “How do I adjust ISO settings?” Others ask about memory card compatibility and troubleshooting blurry photos. These FAQs address key concerns, ensuring users can optimize their camera’s performance and resolve common issues efficiently with clear, concise solutions.
13.2 Answers to Common Queries
The Leica D-LUX 3 manual is available for free download on websites like Manuals.co.uk and Leica’s official site. It covers troubleshooting, ISO adjustments, and memory card compatibility. For blurry photos, using a tripod or increasing shutter speed is recommended. The manual is in English and provides detailed instructions for optimal camera use, ensuring users can resolve issues and enhance their photography experience effectively.
The Leica D-LUX 3 manual is essential for optimizing camera use, offering detailed guidance on features like image stabilization and manual controls, ensuring a user-friendly experience.
14.1 Final Thoughts on the Leica D-LUX 3
The Leica D-LUX 3 remains a standout compact camera, offering excellent image quality, ease of use, and advanced features. Its 10-megapixel sensor, 4x optical zoom, and image stabilization deliver sharp results. The user-friendly menu and minimal manual adjustments make it accessible to all skill levels. While it’s a 15-year-old model, its performance still impresses. The PDF manual is invaluable for unlocking its full potential, ensuring users can explore every feature and setting with confidence.
14.2 Encouragement to Explore More Features
Take the time to explore the Leica D-LUX 3’s advanced features, such as RAW shooting, manual focus, and burst mode, to elevate your photography. Experiment with ISO settings and white balance to capture unique tones. The camera’s intuitive design and comprehensive manual make it easy to discover new creative possibilities. Dive deeper into its capabilities to unlock its full potential and enhance your photographic journey.


About the author