Monthly Archive July 27, 2024

Bylysanne

honeywell th8320r1003 installation manual

Welcome to the Honeywell TH8320R1003 Installation Manual, your comprehensive guide for installing, configuring, and troubleshooting this advanced thermostat. This manual covers system requirements, wiring, and setup procedures to ensure a smooth installation process. Designed for both professionals and homeowners, it provides detailed instructions for optimal performance and efficiency. Discover how to harness the full potential of your Honeywell thermostat with this essential resource.

1.1 Overview of the Honeywell TH8320R1003 Thermostat

The Honeywell TH8320R1003 is a VisionPRO 8000 touchscreen thermostat featuring advanced temperature control and smart home integration. It supports multistage HVAC systems and offers programmable scheduling for energy efficiency. With RedLINK wireless technology, it seamlessly connects to accessories like humidifiers and air cleaners. The thermostat also provides Wi-Fi connectivity for remote management via Honeywell Home apps. Its intuitive interface simplifies setup and operation, while the 7-day programmable schedule ensures customized comfort. Designed for reliability and performance, this thermostat is ideal for modern homes seeking precise climate control and smart functionality.

1.2 Importance of Proper Installation

Proper installation of the Honeywell TH8320R1003 thermostat is crucial for ensuring optimal performance, safety, and efficiency. Incorrect installation can lead to system malfunctions, increased energy bills, or even safety hazards. Following the manual’s guidelines ensures compatibility with your HVAC system and prevents potential damage. Adhering to the installation steps guarantees precise temperature control, efficient energy use, and reliable operation. Improper wiring or setup can void warranties and compromise system longevity. Always follow manufacturer instructions to achieve a seamless and safe installation, ensuring your thermostat operates at its best for years to come.

1.3 Safety Precautions and Warnings

Before installing the Honeywell TH8320R1003 thermostat, ensure all power to the HVAC system is turned off to avoid electrical shock or injury. Always follow local electrical codes and safety guidelines. Handle the thermostat and its components with care to prevent damage. Avoid installing during extreme weather conditions or power outages. Keep the area clean and well-ventilated during installation. Do not attempt to modify or tamper with internal components, as this may cause malfunctions or safety hazards; Failure to adhere to these precautions can result in equipment damage, personal injury, or void the product warranty. Ensure all connections are secure and properly insulated.

System Requirements and Compatibility

The Honeywell TH8320R1003 is compatible with various HVAC systems, including heat pumps and multi-stage systems. It supports RedLINK and Wi-Fi for enhanced wireless connectivity and control.

2.1 Compatible HVAC Systems

The Honeywell TH8320R1003 thermostat is compatible with a wide range of HVAC systems, including heat pumps, gas furnaces, and multi-stage heating and cooling systems. It supports both conventional and heat pump configurations, making it versatile for various home setups. The thermostat is designed to work seamlessly with multi-stage systems, offering precise temperature control. Additionally, it is compatible with dual-fuel systems, allowing for efficient operation in diverse climates. Always verify your system type with the wiring diagram to ensure proper installation and functionality.

2.2 Electrical Requirements

The Honeywell TH8320R1003 thermostat requires a 24V AC power supply, typically derived from the HVAC system. It is compatible with most standard heating and cooling systems, including those with a common wire (C-wire). For systems without a C-wire, the thermostat can operate using its built-in battery-powered option, though a C-wire is recommended for optimal performance. Ensure the system voltage matches the thermostat’s specifications, generally 20V AC to 30V AC at 50/60 Hz. Proper wiring and electrical connections are critical to avoid damage and ensure safe, efficient operation. Always verify compatibility with your HVAC system’s electrical configuration before installation.

2.3 RedLINK and Wi-Fi Compatibility

The Honeywell TH8320R1003 thermostat is equipped with RedLINK technology, enabling wireless communication with compatible accessories like wireless sensors and RedLINK-enabled devices. This feature ensures reliable, interference-free connections and seamless integration with your HVAC system. Additionally, the thermostat supports Wi-Fi connectivity, allowing for remote control and scheduling through Honeywell’s Home app. A stable internet connection is required for Wi-Fi functionality. Ensure your network meets the thermostat’s compatibility requirements for optimal performance. RedLINK and Wi-Fi capabilities enhance convenience, offering advanced control and monitoring of your home’s temperature settings from anywhere.

Pre-Installation Steps

Before installing, locate the serial number, verify system compatibility, and gather all necessary tools and materials. Ensure the power is off and follow safety guidelines. Proper preparation ensures a smooth and safe installation process.

3.1 Gathering Tools and Materials

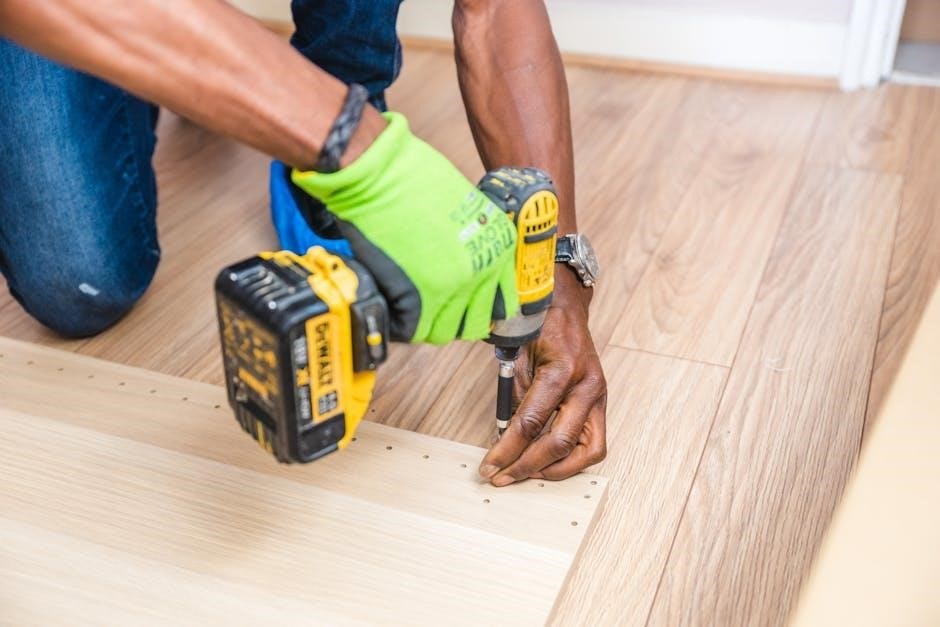
Before starting the installation, gather all necessary tools and materials to ensure a smooth process. Essential tools include a screwdriver, wire strippers, a drill, and a voltage tester. Materials needed are wall anchors, screws, and batteries for the thermostat. Ensure you have the installation manual and wiring diagram specific to your HVAC system. Verify compatibility with your system type, whether single-stage, multi-stage, or heat pump. Having all items ready beforehand prevents delays and ensures proper setup. This preparation step is crucial for a successful and efficient installation of your Honeywell TH8320R1003 thermostat.

3.2 Understanding the Wiring Diagram

Understanding the wiring diagram is crucial for a safe and correct installation. The diagram outlines terminal connections, such as R (heating power), W (heat stage), Y (cooling), G (fan), and C (common). Locate the appropriate wiring diagram for your HVAC system type, whether single-stage, multi-stage, or heat pump. For two-transformer systems, note the specific instructions, such as removing the factory-installed jumper. Ensure all wires are correctly matched to their terminals to avoid malfunctions. Refer to the manual for detailed labeling and step-by-step guidance to ensure accurate connections and proper system functionality.

3.3 Selecting the Installation Location

Selecting the right installation location is essential for accurate temperature sensing and system performance. Install the thermostat about 5 feet above the floor to ensure it measures the average room temperature. Avoid areas exposed to direct sunlight, drafts, or extreme temperatures, as this may cause incorrect readings. Choose a wall with a sturdy structure to support the thermostat and ensure level installation for proper appearance and functionality. Ensure the location provides easy access for future adjustments or maintenance. Proper placement guarantees reliable operation and optimal comfort in your home.

Installation Process

Follow these basic steps to install the Honeywell TH8320R1003 thermostat: mount the wallplate, connect the wires according to the wiring diagram, install the thermostat, and power the system. Proper installation ensures reliable operation and optimal performance. Ensure all connections are secure and double-check the wiring configuration before powering up the system. This process is designed to be straightforward, with clear instructions provided in the manual to guide you through each step successfully.

4.1 Mounting the Wallplate

Properly mounting the wallplate is the first step in installing the Honeywell TH8320R1003 thermostat. Ensure the wallplate is level and securely fastened to the wall; Use a pencil to mark the mounting holes, then drill and install wall anchors if necessary. Mount the wallplate about 5 feet above the floor for optimal performance. Make sure the wallplate is aligned straight and level to ensure accurate temperature readings. Once installed, the wallplate provides a stable base for the thermostat. Follow the manual’s instructions carefully to avoid misalignment or damage to the wall or device.

4.2 Connecting the Wires

Connecting the wires is a critical step in the installation process. Start by matching the wiring diagram to your HVAC system type, ensuring each wire is connected to the correct terminal. Loosen the screws on the wallplate terminals, then securely attach the wires. For conventional systems, connect the R, W, Y, G, C, and other necessary wires according to the diagram. In two-transformer systems, remove the factory-installed jumper and connect the wires appropriately. Avoid crossing wires or making loose connections, as this can lead to system malfunctions. Double-check all connections before proceeding to ensure proper functionality and safety.

4.3 Installing the Thermostat

After mounting the wallplate, carefully align the thermostat with the notches on the wallplate and gently press it into place. Ensure the thermostat is level for accurate temperature readings. Install two fresh AAA alkaline batteries to power the device. Once secured, turn on the power to the HVAC system and verify the thermostat lights up. Avoid over-tightening the screws to prevent damage. Double-check all connections and ensure the thermostat is properly seated for optimal performance. This step completes the physical installation, preparing the thermostat for programming and configuration.

4.4 Powering the System

After installing the thermostat, insert two fresh AAA alkaline batteries to power the device. Ensure the HVAC system’s power is turned off before proceeding. Restore power to the system and verify the thermostat lights up. Check that all connections are secure and the system responds correctly. If using a two-transformer system, ensure the jumper has been removed. The thermostat will automatically detect the power source and initialize. Allow a few minutes for the system to power up and stabilize. Confirm proper operation by testing heating, cooling, and fan modes. This completes the system powering process, readying it for configuration and use.

Wiring and Connections

This section details wiring configurations, including conventional terminal connections and two-transformer systems. It also covers wireless accessory integration for seamless smart home compatibility and functionality.

5.1 Conventional Terminal Letters

The Honeywell TH8320R1003 uses standard terminal letters for wiring connections. These include R (heating power), W (heating control), Y (cooling control), and C (common) terminals. Proper identification and connection are crucial to ensure system functionality. Always refer to the wiring diagram in the manual for specific configurations. For two-transformer systems, remove the factory-installed jumper to avoid electrical issues. Ensure all connections are secure to prevent loose wires, which can cause malfunctions. Double-check terminal assignments before powering on the system to guarantee safe and efficient operation.

5.2 Two-Transformer Systems

For two-transformer systems, the Honeywell TH8320R1003 requires specific wiring configurations. Remove the factory-installed jumper to prevent electrical conflicts. Ensure the R terminal connects to the secondary side of the heating transformer, while the C terminal links to the common side. Properly wiring these terminals ensures safe and efficient operation. Always refer to the wiring diagram for accurate connections. Double-checking the setup prevents potential malfunctions or safety hazards. This configuration supports systems requiring separate power sources for heating and cooling, ensuring optimal performance and reliability. Follow the manual’s guidelines carefully to avoid installation errors. Secure all connections firmly to maintain system integrity.

5.3 Wireless Accessories Setup

To set up wireless accessories for the Honeywell TH8320R1003, ensure the thermostat is powered on. Install AAA alkaline batteries in the accessories if required. Use the manual’s instructions to pair devices by pressing and holding designated buttons until connected. Configure settings and schedules in the thermostat’s menu for optimal functionality. Check for software updates to ensure compatibility and functionality. Test the system to confirm all accessories respond correctly. This setup enhances your HVAC system’s control and convenience, allowing seamless wireless operation. Refer to the manual for troubleshooting if issues arise.

Thermostat Setup and Configuration

Configure your Honeywell TH8320R1003 by following on-screen instructions for initial setup. Program schedules, adjust temperature settings, and customize options to suit your preferences and HVAC system needs.

6.1 Initial Setup and Programming

The initial setup of the Honeywell TH8320R1003 begins with powering on the thermostat and following the on-screen prompts. Use the touchscreen interface to set the date, time, and preferred temperature units. Choose between Fahrenheit or Celsius and select your HVAC system type. Next, program a schedule by specifying temperature settings for each day of the week. You can also enable features like humidity control and energy-saving modes during this process. The thermostat guides you through each step with clear instructions, ensuring a seamless setup experience tailored to your comfort preferences and energy efficiency goals.

6.2 Setting Up the Programmable Schedule

Creating a programmable schedule on the Honeywell TH8320R1003 allows you to customize temperature settings for different times of the day and days of the week. Start by navigating to the scheduling menu and selecting the “Create Schedule” option. Choose a pre-set template or build a custom 7-day schedule. Set specific temperatures for periods like Wake, Leave, Return, and Sleep. The thermostat’s intuitive interface makes it easy to adjust these settings to match your lifestyle. Once programmed, the system automatically adjusts temperatures, ensuring energy efficiency and comfort. Review and save your schedule to activate it.

  • Set temperatures for up to four periods per day.
  • Customize settings for each day of the week.
  • Enable energy-saving modes during unused hours.

6.3 Adjusting Installer Options

Installer options on the Honeywell TH8320R1003 allow fine-tuning of system parameters to optimize performance. Access these settings through the advanced menu by entering the installer code. Adjustments include temperature differential, heating cycle rate, and humidification control. These settings ensure compatibility with your HVAC system and improve efficiency. Use the touchscreen to modify parameters, saving changes to apply them immediately. Properly configuring these options ensures reliable operation and maximizes energy savings. Refer to the manual for detailed descriptions of each setting to make informed adjustments tailored to your system requirements.

  • Set temperature differential for heating and cooling accuracy.
  • Adjust cycle rates to minimize wear on equipment.
  • Configure humidification levels for optimal comfort.

Advanced Features

The Honeywell TH8320R1003 offers advanced features like RedLINK Technology for wireless accessory integration, Wi-Fi Connectivity for remote control, and Humidification Control for enhanced comfort management.

7.1 RedLINK Technology

RedLINK Technology is Honeywell’s advanced wireless communication system, enabling seamless integration with compatible HVAC equipment and accessories. This innovative feature allows the thermostat to connect wirelessly to components like humidity controllers, air cleaners, and outdoor sensors, ensuring enhanced system performance and efficiency. RedLINK eliminates the need for additional wiring, simplifying installation and reducing potential errors. It also ensures reliable data transmission between devices, providing precise control over your home’s comfort systems. With RedLINK, users can enjoy advanced functionality, remote monitoring, and optimal energy management, making it a cornerstone of the Honeywell TH8320R1003’s capabilities.

7.2 Wi-Fi Connectivity

The Honeywell TH8320R1003 features built-in Wi-Fi connectivity, enabling remote control and monitoring through the Honeywell Home app. This allows users to adjust temperatures, view system status, and receive alerts from their smartphone or tablet. Wi-Fi connectivity also supports seamless integration with smart home systems, enhancing convenience and energy efficiency. The thermostat’s wireless capabilities simplify installation and reduce reliance on physical controls. With Wi-Fi, users can access advanced features like geofencing and energy usage reports, ensuring optimal comfort and savings. This feature makes the TH8320R1003 a versatile and modern solution for home climate control.

7.3 Humidification Control

The Honeywell TH8320R1003 offers advanced humidification control, allowing seamless integration with compatible humidifiers and dehumidifiers. This feature ensures optimal indoor air quality by maintaining desired humidity levels. Through the Honeywell Home app, users can schedule and monitor humidity settings alongside temperature control. The thermostat also supports sensors to prevent over-humidification, ensuring a balanced and comfortable indoor environment. This integrated system enhances energy efficiency and reduces the risk of moisture-related issues, making it a comprehensive solution for whole-home comfort and air quality management.

User Interface and Navigation

The Honeywell TH8320R1003 features an intuitive touchscreen interface, providing easy navigation for temperature control, scheduling, and system mode adjustments. The home screen offers quick access to essential functions, while the menu system simplifies advanced settings and programmable options, ensuring a user-friendly experience for seamless comfort management.

8.1 Home Screen Overview

The Honeywell TH8320R1003 home screen provides a clear, touchscreen interface displaying current temperature, system status, and humidity levels. Quick-access buttons allow users to adjust settings effortlessly. The screen also features a menu button for advanced options and a status light indicating system activity. Touching the screen wakes it up, while the home button navigates back to the main display. This intuitive design ensures easy operation, with large, readable text and icons for optimal user experience. The home screen is customizable, enabling users to prioritize frequently used functions, making it a central hub for controlling home comfort efficiently.

8.2 Fan and System Mode Selection

The Honeywell TH8320R1003 allows users to select fan and system modes directly from the home screen. System modes include Heat, Cool, and Off, while fan modes offer Auto or constant operation. These settings enable precise control over comfort and energy use. The interface provides clear on-screen buttons for mode selection, ensuring easy navigation. The system mode determines how the HVAC equipment operates, while the fan mode controls airflow circulation. This feature enhances flexibility, allowing users to customize their comfort settings based on preferences and seasonal needs. The mode selection is intuitive, making it easy to optimize system performance and energy efficiency.

8.3 Alerts and User Interaction Log

The Honeywell TH8320R1003 features an Alerts and User Interaction Log that tracks system changes and notifications. This log provides a searchable history of alerts, temperature adjustments, and mode changes, helping users monitor their system’s activity. It allows users to identify patterns, troubleshoot issues, and ensure optimal performance. The log is easily accessible via the thermostat’s interface, enabling users to review past interactions and maintain control over their home comfort settings. This feature enhances transparency and simplifies maintenance, making it easier to address system notifications and user preferences effectively. It supports both homeowner and technician needs for efficient problem-solving.

Troubleshooting Common Issues

This section addresses common issues with the Honeywell TH8320R1003, such as error codes, connectivity problems, and system malfunctions. It provides solutions and reset options to restore functionality, ensuring optimal performance and user convenience. Troubleshooting guides help diagnose and resolve issues quickly, minimizing downtime and maintaining comfort. Key features include error code explanations and step-by-step fixes, making it easier to identify and correct problems efficiently. This resource is essential for both professionals and homeowners to maintain system efficiency and reliability. Regular updates and notifications further enhance troubleshooting capabilities, keeping the system running smoothly.

9.1 Common Installation Errors

Common installation errors for the Honeywell TH8320R1003 include incorrect wiring connections, improper system type selection, and forgetting to install fresh AAA batteries. Ensure the wiring diagram matches your HVAC system type, as mismatches can cause malfunctions. Verify that the wallplate is level and securely mounted. If the thermostat doesn’t power on, check battery installation and wiring connections. Incorrect jumper settings, especially in two-transformer systems, can lead to errors. Always refer to the wiring diagram and manual instructions to avoid these issues. Proper installation ensures reliable performance and prevents potential system damage. Addressing these errors early guarantees a smooth setup process.

9.2 Error Codes and Solutions

The Honeywell TH8320R1003 may display error codes like E1, E30, or E43, indicating specific issues. E1 often relates to sensor problems, while E30 and E43 typically indicate communication or wiring faults. To resolve E1, check and clean the sensors or replace them if damaged. For E30 or E43, verify RedLINK or Wi-Fi connectivity and ensure proper wiring connections. Restart the system after addressing the issue. If errors persist, consult the troubleshooting section or reset the thermostat to factory settings. Always refer to the manual for detailed solutions to ensure optimal performance and avoid recurring problems. Timely resolution prevents system downtime and ensures efficiency.

9.3 Resetting the Thermostat

Resetting the Honeywell TH8320R1003 thermostat can resolve persistent issues. To reset, remove the batteries and wait 30 seconds. Reinstall the batteries and check if the screen lights up. If issues remain, press and hold the “Menu” and “Back” buttons simultaneously for 5 seconds. This restores factory settings. Note that resetting will erase programmed schedules and preferences, requiring reconfiguration. Ensure the system is powered off during the reset process. If problems persist, consult the manual or contact Honeywell support for assistance. Regular resets can help maintain optimal performance and address unforeseen operational glitches effectively.

Maintenance and Upkeep

Regularly clean the thermostat to prevent dust buildup. Replace batteries annually or when the low-battery indicator appears. Update software periodically for optimal performance and new features.

10.1 Cleaning the Thermostat

Regular cleaning ensures optimal performance and longevity of your Honeywell TH8320R1003 thermostat. Use a soft, dry cloth to gently wipe the screen and exterior surfaces. Avoid harsh chemicals or liquids, as they may damage the display or internal components. For stubborn smudges, lightly dampen the cloth with water, but ensure no moisture seeps into the device. Cleaning should be done monthly or as needed. This simple maintenance step prevents dust buildup, ensuring accurate temperature readings and smooth touchscreen functionality. Refer to the maintenance section for additional upkeep tips.

10.2 Replacing Batteries

To maintain uninterrupted operation, replace the Honeywell TH8320R1003 thermostat batteries annually or when the status light flashes green. Use two fresh AAA alkaline batteries. Locate the battery compartment on the rear of the thermostat. Open it by sliding it downward. Remove the old batteries and insert the new ones, ensuring correct polarity. Close the compartment securely. If the display remains off, check the batteries and connections. Proper battery replacement ensures accurate temperature control and avoids system malfunctions. Always turn off power to the HVAC system before replacing batteries for safety.

10.3 Updating Software

Regular software updates ensure your Honeywell TH8320R1003 thermostat operates with the latest features and security. To update, access the menu via the touchscreen and navigate to the “Installer Settings” or “Advanced” section. Select “Check for Updates” to download and install new software. Ensure the thermostat is connected to Wi-Fi or RedLINK for automatic updates. Follow on-screen instructions carefully to avoid interruptions. Once updated, the system will restart automatically. Always complete the update process to maintain optimal performance and compatibility with your HVAC system. Updates may add new functionalities or improve existing features for enhanced user experience.

Completing the Honeywell TH8320R1003 installation ensures optimal performance and efficiency. Follow all steps carefully for a successful setup. Refer to additional resources for further assistance.

11.1 Final Checks and Verification

After completing the installation, perform a thorough system check. Verify all wiring connections are secure and correctly configured. Ensure the thermostat is properly leveled and mounted. Power cycle the system to confirm proper operation. Test heating, cooling, and fan modes to ensure functionality. Review the programmable schedule and settings for accuracy. Check for any error messages or alerts. If issues arise, consult the troubleshooting section or reset the thermostat if necessary. Ensure all wireless accessories are properly linked. Finally, confirm that the thermostat is functioning as expected and providing the desired comfort levels in your home.

11.2 Resources for Further Assistance

For additional support, refer to the official Honeywell website for comprehensive guides, FAQs, and software updates. Contact Honeywell’s customer support for personalized assistance. Online forums and community discussions can also provide valuable insights and solutions. Ensure to register your product on Honeywell’s portal for warranty and exclusive updates. If unresolved issues persist, consult a licensed HVAC technician. Utilize Honeywell’s troubleshooting resources for error codes and system diagnostics; Remember, proper installation and maintenance are key to optimal performance. Explore these resources to maximize your thermostat’s functionality and enjoy seamless home comfort control.

Bylysanne

consumer behavior: building marketing strategy mothersbaugh pdf

Consumer behavior explores how individuals make purchasing decisions, influenced by psychological, social, and economic factors. Understanding these dynamics is crucial for developing effective marketing strategies and meeting customer needs.

1.1. Definition and Importance

Consumer behavior refers to the study of how individuals, groups, and organizations select, purchase, use, and dispose of goods and services to satisfy their needs and wants. It examines the psychological, social, and economic factors influencing purchasing decisions. Understanding consumer behavior is essential for developing effective marketing strategies, as it enables businesses to anticipate and meet customer demands. By analyzing motivations, preferences, and decision-making processes, marketers can create targeted campaigns and build lasting customer relationships. This field also highlights ethical considerations, ensuring marketing practices align with consumer well-being and societal expectations. The insights gained from studying consumer behavior empower companies to innovate and remain competitive in dynamic markets.

1.2. Overview of Mothersbaugh’s Approach

David L. Mothersbaugh’s approach to consumer behavior emphasizes a strategic, theory-to-practice framework. His work integrates psychological, social, and managerial perspectives to provide a comprehensive understanding of consumer decision-making. Mothersbaugh’s strategy-focused method helps marketers design effective campaigns by identifying key factors influencing consumer choices. His approach highlights the importance of internal and external influences, such as motivation, perception, and cultural factors, in shaping purchasing behavior. By blending theory with real-world applications, Mothersbaugh equips marketers with actionable insights to develop targeted strategies. His work also emphasizes ethical considerations, ensuring that marketing practices align with consumer well-being and societal norms. This balanced approach makes his framework a valuable resource for both students and professionals in the field of marketing and consumer behavior.

Foundational Concepts

Consumer behavior is shaped by psychological, social, and economic factors, forming the basis for understanding decision-making processes and developing effective marketing strategies that align with consumer needs and preferences.

2.1. Psychological Influences

Psychological influences on consumer behavior include motivation, perception, and learning. Motivation drives purchasing decisions, while perception shapes how consumers interpret information. Learning and memory also play roles, as past experiences influence preferences and attitudes. These factors help marketers understand how to design effective strategies that resonate with target audiences, ensuring products meet emotional and functional needs. By leveraging psychological insights, businesses can create appealing marketing mixes that drive consumer engagement and loyalty, ultimately fostering long-term success in competitive markets. These concepts are pivotal in building marketing strategies that align with consumer psychology, as outlined in Mothersbaugh’s approach to consumer behavior analysis.

2.2. Social and Cultural Factors

Social and cultural factors significantly influence consumer behavior, shaping preferences and purchasing decisions. Cultural norms, values, and beliefs dictate what products are acceptable and desirable. Social status and group memberships further refine these choices, as consumers often align their purchases with societal expectations. Family and peer influences also play a role, as individuals are swayed by those around them. Additionally, cultural differences across regions require marketers to adapt strategies to resonate with local values. Understanding these factors helps businesses tailor their approaches to diverse markets, ensuring cultural sensitivity and relevance. By addressing these social and cultural dynamics, marketers can create strategies that align with consumer values, fostering trust and loyalty, as emphasized in Mothersbaugh’s insights on consumer behavior and marketing strategies.

2.3. Economic and Managerial Perspectives

Economic and managerial perspectives in consumer behavior focus on how financial factors and organizational strategies influence purchasing decisions. Economic conditions, such as income levels, pricing strategies, and market trends, significantly impact consumer choices. Managerial approaches emphasize how businesses analyze these economic dynamics to develop targeted marketing strategies. By understanding cost-benefit analyses and budget constraints, marketers can tailor products to meet consumer needs while ensuring profitability. Additionally, managerial insights from experts like Mothersbaugh highlight the importance of aligning marketing strategies with economic realities, ensuring that businesses remain competitive in diverse market environments. This integration of economic and managerial perspectives provides a comprehensive framework for building effective marketing strategies that resonate with consumers and drive business success.

Internal Influences on Consumer Behavior

Internal influences include motivation, perception, memory, and personality traits that shape consumer decisions. Understanding these factors helps marketers develop strategies that align with consumer needs and preferences;

3.1. Motivation and Needs

Motivation and needs are central to understanding consumer behavior, as they drive decision-making processes. According to Mothersbaugh, motivation arises from unsatisfied needs, which are classified into physiological, safety, social, esteem, and self-actualization needs, as per Maslow’s hierarchy. Marketers leverage these insights to create products and campaigns that fulfill specific consumer desires. For instance, advertisements often highlight how a product meets a particular need, such as safety or social status. By identifying and addressing these motivations, businesses can tailor their strategies to resonate with target audiences effectively. This approach ensures that marketing efforts align with consumer priorities, enhancing the likelihood of successful outcomes.

3.2. Perception and Learning

Perception and learning significantly influence consumer behavior, shaping how individuals process information and make decisions. Perception refers to how consumers interpret sensory information, filtering out irrelevant data and focusing on what matters. Learning, through experience and social interactions, molds preferences and purchasing habits. Mothersbaugh highlights that learning can be cognitive (e.g., understanding product benefits) or behavioral (e.g., developing brand loyalty). Marketers leverage these insights to design persuasive messages and create memorable brand experiences. By understanding how consumers perceive and learn, businesses can tailor their strategies to align with these cognitive processes, enhancing the effectiveness of their marketing efforts and fostering long-term customer relationships. These psychological mechanisms are vital for developing targeted and impactful marketing campaigns.

3.3. Memory and Attitudes

Memory and attitudes play pivotal roles in shaping consumer behavior, as they influence purchasing decisions and brand loyalty. Memory, both short-term and long-term, affects how consumers recall products and experiences, guiding their preferences. Positive memories often lead to repeat purchases, while negative ones can deter future interactions. Attitudes, shaped by personal experiences and external influences, determine how consumers perceive brands and products. Mothersbaugh emphasizes that attitudes are not static; they evolve over time based on new information and experiences. Marketers can leverage this by creating memorable brand experiences and aligning their messaging with consumer values. Understanding the interplay of memory and attitudes allows businesses to craft strategies that resonate emotionally and intellectually with their target audience, fostering loyalty and trust. This connection is essential for building sustainable marketing strategies.

3.4. Personality Traits

Personality traits significantly influence consumer behavior, as they shape preferences, brand loyalty, and decision-making processes. According to Mothersbaugh, personality refers to the unique, consistent patterns of thought and behavior that define individuals. These traits, such as introversion or extroversion, risk-taking propensity, and optimism, affect how consumers perceive products and services. For instance, adventurous individuals may gravitate toward innovative or niche brands, while cautious individuals prefer familiar, trusted options. Marketers can leverage personality insights to tailor strategies, such as using personality-based segmentation to create targeted campaigns. Understanding personality traits also helps brands align their messaging with consumer values, fostering deeper connections and loyalty. This alignment is crucial for developing effective marketing strategies that resonate on a personal level.

External Influences on Consumer Behavior

External factors such as culture, social networks, and marketing strategies significantly shape consumer purchasing decisions, influencing preferences and behaviors beyond individual control.

4.1. Cultural and Subcultural Effects

Cultural and subcultural influences play a pivotal role in shaping consumer behavior. Culture encompasses the shared beliefs, values, and customs of a society, directly impacting purchasing decisions. Subcultures, such as ethnic or regional groups, further refine these tendencies, creating unique market segments. Marketers must recognize and respect these differences to craft strategies that resonate with diverse audiences. Understanding cultural nuances allows businesses to tailor products and messaging, ensuring alignment with consumer preferences and ethical standards. This approach fosters trust and loyalty, essential for long-term success in competitive markets.

4.2. Social Class and Status

Social class and status significantly influence consumer behavior, as individuals often use purchases to reflect their position within society. Higher classes may prioritize luxury and exclusivity, while lower classes focus on affordability and value. Marketers can segment markets based on income, education, and occupation to tailor strategies. Understanding these dynamics helps in positioning products effectively, ensuring they meet the expectations and aspirations of specific social groups. This alignment not only enhances brand appeal but also fosters customer loyalty, driving sustainable business growth in diverse market environments.

4.3. Family and Social Networks

Family and social networks play a pivotal role in shaping consumer behavior, as individuals are often influenced by the opinions and actions of those around them. Family members can act as decision-makers or influencers, particularly in household purchases. Social networks, both online and offline, amplify these influences, with peers and communities setting trends and standards. Marketers leverage these dynamics by targeting key influencers and creating products that align with group norms. Understanding the interplay between family and social networks allows businesses to craft strategies that resonate with shared values and preferences, fostering trust and loyalty among consumers.

4.4. Marketing and Advertising Impact

Marketing and advertising significantly influence consumer behavior by shaping perceptions, creating brand awareness, and driving purchasing decisions. Effective marketing strategies, as outlined in Mothersbaugh’s approach, leverage consumer insights to craft compelling messages. Advertising, through various channels like social media and digital platforms, plays a crucial role in building brand loyalty and trust. The strategic use of storytelling, visual content, and targeted campaigns enhances consumer engagement. However, ethical considerations must be addressed to ensure transparency and avoid manipulative practices. By aligning marketing efforts with consumer needs and preferences, businesses can foster long-term relationships and achieve sustainable growth.

Marketing Strategies Based on Consumer Insights

Effective marketing strategies leverage consumer insights to align products with needs, preferences, and behaviors, fostering engagement and loyalty through tailored approaches.

5.1. Targeting Specific Consumer Segments

Targeting specific consumer segments involves identifying and understanding distinct groups with shared needs, preferences, and behaviors. By analyzing demographic, psychographic, and behavioral data, marketers can tailor strategies to resonate with each segment. This approach ensures personalized messaging, enhancing engagement and conversion rates. Tools like customer personas and market research help refine targeting efforts, ensuring resources are allocated efficiently. Ethical considerations, such as avoiding manipulation, are crucial to maintain trust. Digital platforms enable precise targeting through data analytics, allowing marketers to adapt strategies in real-time. Effective segmentation fosters stronger consumer connections, driving loyalty and long-term brand success.

5.2. Positioning Products Effectively

Positioning products effectively involves creating a unique brand identity that resonates with target consumers. By understanding consumer perceptions, preferences, and needs, marketers can differentiate their offerings from competitors. This strategy leverages psychological and social influences to align products with consumer values and expectations. Ethical marketing practices, such as transparency and sustainability, can enhance brand positioning. Digital platforms and data analytics enable precise targeting, ensuring messages reach the intended audience. Effective positioning builds brand equity, fosters customer loyalty, and drives long-term business success. It requires continuous adaptation to evolving consumer trends and preferences, ensuring relevance in dynamic markets.

5.3. Developing Appealing Marketing Mixes

Developing appealing marketing mixes involves integrating the 4Ps—product, price, place, and promotion—to create value for consumers. Products must meet customer needs and preferences, while pricing strategies should reflect perceived value. Distribution channels must ensure accessibility and convenience. Promotional efforts, including digital and social media, should engage target audiences effectively. Ethical considerations, such as transparency and sustainability, enhance brand trust. By understanding consumer behavior insights, marketers can tailor their marketing mix to align with customer motivations, perceptions, and cultural influences. This strategic approach ensures a cohesive and impactful marketing strategy, driving customer satisfaction and business growth in competitive markets.

Emerging Trends in Consumer Behavior

Emerging trends include digital influence, sustainability, and technology. Social media shapes preferences, while ethical consumption and smart devices drive decision-making processes.

6.1. Digital and Social Media Influence

Digital and social media have profoundly shaped consumer behavior, with platforms like Instagram and TikTok influencing purchasing decisions. User-generated content and influencer marketing play significant roles in building trust and brand loyalty. Personalized ads and targeted campaigns leverage consumer data to create tailored experiences, enhancing engagement. Social media fosters community interactions, where consumers share experiences and opinions, impacting others’ choices. Brands now prioritize social media strategies to connect with audiences, drive awareness, and foster long-term relationships. The integration of e-commerce features, such as “Shop” tabs, bridges inspiration and action, making social media a critical channel for modern marketing. This shift demands marketers to adapt and innovate, ensuring relevance in a rapidly evolving digital landscape.

6.2. Sustainability and Ethical Consumption

Consumers increasingly prioritize sustainability and ethics in their purchasing decisions, driving demand for eco-friendly and responsibly sourced products. Brands are adopting sustainable practices to meet this trend, such as using recyclable materials and reducing carbon footprints. Ethical consumption extends to fair labor practices and animal welfare, influencing brand loyalty. Transparency in supply chains is crucial, as consumers seek to support companies aligned with their values. This shift reflects a broader societal movement toward environmental and social responsibility, reshaping marketing strategies to emphasize purpose and accountability. Companies that integrate sustainability into their core strategies often gain a competitive edge, appealing to conscious consumers while contributing to a better world.

6.3. The Role of Technology and Innovation

Technology and innovation significantly influence consumer behavior by reshaping how individuals interact with products and brands. Advances in artificial intelligence, big data, and digital platforms enable personalized marketing, enhancing customer experiences. E-commerce and mobile shopping have become integral to purchasing decisions, with social media driving discovery and influencing preferences. The internet of things (IoT) further integrates technology into daily life, impacting consumption patterns. Innovations like augmented reality (AR) and virtual reality (VR) create immersive shopping experiences, while data analytics provide deeper insights into consumer trends. These advancements not only empower consumers but also challenge businesses to adapt and innovate continuously, fostering a dynamic and responsive marketing landscape.

Case Studies and Practical Applications

Real-world examples demonstrate how marketing strategies, informed by consumer insights, drive success. Case studies reveal effective tactics for targeting audiences and creating value.

7.1. Successful Marketing Strategies

Successful marketing strategies often stem from a deep understanding of consumer behavior. By analyzing psychological, social, and economic factors, businesses can tailor their approaches to meet specific needs. For instance, segmentation, targeting, and positioning (STP) frameworks help companies identify niche markets and create personalized campaigns. Digital tools, such as social media analytics, enable real-time insights into consumer preferences, allowing for adaptive strategies. Ethical considerations, like sustainability, are increasingly integral to building trust and loyalty. Mothersbaugh’s work highlights how aligning marketing efforts with consumer values drives long-term success. Practical applications include leveraging data to predict trends and crafting messages that resonate emotionally. These strategies, when executed effectively, foster meaningful connections and drive business growth.

7.2. Lessons from Consumer Behavior Analysis

Consumer behavior analysis offers valuable insights for marketers, emphasizing the importance of understanding internal and external influences on decision-making. Psychological factors like motivation and perception play a crucial role, as highlighted by Mothersbaugh. Additionally, cultural and social dynamics significantly shape purchasing patterns. Ethical considerations, such as sustainability and trust, are increasingly vital for long-term brand loyalty. Marketers must adapt strategies to align with evolving consumer values and technological advancements. By integrating these lessons, businesses can develop more effective and ethical marketing practices, ultimately fostering stronger consumer relationships and driving sustainable growth in a competitive marketplace.

Future Directions in Consumer Behavior

Future directions focus on evolving consumer needs, technological advancements, and ethical practices, driving innovative marketing strategies to meet changing demands and foster sustainable growth.

8.1. Evolving Consumer Needs and Trends

Evolving consumer needs are shaped by technological advancements, sustainability concerns, and shifting cultural values. As digital platforms dominate, consumers demand personalized experiences and ethical practices. Marketers must adapt strategies to align with these trends, ensuring relevance and trust. The integration of artificial intelligence and data analytics provides deeper insights into consumer preferences, enabling tailored approaches. Additionally, the rise of social media influences purchasing decisions, emphasizing the importance of authentic brand engagement. Sustainability has become a key driver, with consumers favoring brands that prioritize environmental and social responsibility. Understanding these shifts is crucial for developing forward-thinking marketing strategies that resonate with modern consumers and drive long-term success.

8.2. Innovations in Marketing Strategies

Innovations in marketing strategies are transforming how brands engage with consumers. Data analytics and artificial intelligence enable precise targeting and personalized experiences. Interactive content, such as virtual reality and augmented reality, enhances consumer immersion. Social media platforms and influencer partnerships have become vital for reaching younger audiences. Marketers are also leveraging omnichannel strategies to ensure seamless experiences across all touchpoints. Additionally, advancements in technology allow for real-time feedback, enabling agile adjustments to campaigns. These innovations not only enhance efficiency but also foster deeper connections with consumers. By embracing these cutting-edge approaches, marketers can stay competitive and align with evolving consumer expectations, driving growth and brand loyalty in a dynamic marketplace.

Ethical and Social Considerations

Ethical marketing practices prioritize transparency, honesty, and consumer well-being. Social responsibility ensures brands address societal needs, fostering trust and loyalty while promoting sustainable consumption and ethical decision-making.

9.1. Ethical Marketing Practices

Ethical marketing practices are essential for building trust and loyalty with consumers. Transparency, honesty, and fairness in advertising ensure that consumers are not misled. Companies must respect privacy and avoid manipulative tactics, fostering a positive relationship with their audience. Ethical practices also involve social responsibility, where businesses address environmental and societal issues. By aligning marketing strategies with ethical standards, brands can enhance their reputation and long-term success. Mothersbaugh’s approach emphasizes the importance of ethical considerations in consumer behavior, highlighting how ethical marketing not only benefits society but also strengthens brand-consumer connections. These practices are integral to sustainable and responsible business operations.

9.2. Social Responsibility in Consumer Behavior

Social responsibility plays a vital role in shaping consumer behavior and marketing strategies. Consumers increasingly prioritize brands that demonstrate ethical practices, such as sustainability and community engagement. Companies that embrace social responsibility build trust and loyalty, aligning with evolving consumer values. Mothersbaugh highlights how businesses can integrate social responsibility into their strategies, fostering positive societal impact while enhancing brand reputation. This approach not only addresses environmental and social challenges but also resonates with conscious consumers. By embedding social responsibility into their operations, companies can create meaningful connections and drive long-term success. This shift reflects a broader movement toward ethical consumption, where consumers actively support brands that contribute positively to society.

Bylysanne

safety first car seat 3 in 1 manual

1.1 Overview of the Safety 1st Grow and Go 3-in-1 Car Seat

The Safety 1st Grow and Go 3-in-1 Car Seat manual provides clear guidance for installation, usage, and maintenance, ensuring safety and comfort for children from infancy to booster stage.

The Safety 1st Grow and Go 3-in-1 Car Seat is a versatile, long-lasting solution designed to accommodate children from infancy through early childhood. It transitions seamlessly from rear-facing (5-40 lbs, 19-40″) to forward-facing (22-65 lbs, 29-49″) and finally to a belt-positioning booster (40-100 lbs, 43-52″). Featuring plush padding, machine-washable covers, and lightweight construction, it offers comfort and convenience. The manual provides detailed guidance for proper installation, ensuring safety and ease of use across all stages.

1.2 Importance of Following the Manual for Safe Installation and Use

Adhering to the Safety 1st Grow and Go 3-in-1 Car Seat manual is crucial for ensuring proper installation and safe usage. The manual provides step-by-step instructions for securing the seat in rear-facing, forward-facing, and booster modes, emphasizing weight and height limits. Improper installation can compromise safety, so following guidelines is essential. The manual also highlights vehicle compatibility and features like Comfort Cool Technology, ensuring the seat adapts to your child’s growth while maintaining optimal protection. Always refer to the manual to maximize safety and convenience.

Types of Car Seats and Their Uses

Safety 1st car seats include infant, convertible, and all-in-one models, each designed for specific age and weight ranges to ensure optimal safety and comfort for children.

2.1 Infant Car Seat (Rear-Facing Only)

An infant car seat is designed for newborns and small babies, typically used rear-facing only. It’s portable and intended for infants up to 5-40 pounds, depending on the model. This seat ensures the baby’s head, neck, and spine are protected during sudden stops or crashes. Parents should transition to a convertible or all-in-one car seat once their child outgrows the infant seat, usually before their first birthday. Proper installation and usage are crucial for safety.

2.2 Convertible Car Seat (Rear-Facing and Forward-Facing)

A convertible car seat offers flexibility, accommodating children from infancy through toddler years by transitioning from rear-facing to forward-facing positions. Designed for safety, it supports rear-facing up to 40 pounds and forward-facing from 22-65 pounds. This seat ensures proper spinal alignment and protection during crashes. Parents can extend its use by converting it as their child grows, maintaining safety and comfort throughout different stages of development. Proper installation and harness adjustment are critical for optimal protection.

2.3 All-in-One Car Seat (3-in-1 Functionality)

The Safety 1st Grow and Go 3-in-1 Car Seat offers unparalleled versatility, adapting to a child’s growth from infancy to youth. It transitions seamlessly through three stages: rear-facing (5-40 lbs), forward-facing (22-65 lbs), and belt-positioning booster (40-100 lbs). This design eliminates the need for multiple car seats, providing long-term value and convenience. Its lightweight construction and machine-washable padding enhance usability, while advanced safety features ensure protection across all stages. This seat grows with your child, offering a practical solution for evolving needs.

Key Features of the Safety 1st Grow and Go 3-in-1 Car Seat

The Safety 1st Grow and Go 3-in-1 Car Seat features three growth stages, Comfort Cool Technology, and a machine-washable seat pad for convenience and durability.

3.1 Weight and Height Limits for Each Stage

The Safety 1st Grow and Go 3-in-1 Car Seat accommodates children through three stages with specific weight and height limits. Stage 1 (Rear-Facing) supports 5-40 lbs and 19-40″. Stage 2 (Forward-Facing) is for 22-65 lbs and 29-49″. Stage 3 (Booster) handles 40-100 lbs and 43-52″. These limits ensure proper fit and safety across growth stages. Always verify your child’s measurements against the manual to ensure compliance and optimal protection.

3.2 Stage 1 — Rear Facing (5-40 lbs, 19-40″)

Stage 1 of the Safety 1st Grow and Go is designed for rear-facing use, suitable for infants weighing 5-40 lbs and measuring 19-40″ in height. This stage provides essential support for newborns and small babies, ensuring their safety during the earliest and most vulnerable years. The seat’s design promotes a snug fit, while the adjustable harness and headrest offer customized comfort. Rear-facing is recommended until the child reaches the seat’s weight or height limit. Always follow manual guidelines for proper installation.

3.3 Stage 2 ⎼ Forward Facing (22-65 lbs, 29-49″)

Stage 2 supports forward-facing use for children weighing 22-65 lbs and measuring 29-49″ tall. This stage offers an adjustable harness and headrest for growing children, ensuring proper fit and comfort. The expandable headrest accommodates taller kids, while plush padding and cup holders enhance ride comfort. Parents appreciate the lightweight design and ease of moving the seat between vehicles. This stage is ideal for toddlers who have outgrown rear-facing but still need a secure, supportive seat.

3.4 Stage 3, Belt Positioning Booster (40-100 lbs, 43-52″)

Stage 3 transitions the car seat into a belt-positioning booster for children weighing 40-100 lbs and measuring 43-52″ tall. The booster uses the vehicle’s lap and shoulder belt, ensuring proper positioning across the child’s hips and shoulder. The manual guides removing the harness and adjusting the headrest for a snug fit. This stage is designed for older kids, promoting independence while maintaining safety and comfort. Regular checks are essential to ensure the belt fits correctly and the booster is securely positioned.

3.5 Comfort Cool Technology for Superior Comfort

The Safety 1st Grow and Go features Comfort Cool Technology, designed to regulate temperature and provide ventilation. This innovative system ensures breathability, keeping children cool during long rides. The technology enhances comfort without compromising safety, making it ideal for extended trips. Parents and kids alike appreciate the added relaxation this feature brings, contributing to a pleasant traveling experience. This focus on comfort aligns with the seat’s overall design, prioritizing both safety and child well-being.

3.6 Machine-Washable and Dryer-Safe Seat Pad

The Safety 1st Grow and Go 3-in-1 Car Seat features a machine-washable and dryer-safe seat pad, making maintenance easy and convenient. Parents can remove the pad, wash it in a machine, and dry it in a dryer, ensuring cleanliness without damaging the material. This practical feature enhances hygiene and comfort, allowing for a fresh and cozy riding experience for children. It’s a thoughtful design element that supports long-term usability and satisfaction.

3.7 Lightweight Design for Easy Portability

The Safety 1st Grow and Go 3-in-1 Car Seat features a lightweight design, making it easy to transfer between vehicles. Its portability is a significant advantage for families who need flexibility. The seat’s compact and manageable weight reduces strain during handling, ensuring convenience for parents on the go. This lightweight construction enhances the overall usability, making it a practical choice for busy families.

3.8 Cup Holders for Added Convenience

The Safety 1st Grow and Go 3-in-1 Car Seat includes two built-in cup holders, providing added convenience for parents and children. These holders keep snacks and drinks within easy reach, reducing distractions while driving. Their integrated design ensures the car seat remains uncluttered, maintaining a clean and organized environment for your child. This feature enhances comfort and accessibility, making long trips more enjoyable for the whole family.

3.9 Harness Height Adjustment Without Rethreading

The Safety 1st Grow and Go 3-in-1 Car Seat offers a convenient harness height adjustment feature that eliminates the need for rethreading. Parents can easily customize the fit as their child grows, ensuring proper shoulder strap positioning. This user-friendly design enhances safety and comfort, while the color-coded belt paths and diagrams in the manual provide clear guidance for adjustments. This feature is particularly praised for its ease of use, making it a standout aspect of the car seat.

Installation of the Safety 1st Grow and Go 3-in-1 Car Seat

The installation involves using UAS connectors or a vehicle seat belt, ensuring a secure fit. Adjust the recline angle to achieve proper leveling, especially for rear-facing positions. For forward-facing, attach the tether strap to the vehicle’s anchor for added stability. Always refer to the manual for color-coded guidance and diagrams to ensure correct installation steps are followed.

4.1 Rear-Facing Installation

Rear-facing installation begins by threading the UAS connector belt or vehicle seat belt through the designated rear-facing belt path. Ensure the car seat is level by adjusting the recline angle—use a foam pool noodle or tightly rolled towel if necessary. Secure the UAS connectors to the vehicle’s anchors or tighten the seat belt until the car seat is snug. For added stability, ensure the seat doesn’t move more than an inch in any direction. Always refer to the manual for color-coded guidance and diagrams to confirm proper installation.

4.2 Forward-Facing Installation

For forward-facing installation, thread the UAS connector belt or vehicle seat belt through the forward-facing belt path. Attach the tether strap to the vehicle’s tether anchor for added stability. Tighten the UAS belt or seat belt until the car seat is snug and doesn’t move more than an inch. Ensure the harness straps are at or above your child’s shoulders. Use your body weight to compress the seat while tightening for a secure fit. Always consult the vehicle manual for tether anchor locations.

4.3 Using the Vehicle Seat Belt for Installation

To install using the vehicle seat belt, thread the belt through the designated belt path on the car seat. Buckle the seat belt and ensure it is not twisted. For vehicles with locking belts, engage the locking mechanism by pulling the belt out fully and letting it retract. If your vehicle lacks this feature, use a locking clip to secure the belt. Tighten the belt firmly until the car seat is snug and immobile, ensuring it doesn’t move more than an inch in any direction.

4.4 Using the UAS (Universal Anchorage System) for Installation

To install using the UAS, attach the connectors to the vehicle’s anchors and tighten the UAS belt. Ensure the car seat is level and secure. For rear-facing, adjust the recline angle so the seat is parallel to the ground. If needed, use a pool noodle or towel under the seat for proper alignment. Tighten the UAS belt until the seat doesn’t move more than an inch in any direction. Always refer to the manual for color-coded guides and diagrams.

4.5 Adjusting the Recline Angle for Proper Fit

To ensure proper fit, adjust the recline angle so the car seat is level. For rear-facing, the level line on the seat’s side should be parallel to the ground. Use a foam pool noodle or towel under the front if needed. For forward-facing, align the seat flush with the vehicle’s seat back. Always check the manual for specific instructions and use the built-in level indicator for accuracy.

4.6 Tightening the Seat Belt or UAS Belt for Secure Fit

To ensure a secure fit, tighten the seat belt or UAS belt until the car seat is snug and doesn’t move more than an inch in any direction. For rear-facing, lean into the seat while tightening, and for forward-facing, use your knee to apply pressure. Avoid twisting the belt, as this can weaken its effectiveness. After tightening, check the car seat’s movement at the belt path to confirm it’s properly secured. Refer to the manual for specific tightening instructions.

4.7 Attaching the Tether Strap for Forward-Facing Installation

For forward-facing installation, attach the tether strap to your vehicle’s tether anchor to enhance stability. Loosen the tether strap before installation, then secure it to the anchor point. Tighten the tether after the UAS or seat belt is secured. Ensure the tether is snug and not twisted. Refer to your vehicle’s manual to locate the tether anchor. The tether strap helps reduce movement and provides added protection for your child. Always follow the manual’s instructions for proper attachment.

4.8 Ensuring the Car Seat is Level and Secure

To ensure the car seat is level, check the built-in level indicator or use a bubble level tool. For rear-facing, the recline angle must align with the vehicle’s seat. If needed, place a foam pool noodle or rolled towel under the seat for proper leveling. Once secured, the car seat should not move more than one inch side-to-side or front-to-back. Always verify tightness by grasping the seat at the belt path and tugging firmly to confirm it’s snug and stable.

Safety and Comfort Features

The Safety 1st Grow and Go 3-in-1 Car Seat offers side impact protection, plush padding, and an expandable headrest for enhanced safety and comfort during rides.

5.1 Side Impact Protection for Enhanced Safety

The Safety 1st Grow and Go 3-in-1 Car Seat features robust side impact protection, designed to absorb and distribute crash forces away from your child. Its sturdy frame and cushioned padding work together to provide a safe and secure environment, while the expandable headrest adds extra protection for your child’s head and neck in the event of a collision. This advanced safety feature ensures your child is well-protected in various crash scenarios.

5.2 Plush Padding for Comfort During Long Rides

The Safety 1st Grow and Go 3-in-1 Car Seat features luxurious plush padding designed to ensure your child’s comfort during extended trips. The soft, breathable material provides optimal support and reduces restlessness, while the ergonomic design cradles your child’s body. This padding, combined with the machine-washable and dryer-safe seat pad, offers both convenience and long-lasting comfort. Parents and children alike appreciate the attention to detail in creating a cozy riding experience.

5.3 Expandable Headrest for Growing Children

The Safety 1st Grow and Go 3-in-1 Car Seat includes an expandable headrest designed to accommodate your child’s growth. This feature ensures proper head and neck support as your child gets taller. The headrest adjusts seamlessly, providing a secure and comfortable fit at every stage. Its versatility allows for a compact design when rear-facing, saving space in smaller vehicles while maintaining safety and comfort. This thoughtful design ensures your child’s needs are met as they grow.

5.4 Harness Straps Positioning Guidelines

The Safety 1st Grow and Go 3-in-1 Car Seat requires precise harness strap positioning for optimal safety. For rear-facing installations, straps must be at or below the child’s shoulders, while forward-facing positions demand straps at or above shoulder level. Ensure straps are snug, using the pinch test to confirm no excess webbing. The chest clip should sit at armpit level to distribute forces effectively. Follow the manual’s step-by-step guide for each stage, avoiding twists and ensuring flat lay for safety and comfort.

Pros and Cons of the Safety 1st Grow and Go 3-in-1 Car Seat

  • Pros: Lightweight, machine-washable pad, easy installation, and 3-in-1 functionality.
  • Cons: Harness rethreading required for newborns and challenges with UAS belt tightening.

6.1 Advantages of the 3-in-1 Design

The 3-in-1 design offers unmatched versatility, adapting to a child’s growth from rear-facing infancy to forward-facing toddlerhood and finally to a belt-positioning booster. This eliminates the need for frequent upgrades, saving time and money. Its lightweight and compact frame ensures easy portability between vehicles. Additionally, features like plush padding, cup holders, and a machine-washable seat pad enhance comfort and convenience, making it a practical choice for families seeking long-term safety and value.

6.2 Disadvantages and Potential Drawbacks

Despite its many benefits, the Safety 1st Grow and Go 3-in-1 Car Seat has some drawbacks. The harness height adjustment requires rethreading for newborns, which can be inconvenient. Additionally, undoing the chest clip and harness buckle demands significant strength, potentially challenging for some users. Some parents also noted that the seat can be tricky to install in smaller vehicles due to space constraints. Furthermore, the belt positioning in booster mode may not always align perfectly with certain vehicle seat designs, requiring careful adjustment.

Maintenance and Cleaning

The Safety 1st Grow and Go 3-in-1 Car Seat requires regular cleaning and maintenance. The machine-washable and dryer-safe seat pad and headrest pad ensure easy upkeep. Always inspect for wear and tear, and replace the seat if damaged or expired. Proper care extends the seat’s lifespan and safety.

7.1 Washing the Seat Pad and Headrest

The Safety 1st Grow and Go 3-in-1 Car Seat features a machine-washable and dryer-safe seat pad and headrest. For cleaning, remove the pad and headrest, then wash them in cold water using a mild detergent. Avoid using bleach or harsh chemicals to prevent damage. Gently scrub stains and rinse thoroughly. Air-drying is recommended, but if using a dryer, select a low heat setting. Ensure all parts are completely dry before reassembling the car seat to maintain hygiene and safety.

7.2 Drying Instructions for Seat Covers

After washing, seat covers should be air-dried or tumble-dried on a low heat setting. Avoid high heat to prevent shrinkage or damage. Remove promptly from the dryer while slightly damp to prevent wrinkles. Lay flat or hang to air-dry completely. Ensure covers are dry before reinstalling to maintain your child’s comfort and the car seat’s integrity. Proper drying prevents mold and ensures the seat remains safe and hygienic for your child.

7.3 Regular Inspection for Wear and Tear

Regular inspection ensures the car seat remains safe and functional. Check for cracks, frays, or stains on the harness, belts, and seat pad. Verify expiration dates as specified in the manual. Address any wear promptly to maintain safety.

7.4 When to Replace the Car Seat

Replace the car seat if it shows signs of wear, damage, or after an accident. Seats typically expire 6-10 years from manufacture. Always follow the manual’s guidelines.

User Feedback and Reviews

Parents praise the Safety 1st Grow and Go for its ease of installation, comfort, and versatility. Many highlight the machine-washable seat pad and lightweight design as key advantages. Testimonials often mention the seat’s durability and how it grows with the child, making it a practical long-term investment for families.

8.1 Parent Testimonials and Experiences

Parents have shared overwhelmingly positive feedback about the Safety 1st Grow and Go 3-in-1 Car Seat. Many praise its ease of installation, comfort, and versatility. One parent highlighted how the machine-washable seat pad and lightweight design made it a practical choice for daily use. Another mentioned the ease of adjusting the harness without rethreading, which saved time. Several users appreciated the expandable headrest and cup holders, noting how these features kept their children comfortable during long trips. Overall, families have expressed satisfaction with its durability and value.

8.2 Common Praise for Comfort and Ease of Use

The Safety 1st Grow and Go 3-in-1 Car Seat is widely praised for its exceptional comfort and user-friendly design. Parents often highlight the plush padding, machine-washable seat pad, and lightweight construction, making it easy to move between vehicles. The harness straps are easy to adjust without rethreading, and the cup holders add convenience. Many users also appreciate the straightforward installation process and the seat’s ability to grow with their child, ensuring long-term comfort and safety.

8.3 Reported Challenges and Solutions

Some parents noted challenges with harness height adjustments for newborns, requiring rethreading and undoing the chest clip, which demands strength. Installation issues included difficulty tightening the UAS belt, resolved by removing seat padding for better leverage. Additionally, the seat’s height sometimes interfered with vehicle front seats, especially in smaller cars. Using a foam pool noodle or towel helped achieve proper recline angles, ensuring a secure and level fit for safer installation.

Tips for Choosing the Right Car Seat

Check your vehicle’s manual for compatibility, test the car seat fit, and ensure it meets your child’s weight and height needs for comfort and safety.

9.1 Considering Vehicle Compatibility

Ensure your vehicle is compatible with the Safety 1st Grow and Go 3-in-1 Car Seat by checking seat belt paths, UAS anchors, and available space; Consult both your car and car seat manuals to confirm proper installation methods. Test the fit in your vehicle before purchasing, as some seats may not fit well in smaller cars or specific models. Proper compatibility ensures safe and secure installation, adapting to your child’s growth stages seamlessly.

9.2 Checking Weight and Height Limits

Always verify the weight and height limits of the Safety 1st Grow and Go 3-in-1 Car Seat to ensure proper fit for your child. Rear-facing is suitable for 5-40 lbs (19-40″), forward-facing for 22-65 lbs (29-49″), and booster for 40-100 lbs (43-52″). Regularly check your child’s growth against these limits and adjust the seat accordingly. Consult the manual for precise guidelines to ensure safe and comfortable use at every stage.

9.3 Evaluating Ease of Installation

Evaluate the installation process by reviewing the Safety 1st Grow and Go 3-in-1 Car Seat manual, which provides clear, color-coded instructions. Both UAS and seat belt installations are straightforward, with belt paths marked for ease. Use a pool noodle or towel for leveling, and ensure the seat doesn’t move more than an inch. Proper installation ensures safety, so follow the manual’s guidance carefully.

The Safety 1st Grow and Go 3-in-1 Car Seat is a versatile, long-lasting option offering comfort, ease of use, and advanced safety features for children of all sizes.

10.1 Final Thoughts on the Safety 1st Grow and Go 3-in-1 Car Seat

The Safety 1st Grow and Go 3-in-1 Car Seat stands out as a top-tier choice for parents seeking durability, comfort, and safety. Its 3-in-1 functionality allows it to adapt to a child’s growth, from rear-facing to booster stages. With features like plush padding, machine-washable covers, and easy installation, it ensures both comfort and convenience. Parents appreciate its lightweight design and expandable headrest, making it an excellent investment for long-term use. The seat’s ability to save legroom and accommodate multiple car seat setups adds to its practicality. While some users noted minor challenges with harness adjustments, overall, the seat delivers exceptional value and peace of mind for families.

10.2 Importance of Proper Usage for Maximum Safety

Proper usage of the Safety 1st Grow and Go 3-in-1 Car Seat is crucial for ensuring maximum safety. Always follow the manual’s guidelines for installation, weight limits, and stage transitions. Regularly inspect the seat for wear and tear, and ensure it is securely fastened in the vehicle. The seat must be level and tightly fitted to prevent movement during travel. Failure to adhere to these steps can compromise safety, emphasizing the need for careful attention to detail to protect your child effectively.

Bylysanne

the sword of kaigen pdf

Background and Setting of The Sword of Kaigen

The Kaigenese Empire, inspired by Japanese culture, is home to theonites with magical abilities. The Kusanagi Peninsula, known as the Sword of Kaigen, is a key setting;

1.1. The Kaigenese Empire and Its History

The Kaigenese Empire, inspired by Japanese culture, is a central setting in The Sword of Kaigen. Its history is marked by centuries of conflict, with the Kusanagi Peninsula serving as a strategic defense against invaders. The empire is ruled by a rigid hierarchical system, emphasizing honor, duty, and martial prowess. Theonites, individuals with magical abilities, play a crucial role in its military and societal structure. The empire’s history is intertwined with propaganda and controlled narratives, shaping its citizens’ perceptions of truth. This backdrop of tradition and power sets the stage for the story’s exploration of identity, resilience, and legacy, deeply influencing its characters and their struggles.

1.2. The Kusanagi Peninsula and Its Significance

The Kusanagi Peninsula, a remote and icy region, serves as a strategic defensive stronghold for the Kaigenese Empire. Known as “The Sword of Kaigen,” it symbolizes the empire’s military prowess and resilience. The peninsula’s harsh environment has forged a culture of disciplined warriors, whose loyalty to the empire is unwavering. Its significance extends beyond geography; it represents the empire’s honor and the sacrifices made by its people. The Kusanagi Peninsula is not only a physical barrier against invaders but also a cultural and historical cornerstone, shaping the identities of its inhabitants and influencing the story’s central themes of duty, legacy, and self-discovery.

1.3. The Concept of Theonites and Their Role

Theonites are individuals within the Kaigenese Empire who possess extraordinary magical abilities, wielding powers tied to nature, such as water and ice. They are revered for their strength and play a central role in the empire’s defense. Theonites are trained from a young age to master their abilities, often becoming elite warriors or leaders. Their presence is crucial in maintaining the empire’s dominance and protecting its people. Theonites’ magical prowess is both a gift and a burden, as it sets them apart from others, influencing their identities and societal roles. Their abilities are integral to the story’s conflicts and character development, symbolizing both power and responsibility. Theonites’ existence shapes the world’s dynamics and cultural values, making them pivotal to the narrative.

1.4. Cultural and Martial Arts Influences

The Sword of Kaigen is deeply influenced by Japanese culture and martial arts, with its setting and themes drawing inspiration from samurai traditions and honor codes. The novel’s world-building reflects a blend of fictional and historical elements, creating a unique cultural landscape. Martial arts play a central role, with techniques like the Whispering Blade symbolizing discipline, power, and moral philosophy. The story’s cultural depth is enriched by its exploration of traditional values, family honor, and the clash between modernity and heritage. These influences not only shape the characters’ identities but also drive the plot’s emotional and philosophical undertones, making the novel a compelling blend of action, culture, and introspection.

Plot Summary of The Sword of Kaigen

The Sword of Kaigen follows Mamoru and Misaki as they navigate personal growth, cultural clashes, and external threats in the Kusanagi Peninsula, revealing hidden truths and conflicts.

2.1. Mamoru’s Mountain Climb and Its Symbolism

Mamoru’s daily climb up 821 steps to Kumono Academy symbolizes his journey of self-discovery and resilience. The climb mirrors the rigorous path to becoming a warrior, testing his physical and mental resolve. Encountering Kwang, a transfer student, introduces cultural contrasts and challenges Mamoru’s beliefs. The climb also reflects the broader themes of tradition and personal growth, as Mamoru navigates his identity amidst societal expectations. This symbolic journey sets the stage for Mamoru’s internal and external struggles, highlighting his determination and the weight of legacy in shaping his future.

2;2. Misaki’s Hidden Strengths and Past

Misaki’s past as a skilled theonite warrior, trained at an international academy, contrasts sharply with her current life as a traditional housewife. Her suppressed abilities and strategic mind are revealed through her interactions with her children, particularly Mamoru. Misaki’s internal conflict between her former identity and societal expectations underscores themes of resilience and self-discovery. Her quiet strength and wisdom become a guiding force for Mamoru, as he grapples with his own challenges. Misaki’s journey symbolizes the struggle between personal aspirations and societal roles, highlighting the depth of her character and the sacrifices she has made for her family.

2.3. Kwang’s Disruptive Revelations

Kwang Chul-hee, a transfer student from the north, challenges the official history of the Kaigenese Empire, revealing unsettling truths about its past wars. His claims suggest the Empire’s narrative is fabricated, shaking Mamoru’s faith in his heritage and duty. Kwang’s revelations about the Ranganese Union’s strength and the Empire’s propaganda ignite a spark of rebellion in Mamoru, forcing him to question his beliefs. The discovery of a crashed Yammanka plane, made of Zilazen glass, confirms Kwang’s claims, further destabilizing Mamoru’s understanding of his world. Kwang’s disruptive truths catalyze Mamoru’s journey of self-discovery, highlighting the tension between truth and deception in the Empire’s history.

2.4. The Crashed Plane and Its Implications

The crashed Yammanka plane, discovered by Mamoru and Kwang, is made of Zilazen glass, a material exclusive to Yamma. This discovery confirms Kwang’s claims about the Empire’s lies, shattering Mamoru’s understanding of his world. The plane’s presence reveals the Empire’s misleading narratives about past conflicts, forcing Mamoru to confront the reality of his Empire’s history. This encounter symbolizes the clash between truth and deception, propelling Mamoru into a deeper internal conflict. The crashed plane serves as a pivotal moment, challenging Mamoru’s beliefs and reshaping his perspective on duty, legacy, and identity. Its implications extend beyond personal revelation, impacting the broader understanding of the Empire’s history and its people’s roles within it.

Major Characters in The Sword of Kaigen

Mamoru Matsuda, Misaki, Kwang Chul-hee, and Takeru are central figures, each embodying unique struggles and strengths that drive the story’s emotional and cultural depth forward.

3.1. Mamoru Matsuda: The Protagonist’s Journey

Mamoru Matsuda, a 14-year-old student at Kumono Academy, embodies youthful energy and agility. His daily climb up 821 steps symbolizes his determination and growth. Encountering Kwang Chul-hee, a transfer student, Mamoru begins to question his beliefs. Kwang’s revelations about the Empire’s history challenge Mamoru’s faith in his heritage. Discovering a crashed Yammanka plane further shatters his understanding, forcing him to confront harsh truths. Mamoru’s journey includes rigorous training with his father, Takeru, and learning from his mother, Misaki, about resilience and identity. His internal struggle between tradition and personal growth defines his path. Mamoru’s final battle showcases his bravery, sacrifice, and evolution into a protector, leaving a lasting legacy for his family and community.

3.2. Misaki Matsuda: The Mother’s Hidden Depths

Misaki Matsuda, Mamoru’s mother, appears as a traditional housewife but conceals a past marked by strength and skill. Her time at an international theonite academy in Carytha shaped her as a capable warrior, a stark contrast to her current life. Misaki’s suppressed abilities surface during a Ranganese invasion, where she fiercely protects her family, revealing herhidden combat prowess. Her journey explores the tension between societal expectations and personal identity, showcasing her resilience and wisdom. Misaki’s influence on Mamoru inspires him to find his own path, blending tradition with self-discovery. Her character underscores the complexity of balancing family, duty, and individuality, making her a pivotal figure in the story.

3.3. Kwang Chul-hee: The Outsider’s Impact

Kwang Chul-hee, a transfer student from the north, brings an outsider’s perspective to the Kusanagi Peninsula. His modern uniform and accent mark him as different, sparking curiosity and tension. Kwang challenges Mamoru’s beliefs by questioning the Empire’s history, revealing truths about the Ranganese Union’s strength and the Empire’s propaganda. His disruptive revelations shake Mamoru’s faith in his heritage and duty, forcing him to confront uncomfortable truths. Kwang’s presence catalyzes change, igniting a spark of rebellion in Mamoru. Their discovery of a crashed Yammanka plane further solidifies Kwang’s claims, symbolizing the clash between truth and deception. Kwang’s impact is pivotal, driving Mamoru’s journey of self-discovery and challenging the status quo in the tightly knit warrior community.

3.4. Takeru Matsuda: The Father’s Legacy

Takeru Matsuda, Mamoru’s father, embodies the rigid traditions of the Kaigenese Empire. His adherence to the Whispering Blade technique reflects his unwavering commitment to duty and legacy. Takeru’s leadership after the battle, urging the preservation of Mamoru’s sword, Mamoriken, highlights the importance of honoring family and empire. His stoic exterior conceals deep emotional turmoil, particularly after Mamoru’s sacrifice. Takeru’s legacy is one of duty, resilience, and the weight of tradition, influencing both Mamoru and Misaki. His role underscores the tension between personal identity and inherited responsibilities, shaping the Matsuda family’s journey through loss and rebuilding.

Themes and Symbolism in The Sword of Kaigen

Central themes include identity, resilience, and legacy, with the Whispering Blade symbolizing duty and honor. Tradition clashes with personal growth, shaping characters’ journeys and conflicts.

4.1. Identity and Self-Discovery

Mamoru’s journey embodies the struggle for identity, as he navigates his warrior heritage and personal aspirations. The novel explores how societal expectations and family legacy shape individuality. Through his interactions with Kwang and his mother Misaki, Mamoru confronts the duality of tradition and self-determination. Misaki’s hidden past as a theonite warrior further illustrates the tension between societal roles and personal identity. The Whispering Blade, a symbol of duty, contrasts with Mamoru’s evolving understanding of his role beyond mere obligation. This theme underscores the universal quest for self-discovery amidst expectations and legacy, making it a compelling narrative thread in The Sword of Kaigen.

4.2. Resilience and Sacrifice

Resilience and sacrifice are central themes in The Sword of Kaigen, as characters navigate immense challenges and personal losses. Mamoru’s final battle exemplifies his unwavering resolve, even in the face of overwhelming odds, showcasing his growth as a warrior and his deep sense of duty. Misaki’s resilience is evident in her ability to confront her past and protect her family, despite the emotional toll of her son’s sacrifice. The novel highlights how resilience is not just physical but also emotional, as characters like Misaki grapple with grief and rebuild their lives. Sacrifice is portrayed as both a duty and a testament to love, underscoring the enduring strength of family and community bonds.

4.3. Legacy and Duty

Legacy and duty are deeply intertwined in The Sword of Kaigen, shaping the characters’ identities and actions. Takeru’s adherence to tradition and the Whispering Blade technique reflects his belief in honoring his lineage. After Mamoru’s sacrifice, his sword, Mamoriken, becomes a symbol of his legacy, embodying his bravery and commitment to protecting his family and community. Misaki, too, grapples with her own legacy, balancing her past as a warrior with her role as a mother, ensuring her son’s memory endures. The novel explores how duty, both to family and empire, can be both a source of purpose and a burden, highlighting the tension between inherited responsibilities and personal identity.

4.4. Tradition vs. Personal Growth

The Sword of Kaigen explores the tension between tradition and personal growth, particularly through Mamoru and Misaki’s journeys. Mamoru’s rigorous training under his father, Takeru, emphasizes adherence to the Whispering Blade technique, a symbol of their warrior legacy. However, Kwang’s disruptive truths and Mamoru’s own experiences challenge this rigid tradition, prompting him to question and redefine his role. Misaki’s suppressed past as a skilled warrior contrasts with her current domestic life, highlighting her internal struggle to reconcile tradition with personal identity. The novel underscores the importance of balancing inherited duties with individual growth, showing how adhering too strictly to tradition can stifle potential, while embracing change fosters resilience and self-discovery.

Writing Style and Literary Techniques

M.L. Wang’s vivid storytelling blends Japanese cultural influences with intricate martial arts sequences, creating a rich, emotionally charged narrative that explores identity and resilience through detailed combat scenes.

5.1. Narrative Choices and Storytelling

M.L. Wang’s narrative in The Sword of Kaigen employs a non-linear storytelling approach, blending action-packed sequences with emotional depth. The novel’s structure alternates between present-day events and flashbacks, providing insight into characters’ motivations. Wang’s use of vivid descriptions immerses readers in the world of the Kaigenese Empire, while the pacing balances intense combat scenes with quieter moments of introspection. The storytelling highlights themes of identity and resilience, with a focus on how personal and cultural histories shape decisions. Wang’s ability to weave together action, emotion, and cultural influences creates a compelling narrative that engages readers and explores complex themes effectively. The narrative choices enhance the story’s emotional resonance and depth.

5.2. Use of Martial Arts and Combat Scenes

M.L. Wang intricately weaves martial arts into the narrative, creating dynamic and visually striking combat scenes. Inspired by Japanese traditions, the fighting styles are both graceful and lethal. Each battle is meticulously choreographed, reflecting the characters’ skills and emotional states. The Whispering Blade technique, central to the story, symbolizes precision and discipline. Combat scenes are not just action sequences but reveal character growth and thematic depth. Wang’s vivid descriptions allow readers to envision the fights, enhancing the story’s tension and emotional impact. The blend of martial arts philosophy with intense action underscores the novel’s cultural authenticity and enriches the reading experience, making the combat scenes memorable and integral to the plot.

5.3. Emotional Depth and Character Development

M.L. Wang crafts characters with profound emotional depth, exploring their inner worlds and relationships. Mamoru’s journey from youthful vigor to selfless sacrifice highlights his growth and the weight of legacy. Misaki’s transformation from a subdued housewife to a fierce warrior reveals her hidden strengths and unresolved past. The novel delves into themes of identity, duty, and resilience, with characters facing moral dilemmas and personal losses. Emotional moments, such as Mamoru’s final battle and Misaki’s grief, resonate deeply. Wang’s portrayal of complex family dynamics and the clash between tradition and personal growth adds layers to the narrative, making the characters relatable and their struggles poignant. The emotional depth enhances the story’s impact, leaving a lasting impression on readers.

5.4; Cultural and Historical Inspirations

The Sword of Kaigen draws heavily from Japanese culture and martial arts, creating a richly detailed world. The Kusanagi Peninsula and the Kaigenese Empire evoke feudal Japan, with warriors upholding honor and duty. Theonites, possessing magical abilities, blend myth with history, inspired by samurai tales and traditional martial arts. Themes of loyalty, sacrifice, and the clash between tradition and modernity reflect historical and cultural influences. Wang’s portrayal of these elements adds depth and authenticity, making the setting and characters feel deeply rooted in a fantastical yet familiar world. The novel’s cultural tapestry enriches its narrative, offering readers a compelling blend of history and fantasy.

Analysis and Interpretation

The Sword of Kaigen delves into themes of identity, resilience, and legacy, offering a profound exploration of duty versus personal growth. The novel’s rich cultural tapestry and complex characters invite deep analysis, revealing layers of meaning beneath its compelling narrative. The clash between tradition and modernity is a central focus, with characters like Mamoru and Misaki embodying the struggle to balance heritage with individuality. The story’s emotional depth and symbolic elements, such as the Whispering Blade, add further complexity, making it a thought-provoking read for fans of character-driven fantasy.

6.1. The Whispering Blade: Symbolism and Significance

The Whispering Blade, a central symbol in The Sword of Kaigen, embodies the legacy of the Kaigenese Empire and its warriors. Its silence and lethal precision mirror the discipline and sacrifice expected of those who wield it. For Mamoru, the blade represents his familial obligations and the weight of tradition. Its name, Mamoriken, symbolizes protection and duty, reflecting Mamoru’s ultimate sacrifice. The blade also serves as a metaphor for the clash between tradition and personal growth, as characters like Mamoru and Misaki grapple with their identities. Its significance extends beyond combat, representing the enduring spirit of the Kusanagi Peninsula and the resilience of its people.

6.2. The Role of Propaganda and Truth

Propaganda plays a pivotal role in shaping the narrative of the Kaigenese Empire, masking truths to maintain control. The Empire’s portrayal of historical events as heroic victories is challenged by Kwang’s revelations, exposing the Ranganese Union’s true strength. This clash between official history and reality forces characters like Mamoru to question their beliefs. Propaganda is used to foster loyalty and duty among warriors, creating a divide between truth and perception. The novel critiques how manipulated narratives can distort identity and purpose, while the pursuit of truth, though dangerous, becomes a catalyst for change and self-discovery. This theme underscores the tension between blind obedience and the need for critical understanding.

6.3. The Clash Between Tradition and Modernity

The Sword of Kaigen explores the tension between tradition and modernity through its characters and setting. The Kusanagi Peninsula, steeped in ancient martial traditions, contrasts with the modern ideas introduced by Kwang Chul-hee. Misaki’s suppressed past as a theonite warrior highlights the struggle between her traditional role as a mother and her hidden strength. Mamoru’s journey reflects this clash, as he grapples with his father’s rigid adherence to tradition and his own evolving beliefs. The novel illustrates how tradition can both empower and constrain, while modernity challenges established norms. This conflict mirrors broader themes of identity, duty, and the search for balance between inherited values and personal growth. The interplay between old and new drives the story’s emotional and cultural depth.

6.4. The Psychological Complexity of Characters

The characters in The Sword of Kaigen exhibit profound psychological depth, with their struggles and growth driving the narrative. Mamoru’s journey from youthful idealism to self-doubt and eventual resilience underscores his emotional complexity. Misaki’s internal conflict between her past as a warrior and her present role as a mother adds layers to her character, showcasing her suppressed strengths and quiet wisdom. Kwang’s outsider perspective challenges the status quo, while Takeru’s rigid adherence to tradition reveals his inner turmoil and sense of duty. These characters’ psychological intricacies, marked by unspoken motivations and evolving relationships, create a rich tapestry of emotional and moral conflicts that resonate deeply with readers. Their development enriches the story’s themes of identity, legacy, and personal growth.

Reception and Reviews

The Sword of Kaigen has received critical acclaim for its emotional depth and cultural richness, though some critics note uneven storytelling and retrograde elements in its world-building.

7.1. Critical Acclaim and Praise

The Sword of Kaigen has garnered significant praise for its emotional depth, richly drawn characters, and immersive world-building. Critics highlight its unique blend of Japanese-inspired culture and martial arts, comparing it to works like R.F. Kuang’s The Poppy War. The novel’s exploration of identity, resilience, and legacy resonates deeply with readers. Many applaud M.L. Wang’s ability to craft a compelling narrative that balances action with introspection. The theonite magic system and the Kusanagi Peninsula’s significance are particularly praised for their originality and depth. While some note minor pacing issues, the consensus is that the novel’s strengths far outweigh its flaws, making it a standout in the fantasy genre; Fans and critics alike celebrate its cultural authenticity and heartfelt storytelling.

7.2. Mixed Opinions and Criticisms

While The Sword of Kaigen has been widely praised, some readers express mixed opinions. A few critics find the characters’ motivations and world-building elements challenging to follow, particularly the numerous tribes and regions mentioned early on. The pacing has been a point of contention, with some noting that the narrative can feel uneven. Additionally, the retrograde societal dynamics have drawn criticism, as certain aspects of the empire’s culture may feel outdated to modern readers. Despite these critiques, the novel’s core strengths in emotional depth and storytelling have often been cited as redeeming factors, making it a polarizing yet impactful read in the fantasy genre. The debate among readers highlights its complexity and thought-provoking nature.

7.3. Comparison to Other Works

The Sword of Kaigen draws comparisons to notable works in the fantasy genre, such as Lian Hearn’s Across the Nightingale Floor and R.F. Kuang’s The Poppy War. Both novels share rich cultural influences and deep martial arts themes. Like Hearn, Wang masterfully weaves Japanese-inspired traditions and mythology, creating a vivid world that immerses readers. Similarly, Kuang’s exploration of war and identity resonates in Kaigen’s themes of duty and self-discovery. Yet, Wang’s unique voice and theonite magic set the novel apart. These comparisons highlight the book’s ability to blend familiar elements with fresh perspectives, appealing to fans of character-driven fantasy and cultural storytelling. The novel’s standalone nature also allows it to carve its own niche within the genre.

7.4. Fan Reactions and Community Discussions

Fans of The Sword of Kaigen have expressed enthusiastic praise for its core strengths, with many highlighting its emotional depth and strong character development. Mixed opinions exist, however, with some critics finding the world-building and storytelling uneven. Online forums and communities, such as Goodreads and Reddit, are filled with discussions about the novel’s themes, particularly its exploration of identity, resilience, and legacy. Fans also appreciate the cultural richness and martial arts influences, drawing parallels to other works like The Poppy War. The availability of a detailed PDF study guide has further fueled discussions, offering readers a deeper dive into the novel’s complexities and symbolism.

The Sword of Kaigen PDF and Download Options

The Sword of Kaigen is available as a PDF through platforms like Z-Library, offering easy access to the digital version for readers worldwide, along with study guides.

8.1. Where to Find the PDF Version

The Sword of Kaigen PDF can be found on platforms like Z-Library, offering free access to the novel. Additionally, the official website and online retailers provide legal downloads.

8.2. Legal and Safe Download Platforms

For a legal and safe download, consider platforms like Z-Library or authorized retailers such as Amazon and Barnes & Noble. These sites ensure secure transactions and compliance with copyright laws. Always verify the authenticity of the source to avoid malicious content. Additionally, the author’s official website may offer direct purchase options or links to trusted distributors. Avoid unofficial or pirated sites to support the author and protect your device from potential risks. Purchasing through reputable platforms also guarantees access to the latest editions and updates. This ensures a high-quality reading experience while respecting intellectual property rights.

8.3. Benefits of Reading the Digital Version

Reading the digital version of The Sword of Kaigen offers unparalleled convenience and accessibility. The PDF format allows readers to access the book on multiple devices, ensuring seamless transitions between smartphones, tablets, and computers. Digital versions are also space-saving, eliminating the need for physical storage. Adjustable font sizes and night mode features enhance readability, catering to individual preferences. Additionally, digital copies often include interactive elements like bookmarks, search functions, and hyperlinks, making navigation easier. The portability and flexibility of the digital version make it ideal for modern readers who value efficiency and accessibility. Furthermore, digital formats reduce environmental impact, appealing to eco-conscious readers.

8.4. Study Guides and Companion Resources

Study guides and companion resources for The Sword of Kaigen enhance readers’ understanding of the novel’s complexity. These resources provide in-depth analyses of characters, themes, and symbolic elements, offering insights into M.L. Wang’s narrative choices. Companion guides often include summaries of key chapters, explanations of cultural references, and explorations of the book’s historical and martial arts inspirations. Additionally, some resources feature FAQs, subtle connections between characters, and psychological analyses of their motivations. These guides are particularly useful for readers seeking to uncover the novel’s deeper meanings and for students analyzing the text for academic purposes. The availability of such resources in digital formats, including PDF, makes them easily accessible for a richer reading experience.

Bylysanne

pro1 iaq t701 manual

1.1 Overview of the Pro1 IAQ T701 Thermostat

The Pro1 IAQ T701 is a non-programmable electronic thermostat designed for reliability and ease of use‚ offering precise temperature control for heating and cooling systems.

1.2 Importance of the Manual

This manual provides essential guidance for installing‚ operating‚ and maintaining the T701 thermostat‚ ensuring safe and optimal use of its features and functionality.

The Pro1 IAQ T701 is a non-programmable electronic thermostat designed for simplicity and reliability. It offers intuitive controls‚ including up/down buttons for temperature adjustment and a system mode selector. Compatible with various heating and cooling systems‚ the T701 ensures efficient temperature management. The thermostat features a backlit display for clear visibility and includes a low battery warning to prevent unexpected shutdowns. Its compact design and user-friendly interface make it an ideal choice for homeowners seeking a straightforward solution for controlling their HVAC systems. With a focus on ease of use‚ the T701 is backed by a 5-year limited warranty‚ ensuring long-term performance and customer satisfaction.

The manual is crucial for understanding the Pro1 IAQ T701 thermostat’s features‚ installation‚ and operation. It provides step-by-step instructions for safe and correct installation‚ ensuring optimal performance. The manual also guides users through troubleshooting common issues‚ such as display problems or temperature setting errors‚ helping to resolve them quickly. Additionally‚ it covers maintenance tips‚ like cleaning the thermostat and replacing batteries‚ to extend the product’s lifespan. By following the manual‚ users can register their warranty‚ access customer support‚ and make the most of the thermostat’s energy-efficient features. This comprehensive guide ensures users maximize comfort and efficiency while minimizing potential issues.

Installation Guide

The installation guide provides detailed steps for setting up the Pro1 IAQ T701 thermostat‚ including pre-installation checks‚ wiring connections‚ and mounting instructions to ensure proper functionality.

Alright‚ I need to generate text for the subheading ‘

2.1 Pre-Installation Checks

‘ under the topic ‘pro1 iaq t701 manual’. The user has provided specific instructions that must be followed carefully.

Looking at the previous response‚ I see that it covered checking system compatibility‚ disconnecting power‚ location selection‚ and tools preparation. I need to make sure not to repeat that information but to create something new. However‚ since the user mentioned not to write about other subheadings‚ I should stick strictly to 2.1 without overlapping.

I should use the information provided from the Internet about the Pro1 IAQ T701 manual. From the earlier data‚ I know it’s important to check system compatibility‚ ensure the thermostat location is representative of the room temperature‚ verify power requirements‚ and prepare necessary tools. Maybe I can elaborate on these points‚ ensuring each is clearly explained within the word limit.

I also need to ensure that the text flows well and is easy to understand‚ avoiding any technical jargon that might confuse the reader. Since it’s a manual‚ clarity is key. I’ll review the word count as I draft each sentence to stay within the limit.

2.2 Step-by-Step Installation Process

Begin by ensuring the power to your HVAC system is turned off at the circuit breaker. Remove the old thermostat and take note of the wire connections for reference. Mount the T701 base plate to the wall using the provided screws‚ ensuring it is level. Gently pull the wires through the base plate and connect them to the corresponding terminals on the T701‚ following the wiring diagram in the manual. Secure the thermostat faceplate to the base plate and restore power to the system. Test the thermostat by switching between heating and cooling modes to ensure proper operation. Finally‚ dispose of the old thermostat responsibly.

2.3 Wiring Diagrams and Connections

Refer to the wiring diagrams in the manual to identify the correct connections for your system. The T701 thermostat uses standard terminals (R‚ W‚ Y‚ G‚ C‚ and O/B) to connect to your HVAC system. Ensure the wires are securely attached to the correct terminals on the thermostat. The R terminal connects to the 24V power source‚ while the W and Y terminals control heating and cooling‚ respectively. The G terminal is for the fan‚ and the C terminal provides common wiring. If your system requires it‚ connect the O/B terminal for heat pumps. Always match the wiring configuration to your specific HVAC setup‚ as outlined in the manual‚ to ensure proper functionality. Double-check all connections before restoring power to avoid malfunctions.

2.4 Mounting the Thermostat

Mount the Pro1 IAQ T701 thermostat on an interior wall at a height of 52-60 inches for accurate temperature sensing. Choose a location away from direct sunlight‚ heating vents‚ and radiators to ensure precise readings. Use the provided wall anchors and screws to secure the base plate to the wall. Ensure the base is level and firmly attached. After installing the base‚ connect the wires to the appropriate terminals as shown in the wiring diagram. Finally‚ snap the thermostat faceplate onto the base and ensure it is securely fastened. Proper mounting ensures reliable operation and accurate temperature control of your HVAC system.

Operating the Thermostat

The Pro1 IAQ T701 thermostat offers intuitive controls for basic operation‚ allowing users to adjust temperature settings and monitor system status through its clear display interface.

3.1 Basic Operation and Controls

The Pro1 IAQ T701 thermostat features straightforward controls for seamless operation. Users can adjust the temperature using the up and down arrow buttons‚ while the System button toggles between heating and cooling modes. The display shows both the current room temperature and the setpoint‚ ensuring clear monitoring. A low battery warning icon alerts users when replacement is needed. The thermostat also includes a 5-year limited warranty‚ providing peace of mind. Simple operating instructions are located on the back of the battery door‚ making it easy to understand basic functions and maintenance tasks.

3.2 Setting the Temperature

To set the temperature on the Pro1 IAQ T701 thermostat‚ press the up or down arrow buttons to adjust the desired temperature. Ensure the thermostat is in the correct mode (Cool or Heat) using the System button. For cooling below 68°F‚ switch to Cool mode first‚ then use the down arrow to lower the setpoint. The display shows both the current room temperature and the target temperature‚ allowing for precise control. Adjustments are made in 1°F increments‚ providing accurate temperature management for optimal comfort.

3.3 Understanding the Display

The Pro1 IAQ T701 thermostat features a clear LCD display showing the current room temperature and the setpoint temperature. Icons indicate the active mode (Cool or Heat) and system status‚ such as when the fan or compressor is running. The display also shows battery level‚ with a low-battery warning ensuring timely replacements. System operation indicators like “Cool On” or “Heat On” provide real-time feedback. Understanding the display helps users monitor and control their home’s climate efficiently‚ ensuring optimal comfort and energy use. The interface is designed for simplicity‚ making it easy to navigate and adjust settings as needed.

3.4 Switching Between Heating and Cooling Modes

To switch between heating and cooling modes on the Pro1 IAQ T701 thermostat‚ press the System button until the desired mode (Heat or Cool) appears on the display. The thermostat will confirm the mode change‚ and the system will activate accordingly. Ensure the outdoor temperature is above 50°F (10°C) when switching to Cool mode to prevent compressor damage. The display will show the active mode‚ and you can adjust the setpoint temperature using the up or down arrows. This feature allows seamless transitions between heating and cooling‚ ensuring year-round comfort; Always verify the mode change on the display to avoid unintended system operation.

Features and Functionality

The Pro1 IAQ T701 features user-selectable temperature setpoints‚ system operation indicators‚ and low battery warnings. It is compatible with various heating and cooling systems‚ ensuring efficient comfort control.

4.1 Heating and Cooling System Compatibility

The Pro1 IAQ T701 is compatible with a wide range of heating and cooling systems‚ including gas or oil heat‚ electric furnaces‚ and heat pumps. It supports both systems with and without auxiliary or emergency heat‚ ensuring versatility for different home configurations. The thermostat’s design allows it to integrate seamlessly with various HVAC setups‚ providing precise temperature control and efficient operation. Whether you have a traditional furnace or a modern heat pump‚ the T701 adapts to your system‚ ensuring optimal performance and comfort. This compatibility makes it a reliable choice for diverse heating and cooling needs.

4.2 Energy Efficiency Features

The Pro1 IAQ T701 thermostat incorporates energy-saving features designed to optimize your heating and cooling system’s efficiency. It offers precise temperature control‚ which helps reduce unnecessary energy consumption. The thermostat’s low battery warning ensures continuous operation‚ preventing system downtime that could lead to energy waste. Additionally‚ it provides clear system operation indicators‚ allowing you to monitor and adjust settings for optimal energy use. These features work together to help you save on energy costs while maintaining a comfortable indoor environment. By efficiently managing your HVAC system‚ the T701 supports both energy conservation and cost-effectiveness.

4.3 Battery Management and Low Battery Warning

The Pro1 IAQ T701 thermostat features a reliable battery management system to ensure continuous operation. It uses two AA alkaline batteries‚ which provide long-lasting power. A low battery warning icon appears on the display when the batteries need replacement‚ allowing you to address the issue promptly. Failing to replace the batteries in time may cause system downtime or loss of settings. The thermostat’s battery compartment is easily accessible‚ located on the rear side‚ making replacement straightforward. Always use high-quality batteries to maintain optimal performance. This feature ensures uninterrupted climate control and is designed to protect your comfort system from unexpected interruptions due to battery depletion.

4.4 System Operation Indicators

The Pro1 IAQ T701 thermostat includes system operation indicators that provide real-time feedback on the heating and cooling system’s status. These indicators‚ displayed on the thermostat’s screen‚ show whether the system is actively heating‚ cooling‚ or in idle mode. Additional indicators signal when specific features‚ such as energy-saving modes‚ are active. The LED indicators offer a clear visual confirmation of the system’s operational state‚ ensuring users can monitor and adjust settings as needed. This feature enhances user experience by providing immediate insights into system performance and helps in troubleshooting common issues‚ ensuring efficient and reliable operation of the HVAC system. These indicators are essential for maintaining optimal comfort and energy efficiency.

Advanced Settings and Customization

The Pro1 IAQ T701 thermostat offers advanced settings for temperature setpoints‚ scheduling‚ and user-selectable features‚ allowing for personalized comfort and energy efficiency tailored to specific preferences and needs.

5.1 Adjusting Temperature Setpoints

The Pro1 IAQ T701 allows users to adjust temperature setpoints using the up and down arrow buttons. To change the setpoint‚ press the System button to select the desired mode (Heat or Cool). Use the arrows to increase or decrease the temperature. The display shows the current setpoint‚ and the system will gradually adjust to the new setting. For energy efficiency‚ set the cooling mode below 68°F or heating mode above 72°F. The thermostat also features a low battery warning to ensure uninterrupted operation. Always refer to the manual for specific guidance on setpoint adjustments and system compatibility.

5.2 Scheduling and Programming Options

The Pro1 IAQ T701 thermostat offers basic scheduling and programming options to optimize your heating and cooling needs. Users can set temperature preferences for different times of the day. While it is a non-programmable model‚ it allows for manual adjustments using the up and down arrow buttons. For consistent comfort‚ set your desired temperature and let the system maintain it; The thermostat does not support 7-day scheduling but provides simplicity for users who prefer straightforward operation. Regularly review and adjust settings to match your lifestyle and seasonal changes for energy efficiency. Refer to the manual for detailed guidance on customizing your settings effectively.

5.3 User-Selectable Features

The Pro1 IAQ T701 thermostat offers user-selectable features to customize your comfort experience. Users can adjust temperature setpoints for heating and cooling modes‚ ensuring optimal comfort levels. The thermostat also allows switching between heating and cooling modes‚ providing flexibility based on seasonal needs. A low battery warning feature ensures timely battery replacement‚ preventing system downtime. While it does not support advanced programming‚ its simplicity makes it easy to use. These features are designed to enhance convenience and energy efficiency‚ giving users control over their home’s climate without unnecessary complexity. Refer to the manual for instructions on accessing and adjusting these settings effectively.

Troubleshooting Common Issues

Common issues include display malfunctions‚ incorrect temperature settings‚ and system errors. Check wiring connections‚ ensure proper battery installation‚ and reset the thermostat if necessary.

6.1 Common Display Issues and Solutions

If the display is blank‚ check battery levels or wiring connections. Ensure batteries are installed correctly and terminals are secure. A temperature mismatch or error codes like “E1” or “E2” may indicate system malfunctions. Restart the thermostat by removing and reinserting batteries. If issues persist‚ consult the troubleshooting section or contact support. Display problems often resolve with simple resets or addressing underlying system issues. Always refer to the manual for specific error code meanings and solutions to ensure proper functionality and avoid further complications. Regular maintenance can help prevent display-related issues and ensure accurate temperature readings.

6.2 Temperature Setting Problems

If the thermostat fails to cool below 68°F‚ ensure it is in Cool mode and the setpoint is correctly adjusted using the down arrow. Check for error codes like “E3” or “E4‚” which may indicate sensor issues. Verify wiring connections and ensure the outdoor temperature is above 50°F to prevent compressor damage. If the setpoint does not update‚ restart the thermostat by removing and reinserting the batteries. Ensure the system is properly configured for your heating/cooling setup. If issues persist‚ consult the troubleshooting guide or contact Pro1 support for assistance. Addressing these problems promptly ensures optimal performance and comfort. Regular checks can help prevent recurring temperature setting issues.

6.3 System Malfunction and Error Codes

If the Pro1 IAQ T701 thermostat displays error codes such as E1‚ E2‚ or E3‚ it indicates potential system malfunctions. E1 typically signifies a sensor issue‚ while E2 or E3 may point to communication or configuration problems. To resolve these‚ restart the thermostat by removing and reinserting the batteries. Check wiring connections and ensure they are secure. If the issue persists‚ verify the system configuration matches your heating/cooling setup. For persistent errors‚ consult the troubleshooting section of the manual or contact Pro1 support. Addressing system malfunctions promptly ensures reliable operation and prevents further issues. Always refer to the error code definitions in the manual for precise solutions. Regular system checks can help identify and resolve problems early. Proper maintenance ensures optimal performance and comfort. If errors recur‚ professional assistance may be required to diagnose and repair underlying system issues.

Maintenance and Upkeep

Regular maintenance ensures optimal performance of the Pro1 IAQ T701 thermostat. Clean the device periodically‚ replace batteries when the low-battery warning appears‚ and perform routine system checks to maintain efficiency and functionality.

7.1 Cleaning the Thermostat

To maintain the Pro1 IAQ T701 thermostat’s performance‚ clean it regularly using a soft‚ dry cloth. Avoid harsh chemicals or liquids‚ as they may damage the device. Ensure the thermostat is powered off before cleaning to prevent any electrical issues. Gently wipe the display and exterior to remove dust or debris. This simple maintenance step helps ensure accurate temperature readings and smooth operation. For detailed cleaning instructions‚ refer to the full manual available on the Pro1 IAQ website.

7.2 Replacing Batteries

To replace the batteries in your Pro1 IAQ T701 thermostat‚ first ensure the system is turned off. Locate the battery compartment on the back of the thermostat. Open it by sliding it downward or removing the faceplate‚ depending on the model; Remove the old batteries and insert two new AA alkaline batteries‚ ensuring the +/- terminals align correctly. Replace the compartment and turn the system back on; The thermostat will resume normal operation. If the low battery icon appears‚ replace the batteries immediately to maintain functionality. Always use high-quality batteries to ensure reliable performance. Refer to the manual for detailed steps.

7.3 Regular System Checks

Regular system checks ensure optimal performance and longevity of your Pro1 IAQ T701 thermostat. Start by verifying that the display is free from dust or debris‚ which can interfere with sensor accuracy. Clean the thermostat gently with a soft cloth if necessary. Check that the system cycles on and off correctly‚ ensuring proper heating and cooling operation. Inspect the system operation indicators and error codes to identify any potential issues early. Additionally‚ verify that the outdoor temperature is above 50°F (10°C) when operating the cooling system to prevent compressor damage. Regular checks help maintain efficiency and reliability‚ ensuring your comfort system runs smoothly year-round.

Warranty and Support

Your Pro1 IAQ T701 thermostat is backed by a 5-year limited warranty. Register online at www.pro1iaq.com or mail the form for coverage. Contact support at 1-888-776-1427 for assistance.

8.1 Warranty Registration Process

Register your Pro1 IAQ T701 thermostat within 60 days of installation to activate the 5-year limited warranty. Visit www.pro1iaq.com‚ select “Warranty Registration‚” and complete the online form with your thermostat details. Alternatively‚ mail the warranty registration form to Pro1 IAQ Inc. at 1111 S. Glenstone Ave.‚ Suite 2-100‚ Springfield‚ MO 65804. Include your name‚ address‚ installation date‚ and thermostat model number. Proper registration ensures warranty coverage for repairs or replacements. For assistance‚ contact Pro1 support at 1-888-776-1427 or visit their website for additional guidance.

8.2 Warranty Terms and Conditions

The Pro1 IAQ T701 thermostat is covered by a 5-year limited warranty‚ protecting against manufacturing defects in materials and workmanship. The warranty applies only to the original purchaser and is non-transferable. Proper installation and operation in accordance with the manual are required for warranty validity. Damage resulting from misuse‚ tampering‚ or improper installation is excluded. The warranty does not cover normal wear and tear or third-party repairs. For full details‚ refer to the warranty section in the manual or visit www.pro1iaq.com. The warranty ensures your thermostat operates efficiently‚ providing reliable temperature control and peace of mind for your home comfort system.

8.3 Contact Information for Support

For any questions or assistance regarding the Pro1 IAQ T701 thermostat‚ contact Pro1 Technologies at their toll-free number: 1-888-776-1427. Their office hours are Monday through Friday‚ 9 AM to 6 PM Eastern Time. You can also visit their official website at www.pro1iaq.com for additional resources‚ downloads‚ and support information. Pro1 Technologies is located at 1111 S. Glenstone Ave.‚ Suite 2-100‚ Springfield‚ MO 65804. Their customer support team is available to address installation‚ operation‚ or warranty-related inquiries‚ ensuring prompt and reliable assistance for your thermostat needs.

Additional Resources

Visit www.pro1iaq.com to download the full manual‚ access FAQs‚ or check for software updates. For further assistance‚ contact Pro1 Technologies at 1-888-776-1427.

9.1 Downloading the Full Manual

The full Pro1 IAQ T701 manual is available for download on the official Pro1 Technologies website at www.pro1iaq.com. This comprehensive guide covers installation‚ operation‚ and troubleshooting. It is provided in PDF format for easy access and printing. Spanish versions of the manual can also be downloaded from the same site. The manual includes detailed sections on thermostat operation‚ quick reference guides‚ and warranty information. For assistance‚ contact Pro1 Technologies at 1-888-776-1427 or visit their support page. The manual is compatible with models like T701‚ ensuring you have all the information needed to use your thermostat effectively.

9.2 Frequently Asked Questions (FAQs)

How do I set the temperature below 68°F in cooling mode? Press the System button until “Cool” appears‚ then use the down arrow to lower the setpoint.

Why does the display show a lower temperature than set? The thermostat displays the current room temperature‚ not the setpoint‚ until the system reaches the desired temperature.

Can I operate the cooling system below 50°F? No‚ this can damage the compressor. Always ensure outdoor temperatures are above 50°F when using cooling mode.

How do I replace the batteries? Replace AA batteries immediately when the low battery icon appears to maintain proper thermostat function.

These FAQs address common user inquiries‚ ensuring optimal use of the Pro1 IAQ T701 thermostat.

9.3 Software Updates and Firmware

Regular software updates ensure the Pro1 IAQ T701 thermostat operates with the latest features and improvements. To check for updates‚ visit the Pro1 IAQ website and follow the download instructions. Always verify compatibility before installing new firmware to avoid system issues. Use only authorized updates from the official website to maintain device security and functionality. Refer to the operating manual for detailed guidance on updating your thermostat’s software. Keeping your firmware up to date ensures optimal performance‚ enhanced security‚ and access to new features‚ providing a seamless user experience with your Pro1 IAQ T701 thermostat.

Bylysanne

fundamentals of electric circuits 7th edition solutions pdf

The 7th edition of Fundamentals of Electric Circuits by Alexander and Sadiku provides a comprehensive guide to circuit analysis, offering updated content and practical problem-solving techniques.

With 2,481 practice problems and 121 Design a Problem exercises, it enhances learning through real-world applications and advanced network analysis methods, making it a valuable resource for engineering students.

Overview of the 7th Edition

The 7th edition of Fundamentals of Electric Circuits by Charles K. Alexander and Matthew N. O. Sadiku offers a comprehensive and updated approach to circuit analysis. It includes 2,481 practice problems, review questions, and 121 Design a Problem exercises, fostering critical thinking and design skills. The text is divided into three main parts: DC Circuits, AC Circuits, and Advanced Network Analysis Techniques. This edition retains popular features like voltage and current division and Thevenin/Norton equivalents while introducing new content to reflect modern advancements in electrical engineering. The solution manual provides step-by-step solutions for all chapters, aiding students in mastering complex topics. With its balanced approach and real-world applications, the 7th edition remains a cornerstone for engineering education. Its clarity and depth make it indispensable for both students and instructors.

Key Features and Updates

The 7th edition of Fundamentals of Electric Circuits includes numerous enhancements to improve learning outcomes. It features 121 Design a Problem exercises, encouraging students to develop their own problems and solutions. The text contains 2,481 practice problems, review questions, and end-of-chapter homework problems, providing ample opportunities for practice. The addition of real-world examples and case studies bridges theory with practical applications. The solution manual offers detailed, step-by-step solutions for all chapters, including DC, AC, and advanced circuit problems. McGraw-Hill Connect is also available, offering digital resources to enhance learning. These updates ensure the text remains a leading resource for understanding electric circuits, with a focus on both foundational concepts and modern techniques.

Importance of the Solution Manual

The solution manual for Fundamentals of Electric Circuits, 7th Edition is an indispensable resource for students, providing detailed, step-by-step solutions to all chapter problems. It covers DC, AC, and advanced circuit analysis, ensuring comprehensive understanding. The manual includes solutions to practice problems, review questions, and homework exercises, helping students verify their work and improve problem-solving skills. With clear explanations and guided solutions, it bridges gaps in understanding complex circuits. Additionally, the manual supports the Design a Problem feature, enabling students to develop and solve their own scenarios. Available online and through platforms like Chegg, it offers convenient access to learning materials, making it a vital tool for mastering electric circuits.

Core Chapters and Topics Covered

The 7th edition covers essential topics from basic concepts and circuit laws to advanced techniques, including resistors, capacitors, inductors, and circuit theorems, ensuring a solid foundation.

Chapter 1: Basic Concepts

Chapter 1 introduces the foundational principles of electric circuits, including voltage, current, and resistance. It explores Ohm’s Law, energy, and power, providing a clear understanding of circuit elements and their interactions. The chapter also covers Kirchhoff’s Laws, emphasizing their importance in circuit analysis. Through detailed examples and practice problems, students gain a solid grasp of these essential concepts, which serve as the building blocks for more complex topics in later chapters. The 7th edition’s updated content ensures relevance, while the structured approach helps students transition smoothly into advanced circuit analysis. This chapter is crucial for establishing the theoretical framework necessary for tackling real-world circuit problems effectively.

Chapter 2: Basic Laws

Chapter 2 delves into the fundamental laws governing electric circuits, including Ohm’s Law, Kirchhoff’s Current Law (KCL), and Kirchhoff’s Voltage Law (KVL). These principles are crucial for understanding circuit behavior and analysis. Through practical examples and exercises, the chapter illustrates how these laws apply to various circuit configurations, reinforcing foundational concepts. The 7th edition provides comprehensive solutions and step-by-step explanations, enabling students to grasp these essential theories effectively. By mastering these laws, students can confidently approach more complex circuit problems in subsequent chapters, ensuring a solid understanding of electric circuits’ underlying principles.

Chapter 3: Methods of Analysis

Chapter 3 introduces essential methods for analyzing electric circuits, such as Nodal Analysis and Mesh Analysis. These techniques enable students to systematically solve complex circuits by applying fundamental laws and theorems. The chapter emphasizes the importance of setting up accurate equations and solving them to find unknown voltages and currents. With detailed step-by-step solutions, the 7th edition helps students master these analytical skills, which are critical for advancing in circuit theory. Practical exercises and examples further reinforce the application of these methods, ensuring a thorough understanding of circuit analysis principles. This chapter lays the groundwork for tackling more advanced topics in later sections of the textbook.

Chapter 4: Circuit Theorems

Chapter 4 delves into key circuit theorems that simplify the analysis of complex electric circuits. It covers Kirchhoff’s Voltage and Current Laws, Thevenin’s Theorem, Norton’s Theorem, and the Superposition Theorem. These theorems provide powerful tools for reducing circuits to equivalent forms, making calculations more manageable. The chapter also introduces the Maximum Power Transfer Theorem, which is crucial for understanding energy efficiency in circuits. Detailed solutions in the 7th edition’s manual guide students through applying these theorems to various problems, enhancing their problem-solving skills. Practical examples and exercises help reinforce the understanding of these foundational concepts, enabling students to tackle more advanced topics with confidence. The clear explanations and step-by-step solutions make this chapter an invaluable resource for mastering circuit analysis techniques.

Chapter 5: Operational Amplifiers

Chapter 5 focuses on operational amplifiers (op-amps), essential components in modern electronic circuits. It explores ideal op-amp models, characteristics, and practical circuit configurations. Topics include inverting and non-inverting amplifiers, voltage regulators, and integrator/differentiator circuits. The chapter also discusses real-world applications, such as signal processing and feedback systems. The solution manual provides detailed step-by-step solutions for op-amp problems, including design challenges and practical examples. Students learn to analyze and design op-amp circuits efficiently, ensuring a strong foundation in analog electronics. The clear explanations and exercises enable learners to master op-amp behavior, saturation, and compensation, preparing them for advanced circuit design tasks.

Chapter 6: Capacitors and Inductors

Chapter 6 delves into the fundamental concepts of capacitors and inductors, essential for understanding energy storage in electric circuits. It covers the physics of capacitors, including capacitance, dielectric materials, and types of capacitors. Inductors are explored in terms of inductance, magnetic flux, and their behavior in DC and AC circuits. The chapter also examines transient responses in circuits with capacitors and inductors. The solution manual provides detailed solutions for problems involving energy storage, charging/discharging processes, and resonance. Practical examples and exercises help students master the analysis of circuits with capacitors and inductors, ensuring a solid grasp of energy storage principles and their applications in modern electronics.

Chapter 7: First-Order Circuits

Chapter 7 focuses on the analysis of first-order circuits, which involve a single energy-storage element (capacitor or inductor) and a resistor. It explores the transient behavior of RC and RL circuits, including charging, discharging, and the time constant concept. The solution manual provides detailed solutions for problems involving circuit responses to step inputs, voltage division, and energy calculations. Practical examples, such as timing circuits and energy storage applications, are included to enhance understanding. The chapter also addresses methods for solving first-order differential equations governing these circuits. With clear explanations and step-by-step solutions, students can master the fundamentals of first-order circuit analysis and apply them to real-world engineering problems.

Advanced Topics and Techniques

The 7th edition introduces advanced techniques like the Design a Problem feature, enhancing design skills through interactive problem development. It includes over 100 integrated exercises for practical application.

Design a Problem Feature

The 7th edition introduces the Design a Problem feature, which enhances students’ design skills by requiring them to develop both the problem and its solution. This interactive approach encourages critical thinking and practical application of circuit analysis concepts. With over 100 such exercises integrated into the problem sets, students gain hands-on experience in creating and solving real-world circuit scenarios. This feature, retained from previous editions, has been expanded to cover a wider range of topics, including DC circuits, AC circuits, and advanced network analysis techniques. By engaging with these exercises, students can deepen their understanding of circuit theory and its applications. The feature is particularly useful for developing problem-solving abilities and preparing for complex engineering challenges.

DC Circuits Analysis

DC circuits analysis forms the foundation of electrical engineering, focusing on steady-state conditions where currents and voltages remain constant. The 7th edition provides a thorough exploration of DC circuit principles, including Ohm’s Law, Kirchhoff’s Laws, and Thevenin/Norton equivalencies. With numerous practice problems and detailed solutions, students master techniques for analyzing series, parallel, and series-parallel resistor networks. The text also covers more advanced topics like superposition and Maximum Power Transfer. Real-world examples and case studies illustrate practical applications, such as power distribution systems and electronic device circuits. The solution manual offers step-by-step guidance, enabling students to confidently solve complex DC circuit problems and build a strong understanding of fundamental concepts essential for advanced topics in circuit analysis.

AC Circuits Analysis

AC circuits analysis delves into alternating current systems, where voltages and currents vary sinusoidally over time. The 7th edition extensively covers AC circuit fundamentals, including phasors, impedance, and network theorems like Thevenin and Norton equivalents for AC. Students learn to analyze RLC circuits, resonance, and power concepts such as average and reactive power. The text provides detailed solutions for complex AC circuit problems, emphasizing practical applications in power distribution systems, filters, and communication networks. Real-world examples and case studies illustrate how AC circuits are used in electrical engineering, from household appliances to industrial power systems. The solution manual offers step-by-step guidance, helping students master AC circuit analysis and its essential role in modern electrical engineering.

Network Analysis Techniques

Network analysis techniques are essential for understanding complex electrical circuits. The 7th edition covers methods like nodal analysis, mesh analysis, and Thevenin/Norton equivalency to simplify circuit problems. These techniques enable engineers to analyze multi-loop circuits efficiently. The solution manual provides detailed step-by-step solutions for network analysis, emphasizing practical applications. Key topics include superposition, linearity, and duality, which are crucial for advanced circuit design. Real-world examples, such as power distribution systems, illustrate the importance of these methods. The text also integrates modern tools like McGraw-Hill Connect to enhance problem-solving skills. By mastering network analysis techniques, students gain a solid foundation for tackling intricate electrical engineering challenges, making this section indispensable for both academic and professional growth.

Resources and Support

The 7th edition offers extensive resources, including a solution manual with step-by-step answers. McGraw-Hill Connect provides interactive tools for enhanced learning and problem-solving support.

Availability of Solution Manual Online

The solution manual for Fundamentals of Electric Circuits, 7th Edition is widely available online, offering step-by-step solutions to problems. It covers DC, AC, and advanced circuits, ensuring comprehensive understanding. Immediate downloads are accessible, providing quick access to chapter solutions, practice problems, and review questions. Platforms like Chegg and McGraw-Hill Connect offer guided explanations, enhancing problem-solving skills. This resource is invaluable for students seeking clarity and mastering complex concepts efficiently.

Role of McGraw-Hill Connect

McGraw-Hill Connect plays a pivotal role in enhancing learning for Fundamentals of Electric Circuits, 7th Edition. This digital platform offers a range of resources, including homework assignments, interactive simulations, and personalized study plans. Students can engage with adaptive learning tools tailored to their needs, while instructors can track progress and provide feedback. Connect integrates seamlessly with the textbook, offering problem-solving exercises, video tutorials, and real-time assessments. Its interactive simulations help visualize complex circuit concepts, making learning more intuitive. By fostering active engagement and deeper understanding, McGraw-Hill Connect serves as a valuable companion for mastering electric circuits, ensuring students are well-prepared for both academic and practical challenges.

Additional Resources for Problem Solving

Beyond the textbook, students can access a wealth of supplementary materials to enhance their problem-solving skills. The solution manual for the 7th edition provides detailed, step-by-step explanations for over 2,481 practice problems, review questions, and homework exercises. Online platforms like Chegg offer guided solutions and interactive tools to help students grasp complex concepts. Additionally, downloadable PDF resources, such as the Fundamentals of Electric Circuits 7th Edition solutions manual, are widely available, offering immediate access to chapter-specific answers and design exercises. These resources are particularly useful for topics like DC circuits, AC circuits, and advanced network analysis, ensuring students can master even the most challenging problems with confidence and clarity.

Application and Design

The 7th edition emphasizes practical applications of circuit analysis through real-world examples and case studies, enabling students to apply theoretical concepts to design and problem-solving scenarios effectively.

Practical Applications of Circuit Analysis

The 7th edition of Fundamentals of Electric Circuits bridges theory and practice by showcasing real-world applications of circuit analysis in various engineering scenarios. Students learn to apply concepts like voltage division, circuit theorems, and network analysis to design and troubleshoot electrical systems. Practical examples, such as analyzing electric heaters and understanding circuit behavior in household appliances, illustrate how theoretical knowledge solves everyday engineering challenges.

The textbook also integrates problem-solving techniques for scenarios involving energy efficiency and cost analysis, preparing students for professional roles. By connecting abstract principles to tangible outcomes, the 7th edition equips learners with the skills to address real-world electrical engineering problems effectively.

Real-World Examples and Case Studies

The 7th edition of Fundamentals of Electric Circuits enhances learning through realistic examples and case studies, such as analyzing electric heaters and understanding circuit behavior in household appliances. These practical scenarios help students grasp how theoretical concepts apply to everyday engineering challenges. For instance, a problem involving a 1.8-kW electric heater demonstrates energy efficiency and cost analysis, enabling students to calculate operational expenses; Additional case studies explore complex circuits, such as those in electric stoves, providing hands-on insights into circuit design and troubleshooting. By integrating real-world applications, the textbook prepares students to tackle practical engineering problems with confidence and precision, bridging the gap between academic theory and professional practice.

Design Skills Development

The 7th edition emphasizes design skills through the Design a Problem feature, encouraging students to create and solve their own problems. This innovative approach fosters creativity and critical thinking, essential for engineering. With over 100 exercises, students learn to define problems, develop solutions, and present their work. The feature integrates with problem sets, making design thinking a core part of the learning process. By engaging with real-world scenarios, such as optimizing circuit performance, students gain practical experience in circuit design and analysis, preparing them for future challenges in electrical engineering. This hands-on development of design skills ensures students are well-equipped to tackle complex projects with confidence.

The 7th edition of Fundamentals of Electric Circuits offers a comprehensive and updated resource for learning circuit analysis. With its emphasis on practical applications and problem-solving, it equips students for future challenges in electrical engineering, ensuring a strong foundation for advanced studies and real-world applications.

The 7th edition of Fundamentals of Electric Circuits covers essential topics such as basic laws, circuit theorems, and methods of analysis. It emphasizes practical applications and design skills, preparing students for real-world engineering challenges. The text includes 2,481 practice problems and 121 Design a Problem exercises, fostering critical thinking and problem-solving abilities. Key concepts range from DC and AC circuits to advanced network analysis techniques. The solution manual provides step-by-step solutions, reinforcing understanding of circuit theory and its applications. This edition integrates modern tools and resources, such as McGraw-Hill Connect, to enhance learning. By mastering these concepts, students gain a solid foundation in electrical engineering, enabling them to tackle complex problems with confidence.

Future Directions in Electric Circuits

The field of electric circuits is evolving rapidly, with advancements in renewable energy systems, smart grids, and nanotechnology. Emerging technologies like energy harvesting devices and power electronics are reshaping circuit design. The 7th edition of Fundamentals of Electric Circuits prepares students to tackle these future challenges by emphasizing foundational principles and practical problem-solving. As engineering demands grow, the ability to analyze and design complex circuits will become crucial. The text’s focus on design skills and real-world applications equips students to adapt to upcoming innovations. By mastering these concepts, learners will be well-prepared to contribute to the next generation of electrical systems and technologies, ensuring a strong foundation for their future careers in engineering.

Bylysanne

heat and glo manuals

Heat & Glo manuals provide essential guidance for installation‚ operation‚ and maintenance of their fireplaces‚ ensuring safety‚ efficiency‚ and longevity. They offer detailed troubleshooting and eco-friendly practices.

1.1 Overview of Heat & Glo Products

Heat & Glo offers a wide range of innovative gas fireplaces‚ inserts‚ and stoves designed for efficiency and aesthetic appeal. Their product lineup includes models like the SL Series‚ TRB Series‚ and Vienna-II‚ each offering unique features such as advanced heat technology and eco-friendly designs. These products are engineered to provide reliable performance‚ safety‚ and energy efficiency while enhancing home comfort. Heat & Glo is committed to sustainable manufacturing‚ ensuring their fireplaces meet high environmental standards. Whether for traditional or modern settings‚ their appliances deliver warmth and style‚ making them a popular choice for homeowners seeking quality and durability.

1.2 Importance of Reading Manuals

Reading Heat & Glo manuals is crucial for safe and efficient operation of their fireplaces. Manuals provide detailed installation instructions‚ safety precautions‚ and maintenance guidelines. They also offer troubleshooting tips and error code solutions‚ helping users resolve issues quickly. Understanding the manual ensures compliance with warranty terms and prevents potential hazards. It empowers users to maximize product performance‚ extend lifespan‚ and enjoy a hassle-free experience; Proper usage‚ as outlined in the manual‚ is essential for both functionality and safety‚ making it a must-read for all Heat & Glo product owners.

1.3 Where to Find Heat & Glo Manuals

Heat & Glo manuals are readily available on the official Heat & Glo website‚ where users can search by model number or product name. The Owner Support Center also provides direct access to manuals‚ FAQs‚ and troubleshooting guides. Additionally‚ authorized dealers and retailers often have copies available. For convenience‚ manuals can be downloaded in PDF format‚ ensuring easy access for installation‚ maintenance‚ and operation. Always refer to the official sources to ensure you have the most accurate and up-to-date information for your specific model.

Key Sections of Heat & Glo Manuals

Heat & Glo manuals feature sections on safety precautions‚ installation instructions‚ operating guidelines‚ and maintenance requirements to ensure optimal performance and longevity of the product.

2.1 Safety Precautions

Heat & Glo manuals emphasize critical safety precautions to ensure safe operation. Users must read and understand all instructions before installation or use. Key warnings include avoiding water exposure‚ proper venting‚ and adhering to manufacturer guidelines. Additionally‚ the manuals highlight potential hazards such as fire risks if instructions are not followed. Proper clearance from flammable materials and regular inspections are also stressed. Compliance with local safety standards is mandatory. Failure to follow these precautions may void the warranty or pose serious safety risks. Always prioritize safety to enjoy a trouble-free experience with your Heat & Glo fireplace.

2.2 Installation Instructions

Heat & Glo manuals provide detailed installation instructions to ensure safe and proper setup. Users must comply with local building codes and regulations. The manuals outline steps for venting‚ gas line connections‚ and electrical requirements. Proper clearance from combustible materials is emphasized to prevent fire hazards. Installers are advised to follow precise guidelines to avoid warranty voidance; The manual must be left with the owner for future reference. Failure to adhere to instructions may result in unsafe operation. Always ensure installations are performed by qualified professionals to maintain safety and efficiency.

2.3 Operating Guidelines

Heat & Glo manuals offer clear operating guidelines to ensure safe and efficient use. They include instructions for startup‚ temperature control‚ and proper fuel utilization. Safety features like automatic shut-off and venting checks are highlighted. Users are advised to follow remote control and wall switch operation procedures carefully. Regular maintenance reminders are provided to maintain performance. The manuals emphasize avoiding overuse of remote controls and ensuring proper ventilation. Always consult the manual for specific model instructions and adhere to manufacturer recommendations for optimal performance and safety standards. Proper operation ensures longevity and reliable service from your Heat & Glo fireplace.

2.4 Maintenance Requirements

Regular maintenance is crucial for optimal performance and safety of Heat & Glo fireplaces. Manuals emphasize the importance of annual inspections‚ cleaning soot buildup‚ and checking venting systems. Users should inspect for damage‚ ensure proper gas line connections‚ and replace worn-out parts promptly. Cleaning glass surfaces and ensuring airflow vents are unobstructed is recommended. Following the manual’s maintenance schedule helps prevent issues like ignition problems or reduced heat output. Always use approved replacement parts and adhere to manufacturer guidelines to maintain warranty validity and ensure safe‚ efficient operation of your Heat & Glo fireplace.

Troubleshooting Common Issues

Heat & Glo manuals offer solutions for common issues like ignition problems‚ heat output fluctuations‚ and error codes‚ ensuring quick fixes and safe operation of your fireplace.

3.1 Ignition Problems

Ignition issues in Heat & Glo fireplaces can stem from weak battery connections‚ faulty switches‚ or blocked pilot openings. Manuals recommend checking the pilot light‚ ensuring proper gas flow‚ and verifying battery strength. If issues persist‚ consulting error codes or contacting customer support is advised. Regular maintenance‚ like cleaning the pilot assembly‚ can prevent such problems. Always refer to the specific model’s manual for detailed troubleshooting steps to ensure safe and effective resolution.

3.2 Heat Output Issues

Heat output issues in Heat & Glo fireplaces may arise from improper venting‚ gas line restrictions‚ or faulty components. Manuals suggest checking venting systems for blockages and ensuring proper gas flow. Adjusting the airflow or cleaning the burner may resolve low heat output. If issues persist‚ inspecting the heat exchanger or igniter for damage is recommended. Always follow the manufacturer’s guidelines for diagnostics and repairs. Consulting the specific model’s manual ensures accurate troubleshooting and maintaining optimal performance.

3.3 Error Codes and Solutions

Heat & Glo manuals detail error codes to help diagnose and resolve issues. Common codes like “GHI” or “GLO” indicate specific problems‚ such as ignition failures or sensor malfunctions. Solutions often involve resetting the system‚ cleaning sensors‚ or checking gas connections. For accurate troubleshooting‚ consult the manual specific to your model‚ as error codes may vary. Always follow the recommended steps to ensure safety and proper functionality. Regular maintenance can prevent recurring issues‚ and addressing error codes promptly helps maintain optimal performance and warranty validity.

3.4 Noise and Vibration

Noise and vibration in Heat & Glo fireplaces can occur due to metal expansion and contraction during heating and cooling cycles. This is normal and does not affect performance. However‚ unusual noises may indicate issues like loose components or improper installation. Troubleshooting steps include checking for debris‚ ensuring proper venting‚ and verifying that all parts are securely fastened. If noises persist‚ consult the manual or contact customer support for assistance. Addressing vibrations promptly ensures optimal operation and longevity of the appliance. Regular maintenance‚ as outlined in the manual‚ can help minimize such issues and maintain a smooth functioning fireplace.

Installation and Setup

Proper installation ensures safety and efficiency. Follow manual guidelines for venting‚ gas line connections‚ and final inspections. Ensure all components are correctly aligned and tested before use.

4.1 Pre-Installation Checklist

Ensure the selected model matches your space and needs. Verify local building codes and regulations. Prepare the installation site‚ ensuring a clean and safe environment. Check for proper ventilation options and clearances. Inspect all components and parts for damage or defects. Confirm gas line compatibility and electrical connections. Review the manual for specific requirements. Ensure proper tools and materials are available. Consult a professional if unsure about any step. Follow all safety guidelines to avoid hazards. A thorough pre-installation checklist ensures a smooth and safe setup process for your Heat & Glo fireplace.

4.2 Venting Requirements

Proper venting is crucial for safe and efficient operation of Heat & Glo fireplaces. Ensure combustion air is drawn from outside and exhaust gases are expelled correctly. Use approved venting materials and configurations as specified in the manual. Follow local building codes and manufacturer guidelines for termination and clearance requirements. Ensure all vents are undamaged and properly sealed. Direct vent models require precise installation to maintain indoor air quality. Incorrect venting can lead to safety hazards or reduced performance. Always consult a qualified installer for complex setups. Adhere to these requirements to ensure optimal function and compliance with safety standards.

4.3 Connecting Gas Lines

To connect gas lines for your Heat & Glo fireplace‚ begin by locating the gas shut-off valve‚ typically found near the fireplace or along the gas line. Turn the valve off using an appropriate wrench to prevent gas flow. Next‚ connect the gas line to the fireplace‚ ensuring proper threading and fitting. Apply Teflon tape if necessary for a secure seal. After connecting‚ test for leaks using a soap solution to detect any bubbles‚ which indicate leaks. Ensure the gas line size and type match the specifications in the manual. Purge the line by following the manual’s instructions to clear air or debris. Finally‚ turn the gas on and test the fireplace operation. If issues arise‚ recheck connections for accuracy and safety.

4.4 Final Inspection and Testing

After completing the installation‚ perform a thorough inspection of all connections and components to ensure they are secure and undamaged. Check for any gas leaks using a soap solution‚ observing for bubbles. Turn on the gas supply gradually and test the ignition system to confirm it lights properly. Verify that the flame appears consistent and burns cleanly. Review the manual for specific testing procedures to ensure compliance with manufacturer guidelines. Finally‚ operate the fireplace under normal conditions to assess performance and make any necessary adjustments. This step ensures safety and optimal functionality before regular use begins.

Maintenance and Care

Regular maintenance ensures optimal performance and longevity of your Heat & Glo fireplace. Clean surfaces‚ inspect for damage‚ replace worn parts‚ and schedule annual servicing for reliability.

5.1 Cleaning the Fireplace

Regular cleaning is crucial for maintaining your Heat & Glo fireplace’s efficiency and safety. Turn off the fireplace and allow it to cool completely before cleaning. Use a soft cloth or brush to remove dust and soot from surfaces. Avoid harsh chemicals‚ as they may damage finishes. Clean glass doors with a glass-specific cleaner‚ and inspect for scratches or cracks. For gas fireplaces‚ gently vacuum debris from logs and burner areas. Refer to your manual for specific cleaning instructions tailored to your model. Regular cleaning prevents dust buildup and ensures optimal performance‚ while also maintaining the aesthetic appeal of your fireplace.

5.2 Inspecting for Damage

Inspect your Heat & Glo fireplace regularly for damage to ensure safe and efficient operation. Check the exterior for rust or dents and the interior for soot buildup. Examine vents and chimneys for blockages and damage. Look for wear on logs‚ burners‚ or glass panels. Inspect the gas lines for leaks or damage. If any damage is found‚ discontinue use and contact a professional. Regular inspections help prevent hazards and maintain performance. Always refer to your Heat & Glo manual for specific inspection guidelines tailored to your model.

5.3 Replacing Parts

Replacing parts on your Heat & Glo fireplace requires careful attention to ensure safety and functionality. Always consult your specific model’s manual for guidance‚ as parts and procedures vary. Use only genuine Heat & Glo replacement parts to maintain warranty validity and performance. Common parts to replace include logs‚ burners‚ glass panels‚ and ignition components. Before starting‚ turn off the gas supply and ensure the unit is cool; If unsure‚ contact a certified technician or Heat & Glo customer service. Keep track of your fireplace’s maintenance history for future reference.

5.4 Annual Maintenance Schedule

Regular annual maintenance is crucial to ensure your Heat & Glo fireplace operates safely and efficiently. Schedule a professional inspection to check venting systems‚ burners‚ and ignition components. Clean glass surfaces and ensure proper airflow. Inspect logs and embers for wear and replace if necessary. Check gas line connections for leaks and verify proper function of safety features. Keep records of maintenance for warranty purposes. Address any issues promptly to prevent potential hazards. A well-maintained fireplace enhances performance‚ safety‚ and longevity‚ while also adhering to manufacturer guidelines and eco-friendly practices.

Heat & Glo Models and Their Manuals

Heat & Glo offers manuals for various models‚ including SL Series‚ TRB Series‚ and Vienna-II Series‚ ensuring users can access specific guidance for their fireplace.

6.1 SL Series Manuals

The SL Series manuals provide detailed instructions for models like SL-3X-IFT‚ SL-5X-IFT‚ and SL-7X-IFT‚ covering installation‚ operation‚ and maintenance. They include safety precautions‚ troubleshooting tips‚ and eco-friendly practices. These manuals ensure users understand their fireplaces’ features‚ such as advanced heat technology and remote control options. Specific guidelines for venting‚ gas line connections‚ and annual maintenance are highlighted. Additionally‚ they offer solutions for common issues like ignition problems and heat output adjustments. The SL Series manuals are available online‚ allowing easy access for model-specific information and optimal performance.

6.2 TRB Series Manuals

The TRB Series manuals are tailored for models like the 6000TRB‚ offering comprehensive guidance on installation‚ operation‚ and troubleshooting. They emphasize safety‚ detailing venting requirements and gas line connections. Maintenance schedules and error code solutions are included. These manuals ensure optimal performance and longevity‚ addressing specific features of TRB models. They also cover noise reduction tips and eco-friendly practices. Users can download these manuals online‚ ensuring easy access to model-specific information and enhancing their fireplace experience with Heat & Glo’s reliable support.

6.3 Vienna-II Series Manuals

The Vienna-II Series manuals provide detailed instructions for Heat & Glo’s premium gas fireplaces‚ focusing on installation‚ operation‚ and maintenance. They cover model-specific features‚ troubleshooting‚ and safety guidelines‚ ensuring optimal performance. These manuals highlight eco-friendly practices and responsible manufacturing‚ aligning with Heat & Glo’s sustainability efforts. Users can access these manuals online‚ offering easy guidance for model-specific needs. They also include warranty details and customer support information‚ ensuring a seamless experience for Vienna-II Series owners. By following these manuals‚ users can maximize efficiency and enjoy their fireplaces safely and effectively.

6.4 Other Model-Specific Manuals

Heat & Glo offers detailed manuals for various models beyond the SL and Vienna-II series‚ ensuring comprehensive guidance for each product. These manuals provide tailored instructions for installation‚ operation‚ and maintenance specific to each fireplace model. They include troubleshooting tips‚ safety precautions‚ and warranty details‚ ensuring users can address issues promptly. Manuals are easily accessible online‚ allowing owners to download and reference them anytime. By following these model-specific guides‚ users can optimize their fireplace’s performance and lifespan while adhering to safety and environmental standards. This ensures a seamless and enjoyable experience with Heat & Glo fireplaces.

Warranty and Support

Heat & Glo provides comprehensive warranty coverage and dedicated customer support‚ ensuring assistance with installations‚ repairs‚ and troubleshooting. Manuals detail warranty terms and contact information for help.

7.1 Limited Warranty Details

Heat & Glo offers a limited warranty covering defects in materials and workmanship for their gas fireplace products. The warranty period varies by component‚ typically ranging from one to five years. Coverage applies to parts and labor under normal use and service‚ as outlined in the owner’s manual. Registration is often required to activate the warranty. Conditions include proper installation‚ adherence to safety guidelines‚ and compliance with local regulations. Damage from misuse‚ negligence‚ or unauthorized modifications is excluded. Refer to the manual for specific terms and conditions to ensure warranty validity and understand coverage limitations.

7.2 Registering Your Product

Registering your Heat & Glo product is a straightforward process that ensures warranty activation and access to exclusive support services. Visit the Heat & Glo website and navigate to the product registration section. Provide required details‚ including model number‚ serial number‚ purchase date‚ and personal contact information. This step is crucial for validating your warranty and receiving timely assistance. Registration also allows Heat & Glo to notify you of updates‚ recalls‚ or safety notices. Ensure all information is accurate to avoid delays in service or warranty claims. This process is typically completed online and takes only a few minutes.

7.3 Contacting Customer Service

Heat & Glo provides multiple avenues for customer support. Visit their official website and navigate to the “Contact Us” section for assistance. You can reach their support team via phone at 1 (888) 427-3973 during business hours: Monday through Wednesday‚ 8:30 a.m. to 3:00 p.m. (CST). Additionally‚ use the online support center to submit inquiries‚ access FAQs‚ or initiate live chat. For detailed issues‚ include your product model and serial number. The website also offers downloadable resources and troubleshooting guides. Ensure to verify contact information from authorized Heat & Glo sources to avoid outdated details.

7.4 FAQs and Common Questions

Heat & Glo manuals address frequently asked questions to ensure optimal product use. Common inquiries include troubleshooting ignition issues‚ understanding error codes‚ and maintenance tips. Users often ask about noise during operation‚ which is typically normal due to metal expansion. The manuals also cover warranty details‚ installation requirements‚ and safety precautions. For specific concerns‚ the Heat & Glo support center offers a dedicated FAQ section. Visit their official website to explore model-specific guides‚ troubleshooting steps‚ and operational advice. Referencing your product’s manual or support resources ensures accurate and tailored solutions for your fireplace needs.

Environmental and Safety Compliance

Heat & Glo prioritizes eco-friendly practices and safety certifications‚ ensuring their products meet high environmental standards and promote sustainable manufacturing. Their commitment to responsible eco-stewardship is evident in their energy-efficient designs and adherence to safety guidelines‚ making their fireplaces both environmentally conscious and safe for use.

8.1 Eco-Friendly Practices

Heat & Glo is committed to eco-friendly practices‚ incorporating sustainable manufacturing processes and energy-efficient designs. Their products are crafted to minimize environmental impact while maintaining high performance. By using advanced technologies‚ they reduce energy consumption and emissions‚ aligning with global environmental standards. Heat & Glo’s dedication to eco-stewardship ensures their fireplaces are both environmentally responsible and visually appealing‚ promoting a greener future for homeowners. Their innovative approaches reflect a deep commitment to preserving natural resources and reducing carbon footprints‚ making them a leader in eco-conscious hearth solutions.

8.2 Safety Certifications

Heat & Glo products are designed to meet rigorous safety certifications‚ ensuring compliance with industry standards for gas fireplaces. Their fireplaces adhere to certifications from recognized bodies like ANSI and UL‚ guaranteeing safe operation. These certifications verify proper venting‚ combustion‚ and heat output‚ minimizing potential hazards. Regular inspections and adherence to manual guidelines help maintain these safety standards. Heat & Glo’s commitment to safety certifications provides homeowners with peace of mind‚ knowing their appliances are reliable and secure for long-term use.

8.3 Responsible Manufacturing

Heat & Glo prioritizes responsible manufacturing‚ ensuring eco-friendly practices and sustainable solutions. Their commitment to environmental stewardship is reflected in energy-efficient designs and eco-conscious materials. By adhering to strict industry standards‚ Heat & Glo minimizes its environmental footprint while producing high-quality‚ reliable hearth products. This dedication to sustainability not only benefits the environment but also aligns with global efforts to reduce waste and promote greener manufacturing processes. Heat & Glo’s responsible approach ensures that their fireplaces are both environmentally respectful and durable‚ meeting the demands of modern homeowners seeking eco-friendly solutions.

8.4 Sustainability Initiatives

Heat & Glo actively promotes sustainability through innovative manufacturing practices and eco-conscious product design. Their initiatives include using recyclable materials‚ reducing energy consumption‚ and implementing environmentally friendly production methods. By partnering with organizations dedicated to environmental conservation‚ Heat & Glo demonstrates a commitment to preserving natural resources. Additionally‚ their products are designed to maximize energy efficiency‚ reducing emissions and environmental impact. These sustainability efforts align with global goals to combat climate change and promote greener living solutions‚ making Heat & Glo a leader in eco-friendly hearth technology.

Heat & Glo manuals provide comprehensive guidance for safe‚ efficient‚ and eco-friendly fireplace operation. Adhering to these guidelines ensures optimal performance and environmental protection.

9.1 Summary of Key Points

Heat & Glo manuals are crucial for safe and efficient fireplace operation. They cover installation‚ maintenance‚ and troubleshooting‚ ensuring optimal performance and longevity. Key points include adherence to safety precautions‚ proper venting‚ and regular maintenance schedules. Models like SL Series‚ TRB Series‚ and Vienna-II have specific guidelines. Eco-friendly practices and sustainability initiatives are highlighted‚ along with warranty details and customer support resources. Users are encouraged to follow manual instructions carefully to avoid hazards and maintain product integrity. These manuals are essential for both installers and owners‚ providing comprehensive guidance for all aspects of fireplace usage and care.

9.2 Final Tips for Users

Always keep your Heat & Glo manual handy for quick reference. Regularly inspect and maintain your fireplace to ensure optimal performance. Use battery backup for reliable ignition during power outages. Familiarize yourself with model-specific features and troubleshooting tips. Schedule annual maintenance to uphold safety and efficiency. For complex issues‚ consult certified professionals. Utilize Heat & Glo’s customer support for guidance and parts. By following these tips‚ you’ll maximize your fireplace’s lifespan and enjoy a safe‚ cozy experience year-round.

9.3 Importance of Adhering to Manual Guidelines

Adhering to Heat & Glo manual guidelines ensures safety‚ optimal performance‚ and longevity of your fireplace. Proper installation and maintenance prevent fire hazards and warranty voidance. Following instructions guarantees efficient operation and eco-friendly performance. Ignoring guidelines risks malfunction‚ safety issues‚ and environmental harm. Always consult the manual for troubleshooting and maintenance. For complex problems‚ contact certified professionals or Heat & Glo customer support. Compliance with manual recommendations safeguards your investment and ensures a safe‚ enjoyable experience. Prioritize manual guidelines to maintain your fireplace’s reliability and sustainability.

Bylysanne

honeywell th4210u2002 install manual

This manual provides a comprehensive guide for installing the Honeywell TH4210U2002 T4 Pro Programmable Thermostat, ensuring proper setup and functionality for optimal performance․

1․1 Overview of the T4 Pro Programmable Thermostat

The Honeywell TH4210U2002 T4 Pro Programmable Thermostat is a versatile and user-friendly device designed to regulate heating and cooling systems efficiently․ It features intuitive programming options, including wake, leave, return, and sleep settings, allowing users to customize their comfort preferences․ With advanced setup options (ISU) and compatibility with various HVAC systems, the T4 Pro ensures precise temperature control․ Its sleek design and optional cover plate enhance installation flexibility, making it suitable for both new and retrofit applications․ This thermostat is built to provide reliable performance, energy savings, and seamless integration with existing home systems․

1․2 Importance of Proper Installation

Proper installation of the Honeywell TH4210U2002 T4 Pro Programmable Thermostat is crucial for ensuring optimal performance, safety, and energy efficiency․ Incorrect wiring or mounting can lead to system malfunctions, increased energy consumption, and potential damage to the thermostat or HVAC system․ Following the installation manual carefully guarantees correct setup, preventing issues like low battery warnings, wiring errors, or compatibility problems․ Proper installation also ensures that advanced features, such as programmable scheduling and remote access, function as intended, providing users with reliable temperature control and energy savings․ Always refer to the manual for specific guidance to avoid complications․

Package Contents and Accessories

The Honeywell TH4210U2002 package includes the T4 Pro thermostat, UWP mounting system, optional cover plate, junction box adapter, batteries, and installation hardware for proper setup and functionality․

2․1 Thermostat Unit and UWP Mounting System

The Honeywell TH4210U2002 package includes the T4 Pro programmable thermostat unit and the UWP (Universal Wall Plate) mounting system․ The thermostat unit features a sleek, user-friendly interface designed for intuitive temperature control․ The UWP mounting system provides a versatile and secure way to install the thermostat, eliminating the need for a traditional junction box in many cases․ This system is pre-drilled for easy alignment and ensures a level installation․ The UWP is compatible with various wall types and configurations, making it adaptable to different home setups․ Proper installation of both components ensures a seamless and efficient heating and cooling system operation․

2․2 Optional Cover Plate and Junction Box Adapter

The Honeywell TH4210U2002 package includes an optional cover plate and a junction box adapter for specific installation scenarios․ The cover plate is recommended when mounting the thermostat directly to an electrical junction box, ensuring a clean and professional appearance․ The junction box adapter provides additional support and compatibility for installations requiring a standard junction box setup․ These components are designed to enhance the installation process, offering flexibility and ensuring a secure fit for various wall configurations․ They are essential for maintaining the thermostat’s functionality and aesthetic appeal in different home environments․

2․3 Batteries and Installation Hardware

The Honeywell TH4210U2002 thermostat requires fresh AA alkaline batteries for operation, which should be installed immediately when the low battery icon appears․ The package includes necessary installation hardware, such as screws and wall anchors, to secure the thermostat and its components․ Ensure all hardware is used correctly to maintain proper functionality and safety․ Batteries power the thermostat’s controls and programming features, while the hardware ensures a stable and level installation on the wall․ Proper installation of both components is essential for optimal performance and system reliability․

Pre-Installation Preparation

Pre-installation preparation involves turning off power at the breaker box, separating the junction box adapter, and understanding the UWP mounting system for a safe and proper setup․

3․1 Turning Off Power at the Breaker Box

Before starting the installation, ensure the power to the heating and cooling system is turned off at the breaker box or circuit breaker․ Locate the correct breaker associated with the HVAC system and switch it to the “off” position․ Verify that the system is completely powered down to avoid any accidental start-ups․ This step is crucial for safety and prevents potential electrical hazards during the installation process․ Always double-check that the power is off using a voltage tester if necessary․ Properly securing the power supply ensures a safe working environment for installing the Honeywell TH4210U2002 thermostat․

  1. Locate the breaker box and identify the HVAC system breaker․
  2. Switch the breaker to the “off” position․
  3. Confirm the system is powered down before proceeding․

3․2 Separating the Junction Box Adapter

After turning off the power, carefully separate the Junction Box Adapter from the Cover Plate․ This step ensures proper installation and prevents damage to the system․ Gently pull the adapter away from the plate while ensuring all wires remain secure․ If the adapter is stubborn, do not force it, as this could cause damage․ Once separated, set the Cover Plate aside if not needed for your installation․ This step is essential for a safe and proper setup of the Honeywell TH4210U2002 thermostat․ Always handle electrical components with care to avoid accidental power activation․

  1. Gently pull the Junction Box Adapter away from the Cover Plate․
  2. Ensure wires remain securely connected during separation․
  3. Set the Cover Plate aside if not required for your installation․

3․3 Understanding the UWP Mounting System

The UWP Mounting System is designed for secure and precise installation of the Honeywell TH4210U2002 thermostat․ It includes a mounting bracket and hardware to ensure proper alignment and leveling․ The system allows for easy adjustment and holds the thermostat firmly in place․ Before drilling holes, position the UWP on the wall, level it, and mark the hole locations․ This ensures a professional-grade installation․ Always follow the manufacturer’s guidelines for optimal results and to avoid any installation issues․ Proper use of the UWP system guarantees a stable and efficient thermostat setup for your home․

  • Position the UWP on the wall and level it carefully․
  • Mark the hole locations based on the UWP’s alignment․
  • Drill holes and secure the UWP according to the manufacturer’s instructions․

Installation Instructions

The Honeywell TH4210U2002 installation involves turning off power, mounting with the UWP system, wiring, and final alignment․ Follow the manual’s step-by-step guide for proper setup․

  • Turn off power at the breaker box․
  • Mount the thermostat using the UWP system․
  • Connect the wiring as per instructions․
  • Align and secure the thermostat properly․

4․1 Optional Cover Plate Installation

The optional cover plate is used when mounting the thermostat to an electrical junction box, ensuring a sleek and professional appearance․ Begin by separating the cover plate from the UWP system․ Align the cover plate with the junction box, ensuring proper fitment․ Secure it using the provided screws․ If the cover plate is not needed, proceed directly to the UWP mounting system installation․ This step ensures a clean installation, especially in scenarios where the thermostat is replacing an existing one․ Always follow the manufacturer’s guidelines for a secure and level fit․

  • Align the cover plate with the junction box․
  • Secure it using the provided screws․
  • Ensure proper fitment for a clean look․

4․2 Mounting the Thermostat Using the UWP System

Mounting the Honeywell TH4210U2002 using the UWP system ensures a secure and level installation․ Begin by positioning the UWP on the wall, ensuring it is level․ Mark the hole positions as indicated by the UWP․ Drill holes at the marked locations and insert the supplied wall anchors․ Secure the UWP by tightening the screws firmly․ Push any excess wire back into the wall opening․ Close the UWP door, ensuring it lies flat without bulging․ This step is crucial for a clean and professional installation, providing a stable base for the thermostat․

  • Position the UWP on the wall and ensure it is level․
  • Mark hole positions and drill accordingly․
  • Secure the UWP with provided screws and wall anchors․
  • Close the UWP door to complete the mounting process․

4․3 Wiring the Thermostat

Wiring the Honeywell TH4210U2002 thermostat requires careful connection of the system wires to the appropriate terminals․ Refer to the terminal designations provided in the UWP wiring guide․ Match the wires from your HVAC system to the correct terminals on the thermostat, ensuring compatibility with your specific setup․ Use the wiring diagram in the manual to verify connections․ Secure all wires properly inside the wall and avoid any loose connections․ Double-check the wiring before restoring power to the system to ensure safe and proper operation․ Proper wiring is essential for accurate temperature control and system functionality․

4․4 Final Mounting and Alignment

After wiring, ensure the thermostat is properly mounted and aligned․ Level the UWP system on the wall and mark the hole positions․ Drill holes at the marked spots and secure the UWP using the provided hardware․ Align the thermostat with the UWP, ensuring it sits evenly and is centered․ Gently push the thermostat onto the UWP until it clicks into place․ Verify that the UWP door closes without bulging and the thermostat is flush against the wall․ Double-check the alignment to ensure proper fit and functionality․ This step is crucial for both aesthetics and accurate temperature sensing․

4․5 Drilling Holes and Securing the UWP

Position the UWP on the wall, ensuring it is level․ Mark the hole positions lightly with a pencil․ Drill pilot holes at the marked locations using the recommended drill bit size․ Insert the provided wall anchors into the holes to ensure secure mounting․ Align the UWP with the drilled holes and gently tap it into place until it is flush with the wall․ Secure the UWP using the screws provided in the installation hardware․ Tighten the screws firmly but avoid overtightening, which could damage the UWP or the wall․ Double-check the alignment to ensure proper fit and functionality․

Configuring the Thermostat

This section guides you through setting up basic system operation, advanced options, and programming features like wake, leave, return, and sleep schedules for optimal comfort․

5․1 Basic System Operation Settings

Begin by setting the date and time to ensure accurate scheduling․ Adjust the display brightness for optimal visibility․ Enable reminders for filter maintenance and system checks․ Configure the auto-changeover feature to automatically switch between heating and cooling based on temperature․ These settings streamline daily operation and maintain efficiency․ Ensure all configurations align with your home’s specific needs for consistent comfort and energy savings․

5․2 Advanced Setup Options (ISU)

The Installer Setup (ISU) menu offers advanced customization for system compatibility and performance․ Access ISU by pressing and holding the Menu and buttons simultaneously for 5 seconds․ Key settings include compressor cycle rate, heat pump configuration, and system type selection․ These options ensure proper functionality with various HVAC systems․ Use ISU to fine-tune parameters like temperature differential, stage settings, and fan operation․ Proper configuration prevents issues like short cycling and ensures efficient heating and cooling․ Refer to the detailed ISU parameter list starting on page 9 for precise adjustments tailored to your system requirements․

5․3 Programming Icons and Schedules

The Honeywell TH4210U2002 features intuitive programming icons for wake, leave, return, and sleep schedules․ These icons simplify setting temperature preferences for different times of day․ Use the menu to customize schedules, ensuring energy efficiency and comfort․ The thermostat allows up to 7-day programming, with options for fixed or flexible schedules․ Icons guide users through setup, while the interface displays active periods․ Once programmed, the thermostat automatically adjusts temperatures, optimizing energy use․ This feature ensures consistent comfort while reducing energy consumption, making it easy to manage heating and cooling preferences throughout the day and week․

Troubleshooting Common Issues

Address common issues like low battery indicators, system compatibility problems, and wiring errors․ Resetting the thermostat or checking connections often resolves operational difficulties․ Ensure proper setup․

6․1 Low Battery Indications and Solutions

The Honeywell TH4210U2002 thermostat displays a low battery icon when power is insufficient․ Replace batteries promptly with fresh AA alkaline batteries to maintain functionality․ Ensure correct polarity during installation to avoid issues․ If the thermostat shuts down due to low batteries, it may require a manual restart․ Regularly check battery levels to prevent unexpected interruptions․ For optimal performance, avoid using rechargeable or damaged batteries․ Refer to the user guide for detailed steps on replacing batteries and resolving related issues effectively․

6․2 System Compatibility and Wiring Issues

Ensure the Honeywell TH4210U2002 thermostat is compatible with your HVAC system to avoid operational issues․ Verify wiring connections match the terminal designations in the manual․ Incorrect wiring can cause malfunctions or damage․ If the thermostat fails to power on, check for loose connections or damaged wires․ Refer to the UWP wiring terminal designations for proper installation․ Consult the troubleshooting FAQs or contact Honeywell support for unresolved compatibility or wiring problems․ Regularly inspect and maintain wiring to ensure reliable performance and prevent system disruptions․

6․3 Resetting the Thermostat

Resetting the Honeywell TH4210U2002 thermostat can resolve various operational issues․ To reset, press and hold the Menu and Back buttons simultaneously for 5 seconds․ This will restore factory default settings, erasing all custom configurations․ After resetting, power cycle the thermostat by removing the batteries or disconnecting power for 30 seconds․ Reinstall batteries or restore power and reconfigure the settings․ If issues persist, refer to the troubleshooting FAQs or contact Honeywell support for further assistance․ Regular resets can help maintain optimal performance and address unexpected behavior․

Maintenance and Upkeep

Regular maintenance ensures optimal performance․ Replace batteries when the low battery icon appears, clean the thermostat regularly, and verify system functionality to prevent operational issues․

7․1 Replacing Batteries

Monitor battery levels and replace them when the low battery icon appears․ Ensure the system is powered off before starting․ Open the thermostat’s battery compartment, remove the old batteries, and insert fresh AA alkaline batteries, ensuring correct polarity․ Close the compartment securely․ If issues persist, check battery alignment and connections․ Regular battery replacement maintains thermostat functionality and prevents system downtime․ Always use high-quality batteries for reliable performance․ Proper disposal of old batteries is recommended․ This simple maintenance step ensures continuous operation of your Honeywell TH4210U2002 T4 Pro Programmable Thermostat․

7․2 Cleaning the Thermostat

Regular cleaning ensures optimal performance and extends the lifespan of your Honeywell TH4210U2002 T4 Pro Programmable Thermostat․ Power off the system at the breaker box before cleaning․ Use a soft, dry cloth to wipe the thermostat’s exterior, removing dust and debris․ For stubborn stains, lightly dampen the cloth with water, but avoid harsh chemicals or excessive moisture․ Gently clean the display and buttons, ensuring no liquids seep inside․ Allow the thermostat to dry completely before restoring power․ Regular cleaning prevents dust buildup and maintains precise temperature control and functionality․

7․3 Ensuring Proper System Functionality

To ensure proper system functionality, regularly verify that all settings and connections are correct․ Check for loose wires, ensure batteries are fresh, and confirm the thermostat is properly mounted․ Periodically review programmed schedules to align with your lifestyle and preferences․ Maintain the thermostat’s cleanliness to prevent dust interference․ If issues arise, consult the troubleshooting section or reset the thermostat as needed․ Proper upkeep ensures consistent heating and cooling performance, optimizing energy efficiency and comfort․ Regular checks help prevent malfunctions, keeping your system running smoothly year-round․

Technical Specifications

The Honeywell TH4210U2002 T4 Pro Programmable Thermostat features advanced compatibility, multiple power options, and precise dimensions for seamless installation․ It meets all necessary industry certifications for reliability and safety․

8․1 Power Options and Compatibility

The Honeywell TH4210U2002 T4 Pro Programmable Thermostat supports both battery-powered and hardwired installations․ It requires 2 fresh AA alkaline batteries for battery-only operation․ The thermostat is compatible with a wide range of HVAC systems, including single-stage, multi-stage, and heat pump configurations․ It operates on 24V AC power and is designed to work with most standard heating and cooling systems․ The device also features a low battery indicator to ensure uninterrupted performance․ Its universal design ensures compatibility with various system types, making it a versatile choice for different home setups․ Proper power configuration is essential for optimal functionality․

8․2 Dimensions and Weight

The Honeywell TH4210U2002 T4 Pro Programmable Thermostat measures approximately 4․5 inches in height and 3 inches in width, ensuring a sleek and compact design․ Its lightweight construction makes it easy to install without requiring additional support․ The thermostat is designed to fit standard junction boxes and can be mounted flush against the wall for a seamless appearance; Its dimensions and weight are optimized for universal compatibility, allowing it to blend seamlessly with most home interiors․ This compact design ensures ease of installation and minimizes visual impact while maintaining functionality․ The thermostat’s overall size supports efficient heating and cooling control․

8․3 Compliance and Certifications

The Honeywell TH4210U2002 T4 Pro Programmable Thermostat is designed to meet rigorous industry standards, ensuring safety, reliability, and environmental compliance․ It holds UL and ETL certifications, confirming its adherence to safety regulations․ The thermostat also complies with FCC Part 15 standards for electromagnetic compatibility and is Energy Star certified, highlighting its energy efficiency․ These certifications ensure the product meets or exceeds regulatory requirements for safe operation and environmental sustainability․ With these credentials, the Honeywell TH4210U2002 is a reliable choice for homeowners seeking a compliant and eco-friendly solution for temperature control․ Its adherence to global standards ensures durability and performance․

Manufacturer Support and Resources

Honeywell provides comprehensive support resources, including online manuals, customer service contact options, and troubleshooting FAQs to assist with installation and operation of the TH4210U2002 thermostat․

9․1 Accessing Online Manuals and Guides

Access Honeywell’s official website to view or download the TH4210U2002 installation manual and user guide․ The manual is available in PDF format, totaling 60 pages, and provides detailed step-by-step instructions for installation, configuration, and troubleshooting․ Additional resources include technical specifications, wiring diagrams, and advanced setup options․ Users can also find FAQs and troubleshooting guides to address common issues․ For convenience, the manual can be downloaded directly from Honeywell’s support page, ensuring easy access to all necessary information for optimal thermostat performance and functionality․

9․2 Contacting Honeywell Customer Support

For assistance with the Honeywell TH4210U2002 thermostat, contact Honeywell’s customer support team via phone, email, or online chat․ Support is available 24/7 to address installation, troubleshooting, or technical inquiries․ Visit Honeywell’s official website for contact details and regional support numbers․ When reaching out, have your thermostat model number (TH4210U2002) ready to expedite service․ Honeywell also offers FAQs and troubleshooting guides on their website to help resolve common issues quickly․ Their dedicated support ensures prompt assistance for optimal thermostat performance and functionality․

9․3 Troubleshooting FAQs

The Honeywell TH4210U2002 installation manual includes a section dedicated to frequently asked questions and common issues․ Topics covered include low battery warnings, system compatibility checks, and wiring problems․ Users can find solutions for display malfunctions, temperature inaccuracies, and connectivity issues․ The manual also provides steps to reset the thermostat to factory settings․ Additional troubleshooting tips are available online, ensuring users can resolve most issues independently․ For complex problems, contacting Honeywell customer support is recommended․ This resource helps users maintain optimal thermostat performance and address any challenges efficiently․

Bylysanne

ontario bill of sale pdf

A Bill of Sale in Ontario is a legal document proving vehicle ownership transfer between buyer and seller. It is essential for private sales, ensuring clarity and legal protection for both parties, while also aiding in vehicle registration and tax purposes.

1.1 What is a Bill of Sale?

A Bill of Sale is a legal document that records the transfer of ownership of a vehicle or other asset from a seller to a buyer. It provides detailed information about the transaction, including the vehicle’s description, purchase price, and parties involved. This document serves as proof of ownership and ensures a smooth transfer process, protecting both buyer and seller legally. It is commonly used for private sales in Ontario.

1.2 Importance of a Bill of Sale in Ontario

A Bill of Sale is crucial in Ontario as it serves as legal proof of ownership transfer, protecting both buyers and sellers. It provides clarity in private transactions, ensuring all details are documented. This document is essential for vehicle registration, tax purposes, and resolving disputes. It safeguards both parties by establishing a clear record of the sale, making it a vital component of a legally binding transaction.

1.3 When is a Bill of Sale Required?

A Bill of Sale is required during private vehicle sales in Ontario, particularly for used cars. It is necessary to prove ownership transfer and is mandatory for vehicle registration. The document must be signed by both buyer and seller, detailing the vehicle’s VIN, make, year, model, and purchase price. It serves as legal proof of sale and is essential for tax calculations and dispute resolution, ensuring a smooth transaction process.

2.Legal Requirements for a Bill of Sale in Ontario

Legal Requirements for a Bill of Sale in Ontario

A valid Bill of Sale in Ontario requires signatures from both buyer and seller, detailed vehicle information, and optional notarization for enhanced authenticity and legal security.

2.1 Mandatory Information to Include

The Bill of Sale must include the Vehicle Identification Number (VIN), make, year, and model of the vehicle, along with the purchase price and payment method. Buyer and seller details, such as names and addresses, are also required. Additionally, the document should outline the vehicle’s condition and any warranties or disclaimers, ensuring clarity and transparency for both parties involved in the transaction.

2.2 Signature Requirements

Both the buyer and seller must sign and date the Bill of Sale to validate the transaction. Witnesses are recommended but not mandatory. Signatures confirm mutual agreement to the terms, ensuring legal protection. Notarization adds authenticity but is not required unless specified by law or preferred by the parties involved for extra security.

2.3 Notarization and Commissioning

While not mandatory in Ontario, notarizing or commissioning a Bill of Sale enhances its legal credibility. A notary public can validate identities and ensure both parties willingly agree. Commissioning involves an authorized official witnessing the signing, adding a layer of authenticity. This step is particularly beneficial for preventing disputes and ensuring the document’s enforceability in legal matters.

3.How to Create a Bill of Sale in Ontario

How to Create a Bill of Sale in Ontario

Creating a Bill of Sale in Ontario involves using a template or professional service, ensuring all required details are included for a smooth, legally secure transaction.

3.1 DIY Methods for Creating a Bill of Sale

To create a Bill of Sale in Ontario, use a downloadable template from reliable sources like legal document websites. Include VIN, make, model, year, purchase price, buyer and seller details, and signatures. Optional witness sections add authenticity. Ensure clarity and accuracy, and keep a copy for records. Use clear sections for information to avoid missing details, ensuring a professional and legally sound document.

3.2 Using Professional Templates

Professional templates simplify creating a Bill of Sale in Ontario. Platforms like NotaryPro offer customizable templates, ensuring compliance with legal requirements. These templates include sections for VIN, vehicle details, payment methods, and signatures. They reduce errors and save time, providing a polished document. Legal professionals review these templates, ensuring they meet Ontario’s standards for ownership transfer and registration.

3.3 Role of a Notary Public

A Notary Public enhances the legitimacy of a Bill of Sale by witnessing signatures and verifying identities. While not mandatory, their involvement adds legal security and reduces dispute risks. NotaryPro offers online commissioning, allowing quick and convenient document authentication. This service ensures compliance with Ontario’s legal standards, providing both parties with peace of mind and protecting their interests in the transaction.

4.Information to Include in the Bill of Sale

Information to Include in the Bill of Sale

The document must include the Vehicle Identification Number (VIN), make, year, model, purchase price, payment method, buyer and seller details, and signatures for legal validation.

4.1 Vehicle Identification Number (VIN)

The Vehicle Identification Number (VIN) is a unique 17-character code assigned to each vehicle, containing information about its make, model, and production details. It is essential to include the VIN in the Bill of Sale to verify the vehicle’s identity and prevent fraud. The VIN can typically be found on the driver’s side dashboard, doorjamb, or on the vehicle’s registration and title documents. Including the VIN ensures the correct vehicle is being transferred and helps in registration and insurance processes.

4.2 Make, Year, and Model

Including the vehicle’s make, year, and model in the Bill of Sale is crucial for accurate identification. This information helps prevent discrepancies and ensures the correct vehicle is described in the document. The make, year, and model can be found on the vehicle’s registration or manufacturer’s specifications. Clearly stating these details aids in verifying the vehicle’s identity and is essential for legal and administrative purposes, such as registration and insurance.

4.3 Purchase Price and Payment Method

The Bill of Sale must clearly state the purchase price and payment method. This includes whether the payment was made in full, part of a trade-in, or through financing. Documenting the payment method ensures transparency and prevents disputes. It also serves as proof of payment for both parties. This information is essential for tax calculations and registration purposes, providing a clear financial record of the transaction.

4.4 Buyer and Seller Details

The Bill of Sale must include detailed information about both the buyer and seller, such as full names, addresses, and contact details. This ensures clarity and accountability for both parties. Accurate identification helps prevent disputes and provides a legal record of the transaction. Including these details is crucial for establishing ownership transfer and protecting both buyer and seller rights. It also aids in verifying identities for legal purposes.

5.The Role of Car Insurance in the Process

The Role of Car Insurance in the Process

Car insurance is essential for legal compliance and protection during vehicle ownership transfer in Ontario. It ensures both buyer and seller are protected against all potential financial liabilities.

5.1 Insuring the Vehicle After Purchase

Insuring the vehicle after purchase is crucial for legal compliance and financial protection. Buyers must obtain insurance before registering the vehicle, with coverage types varying based on needs. Existing policies can sometimes be transferred, or new ones purchased. The Bill of Sale serves as proof of ownership, necessary for insurance companies to finalize coverage, ensuring both parties are protected against potential liabilities and losses post-sale.

5.2 Transferring Insurance Coverage

Transferring insurance coverage ensures uninterrupted protection for the vehicle. Buyers may transfer existing policies or obtain new ones, requiring the Bill of Sale as proof of ownership. Sellers must cancel their coverage post-sale. Both parties should notify their insurers promptly to avoid gaps or overlaps, ensuring the new owner is fully covered and the seller’s policy is terminated accurately, preventing unnecessary costs or liabilities.

5.3 Liability and Insurance Implications

A Bill of Sale impacts liability and insurance by providing legal proof of ownership transfer. It protects both buyer and seller from disputes over vehicle use post-sale. Insurance coverage must be updated to reflect new ownership, ensuring the buyer is liable for incidents occurring after the sale. The document helps clarify responsibilities, preventing potential legal or financial issues related to uninsured incidents or ownership disputes.

6.Using an Ontario Bill of Sale Template

Using an Ontario Bill of Sale Template

An Ontario Bill of Sale template streamlines document creation, ensuring all necessary details are included. It provides structure, saving time and reducing errors. Professional templates are available online.

6.1 Benefits of Using a Template

Using an Ontario Bill of Sale template offers numerous advantages. It streamlines document creation, saving time and reducing errors. Templates ensure all necessary details are included, adhering to legal standards. They provide a clear structure, making the process easier for both buyers and sellers. Additionally, professional templates enhance credibility and offer customization options to suit specific needs, ensuring a smooth and legally secure transaction.

6.2 Where to Find Reliable Templates

Reliable Ontario Bill of Sale templates can be sourced from legal websites, notary platforms, and professional service providers. NotaryPro offers customizable templates designed for Ontario vehicle sales, ensuring compliance with local laws. Government websites and legal document services also provide verified templates, reducing the risk of errors. Always choose reputable sources to guarantee the template’s validity and effectiveness in legal transactions.

6.3 Customizing the Template

Customizing an Ontario Bill of Sale template involves inserting specific details such as the VIN, make, year, model, purchase price, and payment method. Ensure all fields are filled accurately to reflect the transaction. Include an “as-is” clause for legal protection. Attach photographs of the vehicle for verification. Specify the governing law and include signatures of both parties and witnesses if required. This ensures the document aligns with the transaction’s specifics and complies with Ontario’s legal standards.

7.Bill of Sale vs. Vehicle Ownership

Bill of Sale vs. Vehicle Ownership

A Bill of Sale documents the transfer of ownership, serving as proof of purchase, while vehicle ownership refers to legal title. Both are crucial for registration and verifying ownership rights in Ontario;

7.1 Differences Between the Two Documents

A Bill of Sale is a document created during a transaction, detailing the transfer of ownership from seller to buyer. Vehicle ownership, however, refers to the legal title granted by the province. The Bill of Sale serves as proof of purchase, while ownership is confirmed by government-issued documents like the vehicle permit. Both are essential but distinct, with the Bill of Sale facilitating the transfer and ownership representing legal title.

7.2 When to Use Each Document

The Bill of Sale is used during private vehicle transactions to document the transfer of ownership from seller to buyer. Vehicle ownership, confirmed by a government-issued permit, is required for registration and legal title. Use the Bill of Sale immediately after the sale to prove the transfer, and rely on ownership documents for official registration and legal recognition of title. Both are essential at different stages of the process.

7.3 Legal Implications of Each

The Bill of Sale holds legal significance as proof of ownership transfer, protecting both buyer and seller in disputes. Without it, either party may face legal challenges regarding ownership or payment. The ownership document, issued by the government, is legally required for vehicle registration and confirms the buyer’s title. Both documents are crucial for ensuring legal validity and avoiding potential disputes or penalties in Ontario.

8.The Registration Process After Sale

The Registration Process After Sale

Registering a vehicle in Ontario after a sale requires completing the process within six days, providing necessary documents like the Bill of Sale, insurance, and proof of ownership at ServiceOntario.

8.1 Steps to Register a Vehicle in Ontario

To register a vehicle in Ontario after a sale, gather required documents like the Bill of Sale, proof of insurance, and vehicle ownership. Visit a ServiceOntario center, complete the registration application, and pay the applicable fees and taxes. Ensure the vehicle meets safety standards and obtain a new permit. This process must be completed within six days of the sale to avoid penalties and ensure compliance with provincial regulations.

8.2 Required Documents for Registration

To register a vehicle in Ontario, you need a completed Bill of Sale, proof of vehicle ownership, valid insurance, and a safety standards certificate if required. Ensure the Bill of Sale includes the VIN, vehicle details, and signatures of both parties. Additional documents like photo ID for both buyer and seller may be requested. Submit all paperwork to ServiceOntario to complete the registration process successfully.

8.3 Fees and Taxes Associated with Registration

Registering a vehicle in Ontario involves fees and taxes. The buyer typically pays sales tax on the purchase price when registering. Registration fees vary based on the vehicle type and location. Additional costs may include a permit fee and potential administrative charges. Ensure all fees are paid to complete the registration process successfully and obtain the vehicle permit.

9.Tax Implications of a Bill of Sale

Tax Implications of a Bill of Sale

A Bill of Sale has tax implications, especially for buyers, as it determines the basis for sales tax on the vehicle’s purchase price. It clarifies tax responsibilities and ensures legal compliance for both parties involved in the transaction.

9.1 Sales Tax on Used Vehicles

Sales tax on used vehicles in Ontario is based on the purchase price outlined in the Bill of Sale. The buyer is responsible for paying this tax when registering the vehicle. The Bill of Sale serves as proof of the purchase price, ensuring accurate tax calculation. It is essential for both buyer and seller to retain a copy for their records, as it may be required for tax-related matters.

  • The tax is calculated on the vehicle’s purchase price.
  • Buyers must pay this tax during vehicle registration.
  • The Bill of Sale is required to verify the purchase price.

9.2 Tax Responsibilities for Buyer and Seller

The buyer is responsible for paying sales tax on the vehicle’s purchase price, as outlined in the Bill of Sale. The seller must report the sale to authorities if required. Both parties should retain copies of the Bill of Sale for tax purposes. The document serves as proof of the transaction, ensuring transparency and compliance with tax regulations. Understanding these responsibilities is crucial for avoiding legal or financial issues.

  • Buyers pay sales tax on the purchase price.
  • Sellers may need to report the sale.
  • Both parties should keep copies for tax records.

9.4 Filing Taxes After the Sale

Filing taxes after a vehicle sale in Ontario involves the buyer paying sales tax on the purchase price, typically handled during registration. The seller may need to report the sale for tax purposes. Both parties should retain copies of the Bill of Sale for tax records. This document serves as proof of the transaction, aiding in accurate tax filings and compliance with legal requirements.

  • Buyers must pay sales tax on the vehicle’s price.
  • Sellers may need to report the sale to tax authorities.
  • Keep copies of the Bill of Sale for tax documentation.

10.Best Practices for Completing a Bill of Sale

Ensure all details are accurate and complete, including VIN, payment terms, and signatures. Consider notarization for added authenticity and retain copies for both parties’ records.

10.1 Keeping Copies of the Document

Maintaining copies of the Bill of Sale is crucial for both buyers and sellers. Each party should retain a copy for their records, ensuring proof of ownership and payment. Store physical and digital backups securely to prevent loss. This practice helps resolve disputes and serves as a reliable reference for future transactions, providing peace of mind for both parties involved in the sale.

10.2 Ensuring Clarity and Accuracy

Accuracy and clarity are vital in a Bill of Sale to avoid misunderstandings. All details, such as VIN, vehicle description, and payment terms, must be precise and unambiguous. Both parties should review the document thoroughly before signing. Ensuring that the information is clear and correct protects both the buyer and seller, preventing potential disputes and ensuring a smooth transaction process.

10.3 Attaching Photographs for Verification

Attaching photographs to the Bill of Sale adds an extra layer of verification, providing visual proof of the vehicle’s condition at the time of sale. While not mandatory, this practice helps prevent disputes by documenting the vehicle’s state, including any existing damage or unique features. It serves as additional evidence, ensuring both parties have a clear record of the transaction and reducing the risk of future disagreements.

11.Common Mistakes to Avoid

Common mistakes include omitting key information, failing to have witnesses, and ignoring legal requirements. Ensuring accuracy and completeness is crucial to avoid disputes and legal issues later.

11.1 Omitting Key Information

Omitting essential details like the Vehicle Identification Number (VIN), make, model, year, purchase price, or buyer/seller information can lead to legal disputes. Always double-check that all required sections are filled out accurately. Missing information can render the document invalid or cause registration issues. Ensure clarity and completeness to avoid future complications and protect both parties’ interests effectively.

11.2 Not Having Witnesses

Not having witnesses can reduce the credibility of a Bill of Sale and make it harder to resolve disputes. While not legally required in Ontario, having witnesses can provide additional security and validation of the transaction. Their signatures can serve as independent confirmation of the agreement, offering peace of mind for both buyer and seller. This step is optional but highly recommended for added protection.

11.3 Ignoring Legal Requirements

Ignoring legal requirements when creating a Bill of Sale can lead to disputes or render the document void. Essential details like VIN, payment terms, and signatures must be included to ensure validity. Failing to comply with Ontario’s legal standards can result in financial or legal issues for both parties. Always consult a legal professional to ensure the document meets all necessary requirements and is enforceable in court if needed.

12.Conclusion

A Bill of Sale is a crucial document for vehicle transactions in Ontario, offering legal protection and clarity for both buyers and sellers. Ensure accuracy and completeness to avoid future disputes and facilitate a smooth ownership transfer.

12.1 Final Thoughts on the Importance of a Bill of Sale

A Bill of Sale is an essential document for any vehicle transaction in Ontario, providing legal protection and clarity for both buyers and sellers. It serves as proof of ownership transfer, ensuring a smooth process for registration and tax purposes. Completing it accurately helps avoid disputes and ensures all parties are protected. Treat it as a critical step in finalizing a vehicle sale responsibly.

12.2 Encouragement to Use Legal Documents Responsibly

Using legal documents like the Ontario Bill of Sale responsibly ensures secure and transparent transactions. It protects both buyers and sellers by providing clear proof of ownership and agreed terms. Prioritize accuracy and completeness when filling out these documents to avoid disputes and ensure legal compliance. Seek professional assistance if needed, as proper documentation safeguards your rights and obligations, fostering trust and accountability in every transaction.

Bylysanne

roller guide for boat trailer

Roller guides are essential components of boat trailer systems, designed to assist in aligning and stabilizing boats during loading and unloading. These guides typically include keel rollers and wobble rollers, which help center the boat and reduce friction, ensuring smooth operation and protecting both the boat and trailer from damage. Their durability and ease of use make them a crucial accessory for boat owners seeking efficient and safe trailer performance.

1.1 What Are Roller Guides?

Roller guides are mechanical components designed to assist in aligning and stabilizing boats during the loading and unloading process on a trailer. They typically consist of durable rollers mounted on a frame, which allow the boat to slide smoothly into position. These guides are often adjustable and come in various types, such as keel rollers and wobble rollers, to accommodate different boat sizes and trailer configurations, ensuring efficient and secure alignment every time.

1.2 Importance of Roller Guides in Boat Trailer Systems

Roller guides play a critical role in ensuring safer and more efficient boat handling during loading and unloading. By providing alignment support, they reduce friction and prevent damage to both the boat and trailer. This enhances overall safety, minimizes wear and tear, and makes the process easier for boat owners. Their presence is essential for maintaining proper boat positioning and ensuring a smooth, hassle-free experience for boaters of all skill levels.

Types of Roller Guides

Roller guides come in various types, including keel rollers for centering boats, wobble rollers for flexibility, and adjustable guides for customizable support. Each type enhances trailer functionality.

2.1 Keel Rollers

Keel rollers are specialized components designed to center and stabilize boats during loading and unloading. They are typically mounted along the trailer’s centerline and feature a smooth, rounded surface that cradles the boat’s keel. This design ensures proper alignment, reducing the risk of damage to both the boat and trailer. Keel rollers are especially useful for larger boats, providing consistent support and easing the docking process. Their durability and low maintenance make them a popular choice among boat owners.

2.2 Wobble Rollers

Wobble rollers are versatile and adjustable, allowing for lateral movement of the boat during loading and unloading. Their unique design enables smooth, side-to-side motion, reducing friction and preventing damage to the boat and trailer. Typically mounted on the trailer’s sides, they provide excellent support on uneven surfaces, ensuring safe and efficient trailer performance. Wobble rollers are ideal for various boat sizes and types, offering flexibility and reliability for boat owners.

2.3 Adjustable Roller Guides

Adjustable roller guides offer customization to fit various boat sizes and trailer setups. These guides can be positioned vertically or horizontally, ensuring proper alignment and support. Their adaptability makes them suitable for different boat hull shapes and trailer configurations. By allowing precise adjustments, they enhance loading efficiency and reduce wear on both the boat and trailer, providing a tailored solution for boat owners seeking optimal performance and durability.

Key Features of Roller Guides

Roller guides are built with durable materials, ensuring long-lasting performance. They reduce friction, enabling smooth boat movement during loading and unloading. Customization options allow tailored solutions for specific needs.

3.1 Material and Durability

High-quality roller guides are typically constructed from durable materials like galvanized steel or polyurethane, ensuring resistance to corrosion and wear. These materials withstand harsh marine environments, providing long-lasting performance. The robust design of roller guides ensures they can handle the weight and movement of boats, minimizing damage to both the trailer and the vessel. Regular maintenance further enhances their durability, making them a reliable choice for boat owners.

3.2 Smooth Operation and Friction Reduction

Roller guides are designed to minimize friction, ensuring smooth and effortless movement of the boat during loading and unloading. High-quality rollers, often made from materials like polyurethane, glide effortlessly, reducing resistance. This not only protects the boat’s hull from abrasion but also makes the process safer and more controlled. The smooth operation provided by roller guides enhances overall efficiency, making trailer use more convenient and stress-free for boat owners.

3.4 Customization Options

Roller guides offer versatile customization options to suit various boat and trailer setups. Adjustable roller guides allow for height and angle modifications, ensuring proper alignment with the boat’s hull. Wobble rollers can be repositioned to accommodate different boat widths, while interchangeable roller types provide flexibility. Customization ensures a tailored fit, enhancing efficiency and protection for the boat during loading and unloading, making roller guides adaptable to specific boating needs.

Benefits of Using Roller Guides

Roller guides enhance boat trailer efficiency by improving alignment, reducing wear and tear, and ensuring safer loading and unloading processes. They minimize damage risks and simplify the overall boating experience, making them a valuable investment for boat owners.

4.1 Improved Boat Alignment

Roller guides significantly enhance boat alignment during loading and unloading by providing a smooth, guided path for the vessel. This reduces friction and stress on the boat’s hull, ensuring it centers properly on the trailer. The rollers allow the boat to move evenly, minimizing the risk of misalignment and potential damage. This feature is especially beneficial for novice boaters, as it simplifies the docking process and ensures a secure fit every time.

4.2 Reduced Wear and Tear

Roller guides minimize friction and evenly distribute the boat’s weight, reducing wear and tear on both the vessel and trailer. By preventing direct contact between the boat’s hull and the trailer, they protect against scratches and abrasions. The smooth operation of rollers also reduces strain on the trailer’s frame, prolonging its lifespan. This ensures a safer and more durable setup for frequent use, making maintenance easier and extending the overall service life of the equipment.

4.3 Enhanced Safety During Loading and Unloading

Roller guides significantly enhance safety by providing stability and proper alignment during loading and unloading. They prevent the boat from shifting excessively, reducing the risk of accidents. The smooth, guided movement minimizes the likelihood of damage to the boat or trailer. This added control ensures a safer experience, especially in challenging conditions like slippery ramps or uneven surfaces, making the entire process more secure and confidence-inspiring for boat owners of all experience levels.

Choosing the Right Roller Guide

Selecting the appropriate roller guide involves considering factors like boat size, trailer type, and material durability. Ensure compatibility and choose options that offer smooth operation and long-lasting performance, optimizing both safety and efficiency for your boating needs. Proper fitment is crucial to prevent damage and ensure reliable functionality during loading and unloading, making it essential to evaluate all aspects before making a decision. Always opt for high-quality materials to ensure durability and reliability over time, providing peace of mind and enhancing your overall boating experience. By focusing on these elements, you can find a roller guide that meets your specific requirements and enhances your trailer’s performance, ensuring years of trouble-free use and improving the safety of your boat handling routines.

5.1 Factors to Consider

When selecting roller guides, consider the boat’s size, weight, and hull type to ensure proper fit and functionality. The trailer’s capacity and existing hardware must also align with the roller guide system. Material durability is crucial, as it affects performance in various water conditions. Additionally, assess the ease of installation and maintenance requirements. Budget constraints and brand reputation should also influence your decision, ensuring a balance between quality and affordability. Prioritize systems that enhance boat alignment and reduce friction, offering smooth operation during loading and unloading. By evaluating these factors, you can choose a roller guide that optimizes safety, efficiency, and longevity for your boating needs.

5.2 Compatibility with Boat and Trailer Size

Ensuring roller guides match your boat’s size and trailer dimensions is critical for proper functionality. Measure your boat’s hull and trailer frame to select appropriately sized rollers. Incorrect sizing can lead to poor alignment, reduced efficiency, or even damage. Always check manufacturer specifications to confirm compatibility. A well-fitted system ensures smooth operation, prevents abrasion, and enhances overall safety during loading and unloading. Proper sizing is key to maximizing the benefits of roller guides for your boating needs.

5.3 Budget and Value for Money

When selecting roller guides, consider your budget to ensure value for money. Prices vary based on materials, durability, and features. High-quality models may be more expensive but offer long-term benefits like reduced maintenance and extended lifespan. Assess your needs to balance cost and performance. Affordable options are available without compromising essential functionality, making it important to compare brands and reviews to find the best fit for your investment.

Installation and Maintenance Tips

Proper installation ensures alignment and stability. Regular lubrication of rollers prevents corrosion and friction, while inspections guarantee functionality. Follow manufacturer guidelines for longevity and smooth operation.

6.1 Step-by-Step Installation Guide

Begin by assembling tools and hardware. Attach the roller guides to the trailer frame using bolts, ensuring proper alignment with the boat’s keel. Tighten securely but avoid over-tightening. Adjust the rollers to fit the boat’s hull, allowing smooth movement. Test by loading and unloading the boat to ensure alignment and functionality. Regularly inspect and lubricate moving parts for optimal performance and durability.

6.2 Regular Maintenance for Optimal Performance

Regular maintenance ensures roller guides function effectively. Lubricate moving parts to prevent rust and wear. Inspect rollers for damage or excessive wear. Clean debris and saltwater residue after each use to maintain smooth operation. Tighten bolts periodically to secure the guides firmly. Replace worn-out components promptly to prevent misalignment issues. Proper upkeep extends the lifespan of both the roller guides and the trailer, ensuring safe and efficient boat handling.

6.3 Troubleshooting Common Issues

Identify and address common problems with roller guides to ensure proper function. If rollers stick, clean and lubricate them. For misalignment, adjust the guides or replace worn parts. Inspect for loose bolts and tighten as needed. If the boat sits unevenly, check roller positions and reposition them for better balance. Addressing issues promptly prevents further damage and ensures smooth boat handling during loading and unloading.

Common Mistakes to Avoid

Avoid common errors like incorrect roller alignment, overloading the trailer, and neglecting maintenance. Proper setup and regular checks are essential to prevent damage and ensure safety.

7.1 Incorrect Alignment

Incorrect alignment of roller guides can lead to improper boat positioning, causing damage to the hull or trailer. Misaligned rollers may result in uneven stress, making loading and unloading difficult. Ensure guides are adjusted to match the boat’s keel and sides for smooth, centered movement. Regularly check and adjust alignment to maintain optimal performance and prevent potential damage during transport.

7.2 Overloading the Trailer

Overloading the trailer exceeds its weight capacity, stressing the roller guides and potentially causing damage or malfunction. This can lead to uneven distribution of weight, putting additional strain on the boat and trailer. Always adhere to the manufacturer’s weight limits to ensure safe and efficient operation. Exceeding these limits risks accelerated wear on components and compromises safety during transport.

7.3 Neglecting Maintenance

Neglecting maintenance can lead to premature wear on roller guides, causing misalignment and increased friction. Dirt and debris buildup can seize rollers, while lack of lubrication may result in corrosion. Regular cleaning, lubrication, and inspection are crucial to ensure smooth operation and longevity. Ignoring maintenance can lead to costly repairs and safety hazards, emphasizing the importance of proactive care for optimal performance.

Comparison with Other Trailer Guides

Roller guides offer superior alignment and friction reduction compared to carpeted or solid bunks, enhancing boat protection and ease of use during loading and unloading processes.

8.1 Roller Guides vs. Carpeted Bunks

Roller guides and carpeted bunks are both popular for boat trailers, but they serve different purposes. Roller guides use smooth, rotating surfaces to reduce friction and facilitate easy loading and unloading, while carpeted bunks provide a non-abrasive surface for hull protection. Unlike carpeted bunks, which can wear out and require frequent replacement, roller guides are more durable and require less maintenance. They also allow for better boat alignment and are less likely to cause scratches or damage to the boat’s hull. Additionally, roller guides are easier to clean and maintain, as they don’t absorb water or debris like carpeted bunks can. However, carpeted bunks may offer better grip in certain conditions, though they lack the smooth, rolling action of roller guides. Overall, roller guides are preferred for their durability, low maintenance, and enhanced functionality, making them a more practical choice for frequent boat users.

8.2 Roller Guides vs. Solid Bunks

Roller guides and solid bunks differ significantly in functionality. Roller guides feature rotating elements that reduce friction, making boat loading and unloading smoother. Solid bunks, however, provide a stationary, often carpeted surface. While solid bunks offer hull protection, they can cause friction and wear on the boat. Roller guides promote better alignment and are more durable, requiring less maintenance than solid bunks, which may need frequent carpet replacement. They also minimize the risk of scratches and abrasions, enhancing overall trailer performance and boat safety. Roller guides are generally preferred for their efficiency and longevity, making them a superior choice for boat owners seeking hassle-free trailer operations. Their design ensures easier maneuvering and reduced strain on both the boat and trailer, contributing to a more enjoyable boating experience. Additionally, roller guides are easier to clean and maintain, as they don’t trap debris like solid bunks can, further highlighting their practicality. Overall, roller guides offer a more advanced and user-friendly solution compared to traditional solid bunks.

8.3 Roller Guides vs. Hydraulic Systems

Roller guides and hydraulic systems serve distinct purposes in boat trailer setups. Roller guides are mechanical, using rollers to assist in boat alignment and reduce friction during loading and unloading. Hydraulic systems, on the other hand, automate the process, often adjusting the trailer’s position to cradle the boat. While hydraulic systems offer advanced automation and ease of use, they are more complex and costly to install and maintain. Roller guides provide a simpler, more affordable solution with less mechanical complexity, making them a preferred choice for many boat owners. Hydraulic systems, however, may offer superior precision and convenience for those willing to invest in the technology. Both options aim to enhance trailer functionality but cater to different needs and budgets.

Reviews and Recommendations

Top-rated roller guide brands like CE Smith and Attwood are praised for durability and ease of use. Users highlight improved alignment and reduced wear on boats and trailers.

9.1 Top-Rated Roller Guide Brands

Leading brands like CE Smith and Attwood are highly recommended for their durable roller guides. These brands offer superior quality, ensuring smooth boat alignment and reduced wear. Users praise their reliability and ease of installation. Additionally, Yakima and Rhino-Rack provide innovative solutions tailored for various boat sizes. Their products are known for longevity and performance, making them top choices among boat enthusiasts and professionals alike.

9.2 User Feedback and Experiences

Boat owners frequently highlight the benefits of roller guides, emphasizing improved alignment and reduced wear. Many users report easier loading and unloading, while others appreciate the durability and low maintenance. Some mention that adjustable roller guides offer versatility for different boat sizes. Overall, positive feedback underscores the practicality and effectiveness of roller guides in enhancing trailer performance and user safety during boat handling.

9.3 Expert Opinions

Marine experts and mechanics often endorse roller guides for their ability to reduce friction and simplify boat alignment. Many highlight their durability and low-maintenance design, making them a practical choice for long-term use. Additionally, experts praise the customization options available, allowing users to tailor roller guides to specific boat and trailer setups. Top brands like CE Smith are frequently recommended for their reliability and performance, ensuring both safety and efficiency in boat handling.

Roller guides have become an essential component for boat trailers, enhancing safety, ease of use, and overall trailer performance. Their popularity continues to grow.

10.1 Final Thoughts on Roller Guides

Roller guides are indispensable for boat trailers, offering enhanced alignment, reduced wear, and improved safety. Their durable construction ensures long-term performance, while adjustable options provide flexibility; These guides simplify loading and unloading, making them a worthwhile investment for boat owners seeking reliability and convenience.

10.2 Future Trends in Boat Trailer Technology

Future trends in boat trailer technology focus on innovation and sustainability. Advanced materials like lightweight alloys and corrosion-resistant coatings will enhance durability. Smart systems, integrating IoT for real-time monitoring, are expected to emerge. Eco-friendly designs, such as solar-powered components, may gain traction. Automation, like self-aligning trailers, could improve user experience. These advancements aim to make boat trailers more efficient, environmentally friendly, and user-friendly, catering to the evolving needs of boat enthusiasts and professionals alike.