Christmas crochet patterns offer a creative way to craft festive decorations, gifts, and ornaments. With free PDFs available, you can easily start making handmade holiday items for loved ones.
From intricate ornaments to cozy blankets, these patterns bring joy and warmth to your holiday celebrations. Perfect for beginners and experienced crocheters alike, they make the season merrier.
1.1 The Popularity of Crochet During Christmas
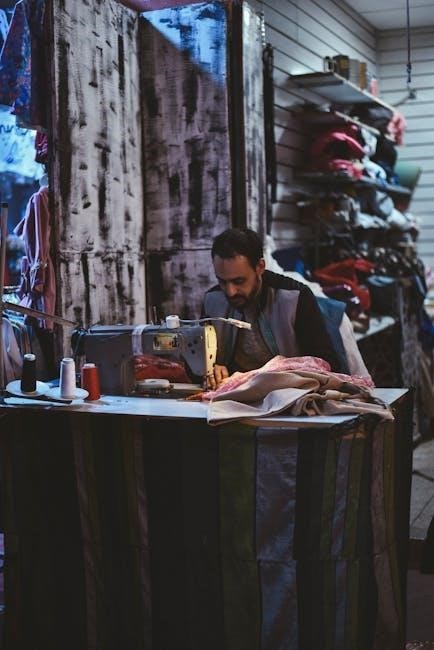
Christmas crochet patterns have gained immense popularity as a fun and creative way to celebrate the holiday season. Many crafters enjoy making personalized gifts, decorations, and ornaments, which add a heartfelt touch to festive celebrations. The availability of free PDF patterns makes it accessible for everyone to participate, regardless of skill level. Crochet projects also serve as a relaxing hobby during the busy holiday season, allowing people to unwind while creating something meaningful. This tradition fosters a sense of accomplishment and joy, making it a beloved activity for many.
1.2 Benefits of Using Free PDF Patterns
Free PDF patterns for Christmas crochet offer numerous benefits, including cost savings and easy accessibility. They provide clear instructions and diagrams, making it simple for crafters of all skill levels to follow. Many patterns are specifically designed for beginners, ensuring a smooth learning experience. Additionally, free PDFs can be downloaded and printed, allowing for offline use and convenience. This accessibility encourages creativity and helps crafters produce beautiful, personalized holiday items without financial investment.
Popular Christmas Crochet Patterns
Popular Christmas crochet patterns include ornaments, decorations, gifts, and amigurumi toys. These designs are beloved for their versatility and festive charm, perfect for all skill levels and thoughtful gifting.
2.1 Christmas Ornaments and Decorations
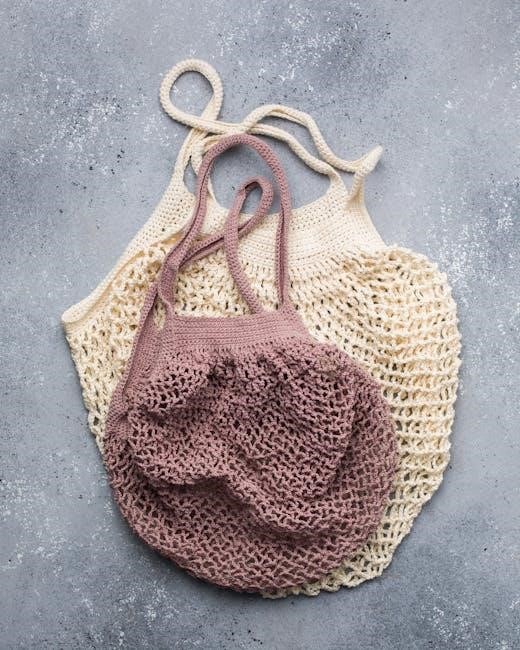
Christmas ornaments and decorations are a delightful way to add handmade charm to your holiday home. Patterns for snowflakes, trees, and bells are particularly popular, offering a festive touch. Many designs are simple enough for beginners, while intricate patterns cater to experienced crocheters. These ornaments can be personalized with beads, glitter, or ribbons, making them unique gifts or keepsakes. Using cotton yarn ensures durability, while metallic threads add a luxurious feel. Crochet decorations bring warmth and character to any Christmas setting, making them a timeless tradition.
2.2 Crochet Christmas Gifts and Accessories
Crochet Christmas gifts and accessories are thoughtful and personalized presents for loved ones. Scarves, hats, gloves, and blankets are popular choices, offering warmth and comfort during the holiday season. These items can be customized with festive colors and patterns to match individual styles. Additionally, smaller accessories like coasters, phone covers, and ornaments make great stocking stuffers or add-ons to larger gifts.
Free PDF patterns provide a budget-friendly way to create these items, ensuring everyone can enjoy handmade holiday cheer. They often include tips for personalizing with buttons, appliques, or embroidery, making each gift truly unique.
2.3 Amigurumi Christmas Toys and Figures
Amigurumi Christmas toys and figures are adorable, stuffed characters that bring festive cheer to your holiday decor or gifts. Popular patterns include snowmen, reindeer, elves, and Santas, all crafted with a cute, cartoonish style. These toys are perfect for decorating trees, mantels, or as gifts for children and adults alike.
Free PDF patterns often include step-by-step guides for creating these charming figures, complete with details like facial features and clothing. They’re a delightful way to add a personal, handmade touch to your holiday celebrations;
Where to Find Free Christmas Crochet PDFs
Discover free Christmas crochet PDFs on platforms like Moogly, The Spruce Crafts, and Etsy, offering a variety of festive patterns for ornaments, gifts, and decorations.
3.1 Moogly: A Hub for Free Crochet Patterns
Moogly is a top destination for free crochet patterns, offering a wide range of Christmas-themed designs. From ornaments to blankets, their collection is diverse and festive.
The site features well-organized categories, making it easy to find specific projects. With clear instructions and high-quality images, Moogly is perfect for crocheters of all skill levels.
Its user-friendly interface and active community forums make it a go-to resource for holiday crafting inspiration and support.
3.2 The Spruce Crafts: Extensive Christmas Collection
The Spruce Crafts offers an extensive library of free Christmas crochet patterns, perfect for creating festive decorations, gifts, and ornaments. Their collection includes a variety of projects, from simple to intricate designs.
With step-by-step tutorials and high-quality photos, the site caters to both beginners and experienced crocheters. It’s a great resource for finding inspiration and detailed instructions for holiday crafting.
The Spruce Crafts ensures that your Christmas projects are both beautiful and meaningful, making it a go-to destination for festive crochet ideas.
3.3 Etsy: Free and Paid PDF Patterns
Etsy is a vibrant marketplace offering a wide range of Christmas crochet patterns in PDF format. While many sellers provide free patterns, others offer paid options with detailed instructions and unique designs.
From ornaments to intricate holiday-themed projects, Etsy’s collection caters to all skill levels. Paid patterns often include exclusive content, making them worth the investment for advanced crocheters.
Explore both free and paid listings to find the perfect pattern for your festive creations, with many sellers offering excellent customer support for their designs.
3.4 Pinterest: A Visual Guide to Patterns
Pinterest is a treasure trove of visual inspiration for Christmas crochet patterns. Users can search for free PDF patterns and save them to boards for easy access.
The platform’s image-driven interface makes it simple to find and choose projects that match your style. Many pins link directly to downloadable PDFs, while others offer step-by-step tutorials.
While some patterns are free, others may redirect to paid sites. Pinterest’s vast collection ensures you’ll find something to suit your festive crochet needs, whether you’re a beginner or an expert.
Materials and Supplies for Christmas Crochet
Essential supplies include soft, festive yarns, durable crochet hooks, and embellishments like beads or bells. These materials bring your Christmas patterns to life with ease and charm.
4;1 Best Yarns for Christmas Projects
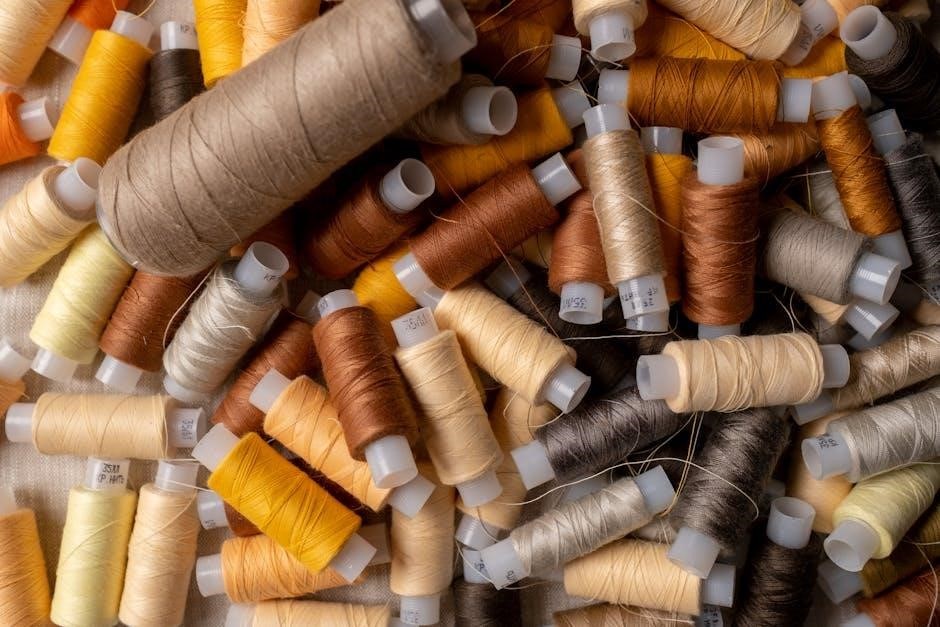
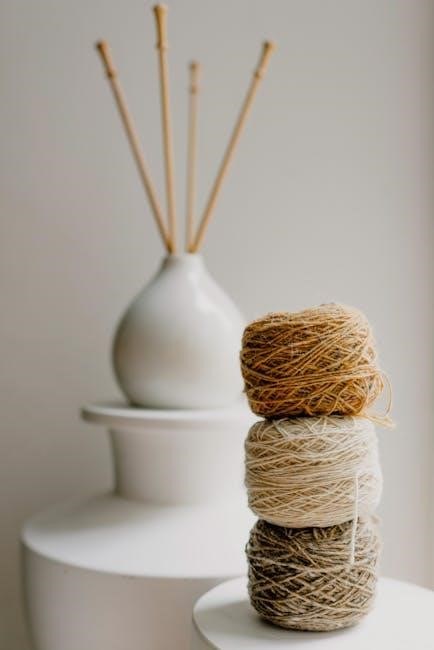
Choosing the right yarn is crucial for Christmas crochet. Acrylic yarns are popular for their softness and durability, while cotton blends offer a natural, rustic feel. Festive colors like red, green, and gold add a holiday touch. Look for yarns with good stitch definition to showcase intricate patterns. Bernat, Lion Brand, and Red Heart are excellent choices, offering a wide range of textures and hues. These yarns ensure your Christmas projects are both beautiful and long-lasting, perfect for gifts or decorations.
4.2 Essential Crochet Hooks for Holiday Crafts
Crochet hooks are a vital tool for holiday projects. Aluminum and steel hooks are durable and provide consistent tension, while ergonomic handles reduce fatigue. Sizes range from 2mm to 10mm, catering to various yarn weights. A set of assorted hooks ensures you’re prepared for any pattern. Investing in quality hooks enhances your crochet experience, making it easier to create intricate ornaments, gifts, and decorations. They are a must-have for crafting memorable Christmas items with precision and comfort.
4.3 Additional Supplies for Embellishments
Beads, sequins, and small bells add festive touches to Christmas crochet projects. Ribbons and bows can be used to finish gifts or decorate ornaments. Buttons and fabric paint are great for creating faces or details on amigurumi toys. Stitch markers help keep track of patterns, while tapestry needles are essential for weaving in ends. Stuffing tools and polyester fiberfill are perfect for plush toys. Glue and scissors are handy for attaching embellishments securely. These supplies enhance your creations, making them truly special and personalized.
Basic Crochet Techniques for Beginners
Mastering basic crochet techniques is essential for creating beautiful Christmas projects. Learn foundational stitches, understand tools, and practice reading patterns to confidently start your holiday crafting journey.
5.1 Understanding Basic Stitches
Mastering basic crochet stitches is the foundation for any Christmas project. Start with simple stitches like single crochet (sc) and half double crochet (hdc), essential for ornaments and gifts. Understanding stitch tension ensures even fabric, while consistent hook size maintains project integrity. Practice these stitches to build confidence and skill, allowing you to tackle more complex patterns with ease.
Beginners should focus on chaining, slip stitching, and working in rows or rounds. These skills are vital for creating festive items like stockings, tree decorations, or amigurumi toys. With practice, you’ll be ready to craft beautiful, handmade holiday items for loved ones.
5.2 How to Read Crochet Patterns
Reading crochet patterns requires understanding abbreviations, symbols, and terminology. Start by identifying the materials and tools needed, followed by gauge information to ensure proper sizing. Pay attention to stitch counts, row instructions, and any special techniques. Patterns often include diagrams or photos to guide you, especially for complex designs like Christmas ornaments or amigurumi toys.
Always read through the entire pattern before starting to understand the sequence of steps. Check for notes on joining methods, seam allowances, and finishing techniques. Practicing with scrap yarn can help clarify confusing instructions, ensuring your holiday projects turn out as intended.
5.3 Tips for Working with Christmas-Themed Yarns
When using Christmas-themed yarns, choose materials that match your project’s needs, such as soft acrylics for ornaments or chunky yarns for blankets. Opt for colors like red, green, and gold to enhance the festive look. Consider yarns with metallic or glitter accents for added sparkle.
Swatch before starting to ensure proper tension and stitch definition. Alternate between solid and variegated yarns for visual interest. For amigurumi toys, use yarns with good stitch definition to highlight details. Always follow care instructions to maintain the yarn’s texture and color vibrancy.
Advanced Crochet Techniques for Christmas Patterns
Mastering advanced techniques like seamless joins and color changes elevates your Christmas crochet projects. These skills create professional-looking ornaments, garments, and home decor with intricate details and festive yarns.
6.1 Joining Methods for Seamless Projects
Seamless joining methods are essential for creating professional-looking Christmas crochet projects. Techniques like the invisible join or whipstitch ensure that your ornaments, garments, and home decor items have a polished finish. These methods prevent bulky seams, making your creations look more elegant. By mastering these skills, you can achieve a flawless appearance in your holiday crafts, whether it’s a delicate snowflake or a cozy sweater. Perfect for both beginners and experienced crocheters, seamless joins enhance the overall quality of your work.
6.2 Working in the Round for Ornaments
Working in the round is a popular technique for creating spherical or circular Christmas ornaments. Using double-pointed crochet hooks or circular needles, you can craft seamless balls, bells, or snowflakes. This method allows for even stitching and a professional finish. Start with a magic ring or chain loop, then crochet in spirals or rounds. Maintain consistent tension to ensure symmetry. Perfect for ornaments, this technique brings dimension and charm to your holiday decor, making each piece uniquely special and visually appealing.
6.3 Color Changing and Striping Techniques
Color changing and striping techniques add vibrancy and texture to Christmas crochet projects. These methods allow you to create intricate patterns, perfect for ornaments, sweaters, or blankets. By carrying yarn and changing colors at specific points, you can achieve seamless transitions. Striping adds a modern, festive look, while color changing enables detailed designs like snowflakes or Santas. These techniques elevate your projects, making them stand out with personalized, intricate details that capture the holiday spirit beautifully.
Customizing Your Christmas Crochet Projects
Customizing your Christmas crochet projects allows you to add personal touches, making each item unique. Choose festive colors, add embellishments, or personalize gifts with names or dates for a thoughtful finish.
7.1 Choosing the Right Colors for Festive Looks
Choosing the right colors for your Christmas crochet projects is key to creating a festive atmosphere. Traditional red, green, gold, and white are classic choices, but you can also experiment with icy blues or deep berry tones for a modern twist. Consider the recipient’s preferences and the overall aesthetic you want to achieve. Balancing bold and neutral shades ensures your creations stand out while maintaining a cohesive holiday look. High-quality yarn in vibrant hues will make your projects truly special and professional-looking.
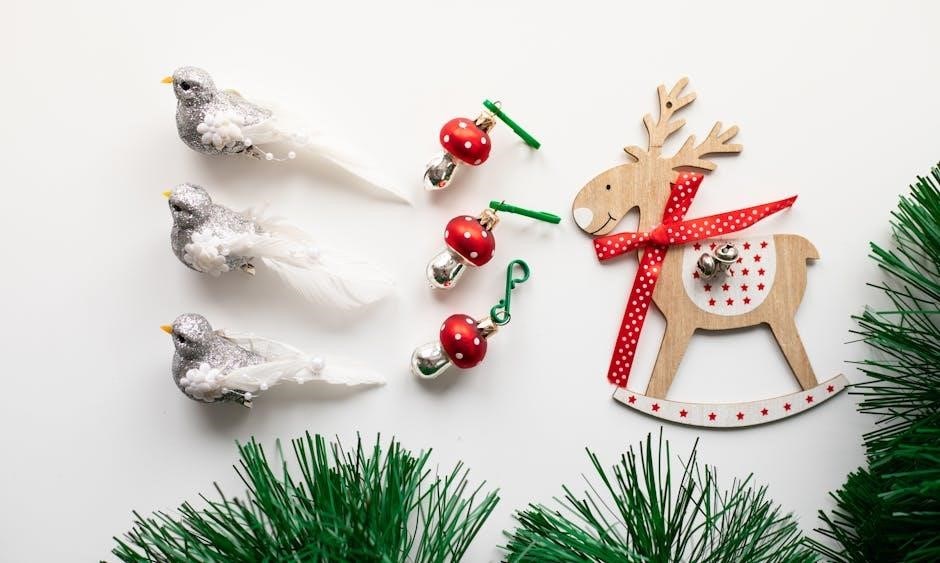
7.2 Adding Embellishments like Bells and Beads
Adding embellishments like bells and beads can elevate your Christmas crochet projects, giving them a festive and personalized touch. These small details bring charm to ornaments, gifts, and clothing. Use a yarn needle to thread beads onto your crochet fabric or attach bells to create jingling ornaments. For a more subtle look, opt for sequins or small bows. These embellishments add texture and visual interest, making your creations stand out during the holiday season.
7.3 Personalizing Gifts with Names or Dates
Personalizing Christmas crochet gifts with names or dates adds a heartfelt, unique touch. Use crochet letter patterns or appliques to spell out names or special dates, then sew them onto blankets, stockings, or ornaments. This customization makes gifts extra meaningful and shows thoughtfulness. Many free PDF patterns include charts for letters and numbers, making it easy to create personalized designs. Such details turn ordinary gifts into treasured keepsakes, perfect for celebrating loved ones during the holiday season.
Troubleshooting Common Crochet Mistakes

Common crochet mistakes like uneven stitches or miscounted rows can be fixed by adjusting tension or recounting stitches. Regularly checking work ensures project success.
8.1 Fixing Uneven Stitches and Tension Issues
Uneven stitches and tension issues are common in crochet. To fix, check your gauge and ensure consistent tension. If stitches are too tight, try a larger hook; if too loose, use a smaller one. Practice even tension by crocheting slowly and evenly. Blocking your project can also help even out stitches. For persistent issues, consider reworking the problematic rows or seeking guidance from tutorials. Proper tension is key to professional-looking Christmas crochet projects.
8.2 Correcting Miscounted Stitches
Miscounted stitches can disrupt the symmetry of your Christmas crochet project. To fix, count each stitch in the row carefully. If the error is minor, frogging (ripping out) the stitches may be necessary. Use a stitch marker to track your progress and ensure accuracy. For complex patterns, working in sections can help prevent miscounting. Patience is key; correcting early ensures a polished finish and avoids larger issues down the line.
8.3 Dealing with Yarn Ends and Weaving
Managing yarn ends is crucial for a neat finish in Christmas crochet projects. Use a yarn needle to weave ends securely, working in small, gentle stitches. Avoid pulling too tightly to prevent puckering. For seamless joins, weave ends as you go or during breaks. Proper weaving ensures durability and a professional look, especially for gifts or decorations. Keep yarn tails organized to avoid tangling and make the process efficient.
Time Management for Holiday Crochet Projects
Plan ahead by breaking projects into smaller tasks and setting realistic deadlines. Start early to avoid last-minute stress and enjoy crafting festive items with ease.
9.1 Planning Ahead for Large Projects
For large Christmas crochet projects, start by breaking them into smaller, manageable tasks. Create a timeline to ensure each part is completed on schedule. Begin with the most complex pieces, like intricate ornaments or blankets, and allocate specific days for each step. Consider the yarn quantity and hook size needed to avoid mid-project shortages. Use a planner or app to track progress and stay organized. This approach helps maintain momentum and reduces last-minute stress, ensuring your holiday crafts are finished in time.
9.2 Breaking Projects into Smaller Tasks
Breaking Christmas crochet projects into smaller tasks simplifies the process and makes it more enjoyable. Start by identifying key components, such as ornaments, garlands, or gift items, and tackle them one at a time. This approach prevents overwhelm and allows for steady progress. Set daily or weekly goals for each task to maintain momentum without feeling rushed.
Use a checklist to track completed tasks and stay organized. This method ensures even large projects, like blankets or intricate amigurumi, are finished on time, keeping the holiday crafting experience stress-free and delightful.
9.4 Managing Time for Last-Minute Gifts
For last-minute Christmas crochet gifts, prioritize projects that are quick to complete, such as scarves, hats, or small ornaments. Create a schedule, allocating specific time slots for each task to ensure timely completion. Focus on simple patterns that require minimal materials and steps. Work in short, focused sessions to maintain productivity without burnout. Stay organized, and consider using pre-made templates or kits to save time. This approach helps you deliver thoughtful, handmade gifts even under tight deadlines.
Christmas crochet patterns bring joy and creativity to the holiday season. With free PDFs, you can craft meaningful gifts and decorations, spreading love and warmth to all.
10.1 Final Tips for a Successful Crochet Christmas
Plan ahead and organize your supplies to avoid last-minute stress. Choose patterns that suit your skill level and time constraints. Personalize gifts with names or dates for a special touch. Don’t forget to add embellishments like bells or beads for a festive look. Finally, enjoy the process and take pride in creating handmade items that bring joy to others. Happy crocheting!
10.2 Encouragement to Share Your Creations
Sharing your Christmas crochet creations can inspire others and bring joy to your community. Post your projects on social media or crafting forums to connect with fellow crocheters. Use hashtags like #ChristmasCrochet or #HandmadeWithLove to reach a wider audience. Don’t hesitate to showcase your work—your unique creations might spark someone else’s holiday crafting journey. The crochet community thrives on shared ideas and encouragement, so let your handmade items shine!