The 4L60E transmission rebuild is a comprehensive‚ step-by-step process designed for both experienced technicians and DIY enthusiasts․ This guide covers essential procedures‚ from disassembly to reassembly‚ ensuring a successful rebuild․
1․1 Overview of the 4L60E Transmission
The 4L60E is a highly versatile‚ electronically controlled automatic transmission designed for rear-wheel-drive vehicles․ As part of the Hydra-Matic family‚ it features four forward gears‚ overdrive‚ and a lockup torque converter for improved efficiency․ Widely used in Chevrolet and GMC trucks‚ SUVs‚ and performance cars‚ the 4L60E is known for its durability and adaptability․ Introduced in 1993‚ it replaced the earlier 4L60 model‚ offering enhanced electronic controls for smoother shifting and better performance under various driving conditions․
1․2 Importance of a Rebuild Manual
A rebuild manual is essential for guiding technicians and enthusiasts through the complex process of rebuilding the 4L60E transmission; It provides detailed‚ step-by-step instructions‚ torque specifications‚ and fluid capacity information‚ ensuring accuracy and preventing costly errors․ The manual acts as a critical reference‚ offering insights into disassembly‚ component inspection‚ and reassembly․ By following its guidelines‚ users can avoid common pitfalls‚ save time‚ and restore the transmission to optimal performance․ It is indispensable for both professionals and DIYers aiming for a successful rebuild․
1․3 Brief History and Applications of the 4L60E
The 4L60E‚ an electronically controlled version of the 4L60‚ was introduced by General Motors in the early 1990s․ Designed for rear-wheel-drive vehicles‚ it replaced the hydraulically controlled 4L60‚ offering improved performance and efficiency․ Widely used in Chevrolet and GMC trucks‚ SUVs‚ and performance cars‚ the 4L60E became a staple in GM’s lineup due to its durability and versatility․ Its applications span various models‚ making it a popular choice for both stock and high-performance builds‚ and a common subject in rebuild manuals for enthusiasts and technicians alike․

Preparation for the Rebuild
Preparation is key for a successful 4L60E rebuild‚ requiring the right tools‚ a clean workspace‚ and safety measures to ensure efficiency and protection during the process․
2․1 Tools and Equipment Required
A successful 4L60E rebuild demands specialized tools‚ including a clutch compressor‚ manual valve link remover‚ and a torque wrench for precise bolt tightening․ Essential items like screwdrivers‚ punches‚ and bearing pullers are also necessary․ Additionally‚ a transmission fluid pump and a clean drain pan are required for handling fluids․ A detailed rebuild manual is crucial for step-by-step guidance․ Ensure all tools are organized and within reach to streamline the process and avoid delays․ Proper equipment ensures accuracy and safety during disassembly and reassembly․
2․2 Safety Precautions and Workspace Setup
Ensure a clean‚ well-lit workspace with proper ventilation․ Wear protective gear like gloves and safety goggles to prevent injury․ Use jack stands to secure the vehicle and avoid transmission damage․ A drain pan is essential for catching fluid spills․ Organize tools and parts neatly to avoid tripping hazards․ Refer to the rebuild manual for specific safety tips tailored to the 4L60E․ A transmission jack or stand is recommended for safe handling; Always follow proper lifting techniques to prevent accidents․
2․3 Gathering Rebuild Kits and Parts
Acquire a complete 4L60E rebuild kit to ensure all necessary components are included․ This typically includes gaskets‚ seals‚ clutch packs‚ steels‚ and bearings․ Verify the kit matches your transmission’s specifications․ Additional parts like a new filter‚ torque converter‚ and manual valve link may be required․ Refer to your manual for a detailed parts list․ Check for worn or damaged components during disassembly and replace them as needed․ Use high-quality‚ OEM-recommended parts to guarantee reliability and performance․ Properly label and organize parts to streamline the rebuild process․

Torque Specifications and Fluid Capacity
The 4L60E requires precise torque specifications for reassembly and typically holds 4-6 quarts of ATF․ Always use the recommended transmission fluid type for optimal performance․
3․1 Essential Torque Specs for Reassembly
Torque specifications are critical for ensuring proper reassembly of the 4L60E․ Valve body bolts typically require 10-12 ft-lbs‚ while planetary gearset bolts need 40-45 ft-lbs․ Clutch pack bolts should be torqued to 20-25 ft-lbs․ Ensure all fasteners meet these specs to avoid damage or leakage․ Always use a torque wrench for accuracy․ Refer to the rebuild manual for specific values‚ as tolerances vary slightly․ Proper torque ensures optimal performance and longevity of the transmission․
3․2 Fluid Capacity and Type Recommendations
The 4L60E transmission typically requires 4 to 6 quarts of fluid‚ depending on whether the torque converter is included․ Use Dexron III or ATF+4 synthetic fluid for optimal performance․ Synthetic fluids are recommended for their enhanced lubrication and temperature stability․ Always refer to the rebuild manual for exact capacity and type specifications․ Proper fluid selection ensures smooth operation and extends transmission life․ Avoid using incorrect fluid types‚ as this can lead to premature wear or damage․ Double-check the fluid level and type before finalizing the rebuild․

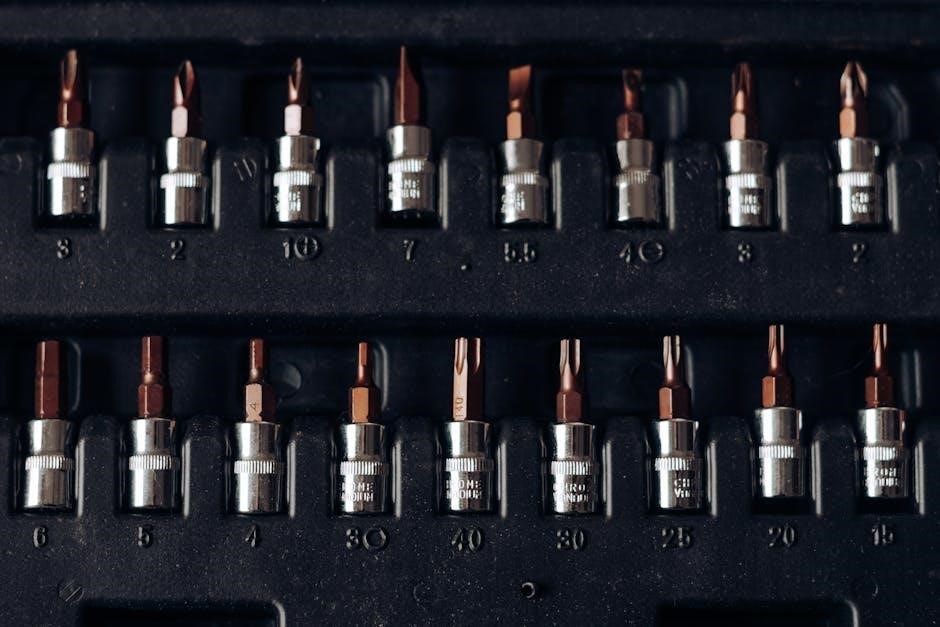
Specialized Tools for the Rebuild
Specialized tools like the clutch compressor‚ manual valve link removal tool‚ and valve body bolt torque wrench are essential for a precise and efficient rebuild process․ These tools ensure proper alignment and torque specifications‚ preventing damage to critical components․ They are specifically designed for the 4L60E transmission‚ making the rebuild process safer and more accurate․ Always use high-quality tools to avoid risking transmission performance or longevity․
4․1 Clutch Compressor Tool
The clutch compressor tool is essential for safely and effectively compressing the clutch pack during disassembly and assembly of the 4L60E transmission․ It ensures even pressure‚ preventing damage to delicate components like clutch plates and steels․ Without this tool‚ compressing the clutch pack would be nearly impossible‚ risking internal damage․ Specifically designed for the 4L60E‚ it provides precise control‚ making the rebuild process more efficient and reliable․ Always use a high-quality compressor to avoid slippage or uneven compression‚ which could compromise the transmission’s performance․
4․2 Manual Valve Link Removal Tool
The manual valve link removal tool is specifically designed to safely detach the manual valve link from the valve body during a 4L60E rebuild․ This specialized tool prevents damage to the link or surrounding components‚ ensuring proper removal without bending or breaking․ It is crucial for maintaining component integrity and simplifies the disassembly process․ Using the correct tool is essential to avoid complications and ensure precise alignment for secure removal․ This tool is a must-have for any 4L60E transmission rebuild to guarantee a smooth and successful procedure․
4․3 Valve Body Bolt Torque Wrench
A valve body bolt torque wrench is essential for accurately tightening the bolts to the specified torque values during the 4L60E rebuild․ Proper torque ensures the valve body is securely fastened‚ preventing fluid leaks and damage to the transmission case․ Using the correct torque wrench guarantees precise alignment and avoids over-tightening‚ which could strip threads or warp the valve body․ This tool is critical for maintaining the integrity of the valve body and ensuring optimal transmission performance after the rebuild․

Step-by-Step Rebuild Process
The 4L60E rebuild involves a detailed‚ step-by-step process‚ including disassembly‚ component inspection‚ and precise reassembly‚ ensuring adherence to torque specifications and procedural guidelines for optimal performance․
5․1 Disassembly Process
The disassembly process begins with removing the torque converter and extracting the valve body․ Carefully note the position of components like check balls and manual valve links․ Remove the transmission pan to access internal parts․ Use specialized tools to detach the clutch packs and planetary gearset․ Document each step to ensure proper reassembly․ Keep all components organized to avoid losing small parts․ This methodical approach is crucial for a successful rebuild‚ ensuring all parts are accounted for and inspected․ Safety and precision are key during disassembly․
5․2 Removing the Torque Converter
Removing the torque converter is a critical step in the disassembly process․ Begin by draining the transmission fluid and securing the vehicle․ Use a wrench to remove the bolts holding the torque converter to the flex plate․ Carefully pull the converter straight out‚ taking note of its alignment with the transmission pump․ Once removed‚ inspect the converter for damage or wear․ Clean the area thoroughly before setting the converter aside for reinstallation․ Proper handling ensures safety and prevents damage to internal components․
5․3 Extracting the Valve Body
Extracting the valve body requires careful attention to avoid damage․ Start by disconnecting the wiring harness and removing the manual valve link․ Next‚ remove the valve body bolts‚ taking note of their lengths and positions to prevent case damage․ Gently lift the valve body out of the transmission‚ ensuring no internal components are dislodged․ Once removed‚ inspect for wear or debris․ Proper extraction is crucial for maintaining hydraulic control and ensuring a smooth rebuild process․ Handle with care to avoid scratching sensitive surfaces․
5․4 Disconnecting the Wiring Harness
Disconnecting the wiring harness is a critical step in the rebuild process․ Carefully pull the harness over the side of the transmission to clear the valve body․ Avoid damaging the wires or connectors․ Remove any clips or brackets securing the harness to the transmission case․ Label the wires if necessary for reinstallation․ Once disconnected‚ secure the harness to prevent interference during the rebuild․ This step ensures safe access to internal components without risking electrical damage or complications during reassembly․
Rebuilding Transmission Components
Rebuilding transmission components involves meticulously restoring the valve body‚ clutch packs‚ and planetary gearset․ Each part requires precision to ensure proper function and durability post-rebuild․
6․1 Rebuilding the Valve Body
Rebuilding the valve body begins with removing the manual valve link and noting check ball locations․ Disassemble the body‚ clean all components‚ and inspect for wear․ Replace worn parts‚ such as the valve kit‚ and install a new gasket․ Ensure proper alignment during reassembly to avoid transmission damage․ Use specialized tools‚ like the manual valve link removal tool‚ for precise adjustments․ Proper torque specs are critical for valve body bolts to maintain functionality and prevent leaks․
6․2 Replacing Clutch Packs
Replacing the clutch packs in a 4L60E transmission is a critical step in its rebuild․ Begin by gathering a clutch pack replacement kit‚ which includes new clutch and steel plates‚ along with necessary seals․ Specialized tools like a clutch compressor will be essential for the process․ Access the clutch packs by removing the transmission pan and valve body‚ following the manual’s instructions carefully to avoid damage․ Remove the old packs‚ taking care not to drop any components into the transmission case․ Clean the area thoroughly before installing the new packs‚ ensuring proper alignment and seating․ Refer to the manual for specific torque specifications and installation sequences․ After reinstalling the valve body and transmission pan‚ refill the transmission fluid and test drive the vehicle to ensure smooth shifting․ Consider upgrading to high-performance clutch packs for enhanced durability and performance‚ and allocate sufficient time for the procedure‚ as it can be time-consuming‚ especially for a novice․ Stay organized‚ follow the manual diligently‚ and exercise patience to achieve a successful clutch pack replacement․
6․3 Inspecting and Rebuilding the Planetary Gearset
Inspecting and rebuilding the planetary gearset is a meticulous process requiring attention to detail․ Start by removing the gearset from the transmission case‚ taking care to note the position of each component․ Examine the sun gear‚ planet gears‚ and carrier for wear‚ scoring‚ or cracks; Replace any damaged parts using high-quality components from a rebuild kit․ Rebuild the gearset by reassembling the components in the reverse order of disassembly‚ ensuring proper alignment and torque specifications․ Apply a thin layer of lubricant to moving parts to prevent friction․ Use specialized tools‚ such as a bearing installer‚ to secure components in place․ Refer to the manual for specific torque values and reinstallation procedures․ After reassembling‚ test the gearset for smooth operation by manually turning the gears․ Properly rebuilding the planetary gearset ensures optimal transmission performance and longevity․ Be cautious during the process to avoid damaging newly installed parts‚ and consider seeking professional help if unsure about any step․ A well-rebuilt gearset is essential for smooth power delivery and reliable shifting‚ making this step crucial in the overall transmission rebuild․ Allocate sufficient time and resources to ensure the job is done right the first time․
Reassembly and Alignment
Reassembly and alignment require precise torque specifications and proper component seating‚ ensuring smooth operation․ Follow the manual for step-by-step instructions and tools needed to achieve accuracy․
7․1 Installing the Valve Body
The valve body installation is critical for proper transmission function․ Ensure all electrical connectors are securely attached and the manual valve link is correctly aligned․ Gently lower the valve body into the case‚ verifying that check balls are in place․ Tighten bolts in the specified torque sequence to avoid damage․ Refer to the manual for exact torque values and locations to ensure a leak-free seal․ Proper alignment prevents internal damage and ensures smooth shifting․ Double-check all connections before proceeding․
7․2 Refitting the Torque Converter
Refitting the torque converter requires careful handling to ensure proper alignment and function․ Clean the area around the pump gear and converter hub to prevent contamination․ Align the torque converter with the pump gear‚ ensuring it seats evenly․ Secure the converter using the appropriate studs‚ but avoid over-tightening to prevent damage․ Double-check the alignment to ensure the converter engages smoothly with the pump gear․ Proper installation is critical for maintaining transmission performance and preventing future issues․ Follow the manual’s torque specifications for secure fastening․
7․3 Reconnecting the Wiring Harness
Reconnecting the wiring harness is a critical step to ensure proper electronic control of the transmission․ Carefully route the harness over the side of the unit‚ ensuring it remains clear of moving components․ Align the connectors with their respective ports on the valve body and transmission case․ Secure all connections firmly to prevent loose wires․ Refer to the manual for specific torque specifications for any electrical connectors or bolts․ Finally‚ test the electrical connections to confirm proper function before reassembling other components․ Proper wiring ensures smooth transmission operation and avoids electrical faults․
Testing the Rebuilt Transmission
Testing the rebuilt transmission involves bench testing to verify hydraulic and electronic functions‚ followed by in-vehicle testing to ensure proper operation under various driving conditions․
8․1 Bench Testing Procedures
Bench testing ensures the rebuilt transmission operates correctly before installation․ Check hydraulic pressure‚ solenoid function‚ and torque converter engagement․ Verify all electrical connections are secure and functioning․ Inspect the torque converter for proper installation and alignment․ Test the transmission in all gear ranges to ensure smooth shifts and proper clutch engagement․ Monitor for any leaks or unusual noises‚ addressing issues immediately․ This step confirms the rebuild’s success and readiness for in-vehicle testing․
8․2 In-Vehicle Testing and Validation
In-vehicle testing is the final validation step after a successful rebuild․ Start by ensuring all electrical connectors are securely attached and fluid levels are correct․ Monitor transmission performance during acceleration‚ deceleration‚ and shifting between gears․ Test under various load conditions to verify smooth operation․ Use a scan tool to check for any trouble codes or abnormal pressure readings․ Inspect for leaks and ensure proper torque converter engagement․ This step confirms the transmission functions as intended in real-world conditions‚ providing peace of mind for both DIY rebuilders and professional technicians․
Troubleshooting Common Issues
Identify common post-rebuild issues like slipping gears or erratic shifting․ Check for causes such as incorrect torque specs‚ damaged clutch packs‚ or faulty solenoids․ Ensure proper repairs․
9;1 Diagnosing Post-Rebuild Problems
After rebuilding‚ issues like slipping gears or erratic shifting may arise․ Start by checking fluid levels and condition․ Inspect for worn clutch packs or faulty solenoids․ Ensure proper torque specs were applied during reassembly․ Use a scan tool to identify error codes related to electronic controls․ Verify wiring harness connections and test throttle valve operation․ Addressing these areas systematically helps pinpoint root causes and ensures reliable transmission performance․ Always refer to the rebuild manual for specific diagnostic procedures and solutions․
9․2 Addressing Common Rebuild Mistakes
Common mistakes during a 4L60E rebuild include improper torque specs‚ misaligned components‚ and incorrect clutch pack installation․ Verify all bolts and fasteners meet specified torque values to avoid damage․ Ensure proper alignment of the valve body and planetary gearset․ Inspect for worn or damaged parts‚ as reusing them can lead to premature failure․ Double-check the installation of the manual valve link and wiring harness connections․ Addressing these issues early prevents costly rework and ensures a smooth‚ reliable transmission operation after the rebuild․
Maintenance and Upkeep
Regular fluid changes‚ filter replacements‚ and inspections are crucial for extending 4L60E transmission life․ Follow recommended maintenance schedules to prevent wear and ensure optimal performance․
10․1 Scheduled Maintenance Recommendations
Regular maintenance is vital for extending the life of your 4L60E transmission․ Change the transmission fluid every 30‚000 to 60‚000 miles‚ depending on usage․ Replace the transmission filter every 30‚000 miles to ensure clean fluid circulation․ Inspect the pan gasket and seals annually for signs of leaks․ Check the fluid level regularly and top it off as needed․ Avoid overheating by monitoring fluid temperature․ Replace worn or damaged components promptly․ Always follow torque specifications for bolts and connectors during maintenance to prevent damage․ Lubricate moving parts as required․ Avoid aggressive driving habits that strain the transmission․
10․2 Tips for Extending Transmission Life
To maximize the lifespan of your 4L60E transmission‚ adopt best practices․ Avoid aggressive driving habits like rapid acceleration or frequent stop-and-go traffic․ Use the correct transmission fluid type and ensure proper cooling system function․ Never tow beyond the recommended weight capacity․ Monitor transmission temperature regularly‚ especially in high-stress conditions․ Keep the battery charged to maintain stable electrical signals․ Avoid extreme heat exposure and ensure proper grounding of electrical components․ Regularly inspect and clean the transmission pan to prevent debris buildup․ These practices will help ensure long-term reliability and performance․
The 4L60E rebuild process‚ while complex‚ offers a rewarding experience․ With careful planning and execution‚ you’ll gain in-depth knowledge and a fully restored transmission‚ ready for years of reliable service․
11․1 Final Thoughts on the Rebuild Process
Completing a 4L60E rebuild is a significant achievement‚ requiring patience‚ precision‚ and dedication․ The process not only restores transmission performance but also enhances your mechanical skills․ Proper tools and a detailed manual are crucial for success․ Attention to torque specs and fluid capacity ensures reliability․ Post-rebuild testing validates your efforts‚ providing confidence in the transmission’s durability․ Regular maintenance will extend its lifespan‚ making the rebuild a worthwhile investment for your vehicle’s longevity and performance․
11․2 Encouragement for DIY Enthusiasts
Embarking on a 4L60E rebuild is a rewarding challenge for DIY enthusiasts․ With a comprehensive manual and the right tools‚ you can restore your transmission to optimal performance․ This project fosters mechanical skills and problem-solving abilities‚ offering a sense of accomplishment․ Don’t be intimidated by complexity—methodical steps and patience yield success․ Take pride in overcoming obstacles and enjoy the satisfaction of a job well done‚ knowing your efforts enhance your vehicle’s reliability and longevity․