Monthly Archive January 27, 2026

Bylysanne

elbow range of motion exercises pdf

Article Plan: Elbow Range of Motion Exercises PDF

This document outlines a comprehensive guide for creating a PDF resource detailing elbow range of motion exercises,
focusing on recovery, flexibility, and strength.
It will cover anatomy, exercises, and progress monitoring.

The PDF will include basic and advanced movements,
strengthening techniques like fist squeezes, and essential safety information for users.

Targeted towards individuals recovering from injuries,
or seeking to improve elbow health,
the PDF will promote optimal joint function and reduced pain.

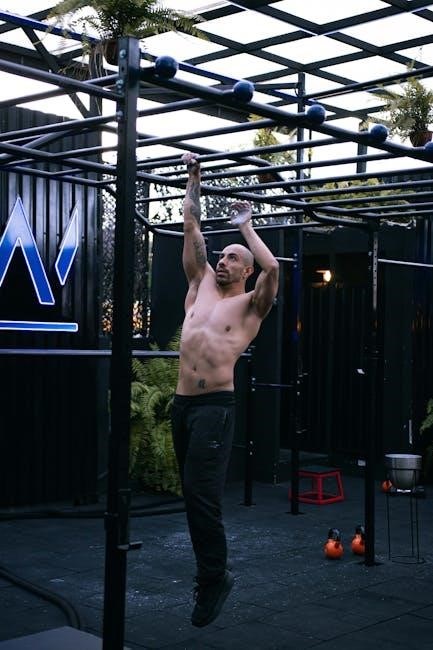
Elbow range of motion exercises are crucial for maintaining joint health,
recovering from injuries, and enhancing overall upper limb functionality.
Flexibility and strength are key.

These exercises improve flexibility,
reduce pain, and restore optimal elbow movement,
benefiting daily activities and athletic performance.

This guide provides a structured approach
to understanding and implementing effective elbow ROM exercises,
promoting long-term joint wellness.

Importance of Elbow Flexibility

Maintaining optimal elbow flexibility is paramount for a wide range of daily activities, from simple tasks like lifting objects and opening doors to more complex movements involved in sports and work. Reduced elbow flexibility can significantly impact your quality of life, leading to discomfort, pain, and limitations in functional abilities.

A flexible elbow joint allows for a fuller, more efficient range of motion, reducing strain on surrounding muscles and tendons. This is particularly important for individuals recovering from elbow injuries, as regaining flexibility is a key component of the rehabilitation process. Exercises like elbow bending and straightening, as well as forearm rotations, directly contribute to improved joint health.

Furthermore, good elbow flexibility can help prevent future injuries by ensuring the joint can withstand stress and adapt to various movements. Neglecting flexibility can lead to stiffness, decreased circulation, and an increased risk of tendonitis or other elbow-related conditions. Prioritizing flexibility through regular exercise is a proactive step towards long-term elbow health and overall well-being.

What is Range of Motion (ROM)?

Range of Motion (ROM) refers to the full movement potential of a joint, measured in degrees. It defines the extent to which a limb can be flexed or extended, rotated, or moved in other directions. Understanding ROM is crucial when discussing elbow health and rehabilitation, as it directly impacts functional capacity.

For the elbow, ROM is assessed by measuring the angles achieved during flexion (bending) and extension (straightening). A normal, healthy elbow typically exhibits a ROM of 0 to 150 degrees – full extension being 0 degrees and complete flexion reaching 150 degrees. Limitations in either direction indicate stiffness or injury.

ROM exercises are designed to restore or maintain this optimal movement. They involve gently moving the joint through its available range, helping to prevent stiffness, reduce pain, and improve overall joint health. Assessing and tracking ROM is a key indicator of progress during rehabilitation, allowing for adjustments to the exercise program as needed.

Why Perform Elbow ROM Exercises?

Performing elbow Range of Motion (ROM) exercises offers numerous benefits, crucial for both injury recovery and maintaining optimal joint health. These exercises combat stiffness, a common consequence of inactivity or injury, preventing the elbow from becoming locked or restricted in its movement.

Regular ROM exercises enhance flexibility and improve blood circulation around the elbow joint, promoting tissue healing and reducing pain. They also play a vital role in preventing further complications, such as muscle contractures or chronic stiffness, especially after periods of immobilization.

Furthermore, maintaining adequate elbow ROM is essential for performing daily activities – from simple tasks like lifting objects to more complex movements involved in sports or work. Strengthening supporting muscles, alongside ROM exercises, reduces strain on the elbow, accelerating recovery and improving overall function.

Understanding Elbow Anatomy & Movement

This section details the key bones, joints, and movements of the elbow,
explaining how flexion and extension contribute to a 0-150 degree range.
Understanding these factors is vital for effective exercise.

Key Bones & Joints of the Elbow

The elbow’s functionality relies on the harmonious interaction of three primary bones: the humerus (upper arm bone), the radius and ulna (forearm bones). The humerus’s distal end features bony prominences called epicondyles, serving as muscle attachment points. These bones articulate to form the elbow joint, a complex hinge joint enabling flexion and extension.

Crucially, the elbow isn’t a single joint but a combination. The humeroulnar joint, between the humerus and ulna, primarily facilitates flexion and extension. Simultaneously, the humeroradial joint, connecting the humerus and radius, contributes to these movements and allows for forearm rotation. A third component, the superior radioulnar joint, further assists in pronation and supination.

Ligaments provide stability, preventing excessive movement, while muscles surrounding the elbow power its motion. Understanding this anatomical framework is essential for performing elbow range of motion exercises safely and effectively, maximizing benefits and minimizing injury risk.

Elbow Flexion & Extension – Normal Ranges (0-150 degrees)

Normal elbow range of motion (ROM) is defined by the degrees of flexion and extension achievable. Full elbow extension represents 0 degrees – the arm fully straightened. Conversely, complete elbow flexion, bending the arm as much as possible, typically reaches between 130 and 150 degrees. Individual variations can occur, but significant deviations from this range may indicate underlying issues.

Maintaining this ROM is vital for everyday activities, from reaching and lifting to simple tasks like eating. Limited flexion hinders activities requiring bringing the hand towards the shoulder, while restricted extension impacts the ability to straighten the arm fully.

Elbow ROM exercises aim to restore or maintain these optimal angles. Assessing and documenting a patient’s initial ROM is crucial before initiating any exercise program, providing a baseline for tracking progress and ensuring exercises are tailored to individual needs and limitations.

Factors Affecting Elbow ROM

Several factors can influence an individual’s elbow range of motion (ROM). Age plays a role, as flexibility naturally decreases with time. Prior injuries, such as fractures, dislocations, or ligament tears, frequently lead to stiffness and reduced ROM. The presence of arthritis, whether osteoarthritis or rheumatoid arthritis, significantly impacts joint mobility due to inflammation and cartilage damage.

Muscle tightness, particularly in the forearm muscles, can restrict both flexion and extension; Scar tissue formation following surgery or injury can also mechanically limit movement. Furthermore, prolonged immobilization, like after casting, often results in joint stiffness and decreased ROM.

Individual anatomy and genetics can contribute to variations in natural flexibility. Understanding these influencing factors is crucial when designing a personalized exercise program to address specific limitations and optimize recovery.

Elbow Range of Motion Exercises: Basic Movements

These foundational exercises gently restore elbow flexibility,
including simple bending and straightening,
and controlled forearm rotations (pronation and supination) for improved function.

Wrist movements are also included,
as they support overall arm health and tendon recovery.

Elbow Bend and Straighten

This fundamental exercise improves joint flexibility and is a cornerstone of elbow rehabilitation. Begin by sitting or standing comfortably with your arm relaxed at your side. Slowly bend your elbow, bringing your hand towards your shoulder as far as comfortably possible. Hold this bent position for 5-10 seconds, focusing on a gentle stretch without pain.

Next, slowly straighten your elbow, returning your arm to its starting position. Again, hold for 5-10 seconds. Repeat this bending and straightening motion 10-15 times, ensuring smooth, controlled movements. Avoid locking your elbow at the end of the straightening phase; maintain a slight bend.

Focus on performing the exercise within your pain-free range of motion. If you experience any discomfort, reduce the range of movement. This exercise can be performed several times a day to promote improved flexibility and reduce stiffness. It’s a simple yet effective way to maintain or regain elbow function.

Forearm Rotations (Pronation & Supination)

Forearm rotations, encompassing pronation and supination, are crucial for addressing forearm tendon injuries and enhancing overall elbow health. Sit comfortably with your elbow bent at 90 degrees and your forearm supported. Pronation involves turning your palm downwards, while supination rotates your palm upwards.

Slowly rotate your forearm, moving from a palm-up position to a palm-down position, and back again. Perform these rotations smoothly and with control, avoiding any jerky movements. Hold each position for a few seconds to feel a gentle stretch in your forearm muscles.

Repeat this exercise 10-15 times, focusing on maintaining a relaxed grip. This exercise helps improve the range of motion in your forearm and can alleviate tension in the surrounding tendons. It’s particularly beneficial for individuals experiencing pain or stiffness in their forearm or elbow. Remember to stop if you feel any sharp pain.

Wrist Flexion and Extension

Wrist flexion and extension exercises are vital components of a comprehensive elbow rehabilitation program, as they directly impact forearm and elbow function. Begin by sitting comfortably with your forearm supported on a table, palm facing down.

Wrist flexion involves bending your wrist downwards, as if signaling “stop,” while extension straightens your wrist upwards. Perform these movements slowly and deliberately, focusing on controlled motion. Avoid forcing the movement beyond your comfortable range.

Repeat each exercise 10-15 times, ensuring a smooth and fluid motion. These exercises help improve wrist flexibility, strengthen forearm muscles, and reduce strain on the elbow joint. Incorporating these movements can significantly contribute to overall upper limb health and recovery. Stop immediately if you experience any sharp or increasing pain.

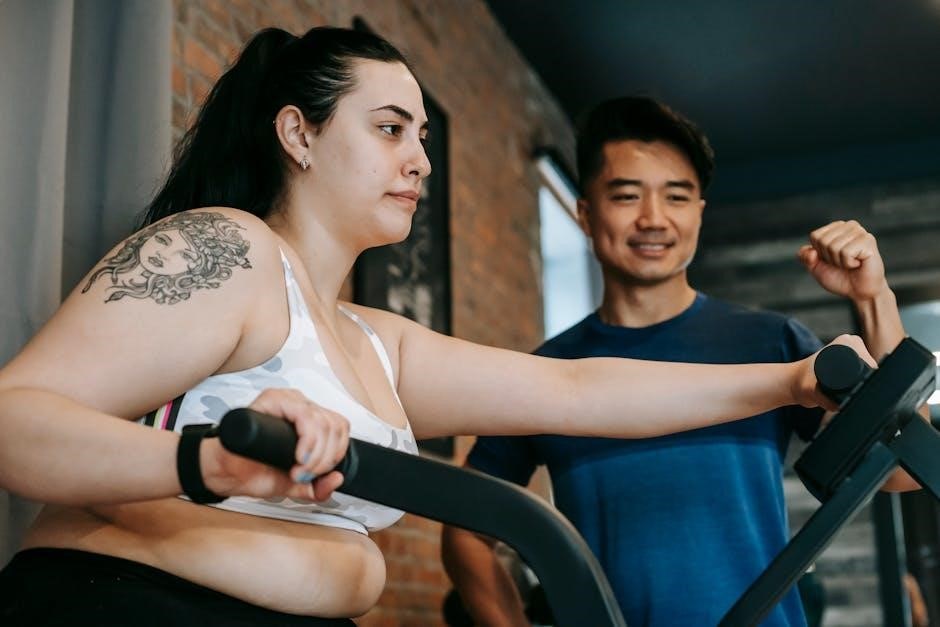
Strengthening Exercises for Supporting Muscles

This section details exercises to fortify forearm muscles, crucial for elbow stability and function.
Strengthening reduces strain and supports recovery,
enhancing overall elbow health and performance.

Exercises include fist squeezes, towel twists, and ball squeezes,
progressively building strength and endurance.

Consistent practice improves grip strength,
vital for daily tasks and preventing re-injury.

Fist Squeeze Exercise

The fist squeeze exercise is a simple yet effective method for strengthening the forearm muscles that directly support elbow function. This exercise is beneficial for individuals aiming to improve their grip strength and overall elbow stability, contributing to a more robust recovery process or preventative maintenance.

To perform the fist squeeze, begin by extending your arm forward, palm facing down. Slowly and deliberately make a fist, squeezing as tightly as you comfortably can. Hold this contracted position for approximately five to ten seconds, focusing on engaging the forearm muscles.

Then, slowly release your fist, extending your fingers fully. Repeat this process 20 to 30 times, completing at least one set per day. For increased difficulty and a more challenging workout, incorporate a stress ball or soft object to squeeze. This adds resistance, further enhancing muscle strengthening.

Remember to listen to your body and avoid any movements that cause pain. Consistency is key to achieving optimal results with this exercise.

Towel Twist Exercise

The towel twist exercise is a valuable component of an elbow rehabilitation program, specifically targeting forearm strength and rotational mobility. This exercise helps improve pronation and supination – the ability to turn your palm up and down – crucial for many daily activities and reducing strain on the elbow joint.

To begin, hold a towel horizontally with both hands, approximately shoulder-width apart. Keep your elbows bent at a 90-degree angle and close to your body. Slowly twist the towel in one direction, as if wringing out water.

Focus on using your forearm muscles to generate the twisting motion, rather than relying on shoulder or arm movement. Repeat this twisting action 10-15 times in one direction, then reverse and repeat in the opposite direction.

Perform 2-3 sets of these twists daily. This exercise can be modified by using a slightly wet towel to increase resistance. Always prioritize controlled movements and stop if you experience any pain.

Ball Squeeze Exercise

The ball squeeze exercise is a simple yet effective method for enhancing grip strength and forearm muscle endurance, directly supporting elbow stability and function. Strengthening the forearm reduces compensatory strain on the elbow joint, aiding in recovery and preventing re-injury.

To perform this exercise, obtain a soft stress ball or a similar compressible object. Hold the ball in your hand, ensuring a comfortable grip. Slowly and deliberately squeeze the ball as tightly as you can, maintaining the squeeze for 5-10 seconds.

Focus on engaging the muscles in your forearm and hand during the squeeze. Release the pressure gradually and repeat the process. Aim for 20 to 30 repetitions per set, completing at least one set daily.

You can increase the difficulty by using a firmer ball or performing the exercise multiple times throughout the day. Listen to your body and stop if you experience any discomfort.

Advanced Elbow ROM Exercises

These exercises build upon basic movements, increasing flexibility and strength.
They include focused stretches for flexion, extension, and forearm rotation,
promoting optimal elbow joint health and function.

Proper form is crucial;
listen to your body and avoid pushing beyond a comfortable range of motion.

Elbow Flexion Stretch

The Elbow Flexion Stretch targets the muscles on the back of your elbow, improving flexibility and range of motion. To perform this stretch, extend your arm straight out in front of you, palm facing down. Gently bend your wrist downwards, pointing your fingers towards the floor.

With your other hand, gently pull your fingers towards your body, feeling a stretch along the back of your elbow and forearm. Hold this stretch for 15-30 seconds, maintaining a steady, comfortable tension. Avoid any sharp or intense pain.

Repeat this stretch 2-3 times on each arm. You can modify the intensity by adjusting the angle of your wrist. Ensure your shoulder remains relaxed throughout the exercise. This stretch is particularly beneficial for individuals experiencing tightness or limited range of motion in elbow flexion. Remember to breathe deeply during the stretch to enhance relaxation and effectiveness.

Caution: If you experience any pain, stop the exercise immediately and consult with a healthcare professional.

Elbow Extension Stretch

The Elbow Extension Stretch focuses on lengthening the muscles at the front of your elbow, promoting full range of motion and reducing stiffness. Begin by raising your arm to shoulder height, bending your elbow at a 90-degree angle, and keeping your palm facing forward.

Gently use your other hand to push your forearm downwards, straightening your elbow further. You should feel a stretch along the front of your elbow and forearm. Hold this position for 15-30 seconds, ensuring the stretch is comfortable and not painful.

Repeat the stretch 2-3 times on each arm. To deepen the stretch, slightly rotate your forearm outwards. Maintain a relaxed shoulder throughout the exercise. This stretch is helpful for individuals with limited elbow extension or those recovering from conditions affecting elbow flexibility. Focus on controlled movements and deep breathing.

Important Note: Stop immediately if you feel any sharp pain and consult a physical therapist if needed.

Forearm/Elbow Stretch (Palm Up/Down)

This stretch targets both forearm and elbow muscles, improving flexibility and addressing tightness. Begin by extending your arm straight out in front of you, with your elbow slightly bent. First, rotate your palm to face upwards.

Using your other hand, gently pull your fingers back towards your body, feeling a stretch along the forearm and the back of your elbow. Hold for 15-30 seconds. Then, rotate your palm to face downwards.

Again, use your other hand to gently pull your fingers back, this time feeling a stretch along the inner forearm and the front of your elbow. Hold for another 15-30 seconds. Repeat this sequence 2-3 times on each arm.

Ensure movements are slow and controlled, avoiding any sharp pain. This stretch is beneficial for those experiencing forearm tendon injuries or limited elbow range of motion. Remember to breathe deeply throughout the exercise.

Creating an Elbow Exercise PDF

Designing an effective PDF requires clear instructions, detailed images, and a user-friendly format. Include essential information like safety precautions and a disclaimer.

Formatting should prioritize readability, utilizing headings, bullet points, and concise language for optimal usability and comprehension.

Essential Information to Include

A comprehensive elbow ROM exercise PDF must prioritize clarity and safety. Begin with a detailed introduction explaining the benefits of these exercises for injury recovery and maintaining joint health. Clearly define elbow flexion and extension, referencing the normal ranges of 0-150 degrees, to establish realistic expectations.

Include a section on elbow anatomy, highlighting key bones and joints, to enhance understanding. Each exercise should have step-by-step instructions accompanied by illustrative images or diagrams. Emphasize proper form to prevent re-injury or strain.

Crucially, incorporate a prominent disclaimer stating that the PDF is not a substitute for professional medical advice. Advise readers to consult a physical therapist before starting any new exercise program, especially if they have pre-existing conditions. Finally, detail potential warning signs – increased pain, swelling – that necessitate immediate medical attention.

Formatting for Clarity & Usability

To maximize user experience, the elbow ROM exercise PDF should employ a clean, organized layout. Utilize clear headings and subheadings to delineate sections, mirroring the article plan. Employ bullet points and numbered lists for exercise instructions, enhancing readability and ease of following.

Incorporate ample white space to prevent visual clutter. Images or diagrams illustrating each exercise are essential, positioned directly alongside the corresponding instructions. Use a consistent font style and size throughout the document.

Consider including a table of contents for quick navigation. Highlight key terms in bold for emphasis. The PDF should be optimized for both on-screen viewing and printing, ensuring legibility in all formats. A logical flow, from introductory information to specific exercises, is paramount for usability.

Safety Precautions & Disclaimer

This elbow ROM exercise PDF is intended for informational purposes only and does not constitute medical advice. Users should consult with a qualified healthcare professional before starting any new exercise program, especially if they have pre-existing conditions.

Always listen to your body and stop immediately if you experience any pain. Perform exercises slowly and with controlled movements. Avoid pushing beyond your current range of motion. Proper warm-up and cool-down are crucial to prevent injury.

The creators of this PDF assume no liability for any injuries sustained while performing these exercises. This document is not a substitute for professional physical therapy. Individuals with acute injuries or significant pain should seek immediate medical attention.

Monitoring Progress & Recognizing Healing

Tracking improvements in pain levels and range of motion is vital.
Reduced discomfort and increased flexibility indicate positive healing.
Consult a physical therapist if progress plateaus or pain worsens.

Signs of Improvement (Reduced Pain, Increased ROM)

Recognizing positive changes is crucial for motivation and adherence to your elbow rehabilitation program. Initially, a noticeable reduction in pain – whether the ache feels less intense, occurs less frequently, or diminishes with activity – signifies progress; Pay attention to pain both at rest and during exercise.

Increased range of motion (ROM) is another key indicator. You should gradually be able to bend and straighten your elbow further without discomfort. Aim for the normal ranges of 0-150 degrees, noting any improvements in elbow flexion and extension.

Improvements aren’t always linear; some days may feel better than others. However, a consistent trend of decreasing pain and increasing ROM over weeks demonstrates effective healing. Documenting your progress – noting pain levels and measured ROM – can provide valuable insights and help you stay on track.

Remember to listen to your body and avoid pushing through sharp or escalating pain.

When to Consult a Physical Therapist

While many elbow issues respond well to home exercises, certain situations necessitate professional guidance. Seek a physical therapist if your pain is severe, persistent, or worsening despite consistent exercise. Sharp, sudden pain, or pain accompanied by swelling, redness, or warmth, requires immediate attention.

If you experience significant difficulty performing daily activities, or if your range of motion remains limited after several weeks of dedicated exercise, a therapist can provide a tailored treatment plan. They can accurately diagnose the underlying cause of your elbow pain and rule out more serious conditions.

A physical therapist can also assess your technique to ensure you’re performing exercises correctly, preventing further injury; They can introduce more advanced exercises and provide manual therapy to address muscle imbalances and joint restrictions. Don’t hesitate to seek professional help – it can significantly accelerate your recovery and optimize your elbow health;

Bylysanne

full body kettlebell workout pdf

Kettlebell training offers a dynamic, full-body approach, blending strength, cardio, and functional movement – often detailed in comprehensive PDF workout programs.

These programs, like the 30-day swing challenge or 3-week plans, focus on exercises such as swings, Turkish get-ups, and goblet squats for effective results.

Kettlebells are versatile tools, suitable for all fitness levels, and can be incorporated into HIIT routines or core-focused sessions, as outlined in various online resources.

What is a Kettlebell?

Kettlebells are distinct from traditional dumbbells, characterized by a cast-iron or steel weight featuring a ball-shaped end and a handle. This unique design, often explored in full body kettlebell workout PDF guides, shifts the center of gravity, demanding greater stabilization and engaging more muscle groups simultaneously.

Unlike fixed-weight dumbbells, the kettlebell’s offset weight challenges your core and improves functional strength. Many PDF resources highlight how this design lends itself to dynamic movements like swings and Turkish get-ups. They aren’t just weights; they’re tools for building power, endurance, and balance.

The kettlebell’s versatility allows for a wide range of exercises, making it a staple in many full body workout routines. Its design encourages proper form and efficient movement patterns, often detailed within instructional PDFs.

Benefits of Kettlebell Training

Full body kettlebell workout PDF programs emphasize numerous benefits, starting with improved cardiovascular fitness. Exercises like kettlebell swings are high-intensity, low-impact, boosting heart rate and endurance. Strength gains are significant, targeting multiple muscle groups concurrently – a key focus in many PDF guides.

Beyond strength, kettlebells enhance functional movement, improving real-world activities. Core strength is dramatically improved due to the constant stabilization required, often detailed in PDF exercise breakdowns. Balance and coordination also see substantial gains.

Many PDF resources highlight kettlebell training’s efficiency; workouts are often shorter yet highly effective. They’re also versatile, adaptable to all fitness levels, and require minimal space, making them ideal for home workouts as outlined in various PDF plans.

Kettlebell Safety Considerations

Full body kettlebell workout PDF programs often include crucial safety advice. Proper form is paramount; incorrect technique can lead to injury. Start with lighter weights and master the movements before increasing the load, as emphasized in many PDF guides.

Warm-up routines are essential, preparing muscles and joints for the demands of kettlebell exercises. Adequate space is vital to avoid collisions, a point frequently noted in PDF workout plans. Listen to your body and stop if you experience pain.

Many PDF resources recommend seeking guidance from a qualified instructor, especially when beginning. Ensure a secure grip and controlled movements throughout each exercise. Prioritize technique over weight to minimize risk, a common theme in comprehensive PDF materials.

Warm-up Routine for Kettlebell Workouts

Full body kettlebell workout PDF guides stress the importance of dynamic stretching and joint mobility to prepare muscles, enhancing performance and preventing injury.

Dynamic Stretching

Dynamic stretching is crucial before a full body kettlebell workout, as highlighted in many PDF guides. Unlike static stretches, dynamic movements prepare your muscles for the demands of the workout, increasing blood flow and range of motion.

Effective dynamic stretches include arm circles, leg swings (forward, backward, and sideways), torso twists, and walking lunges with a twist. These movements mimic the actions performed during kettlebell exercises, priming your body for optimal performance.

Focus on controlled movements through a full range of motion, avoiding bouncing or jerky actions. A proper dynamic warm-up significantly reduces the risk of injury and enhances the effectiveness of your kettlebell training session, as detailed in comprehensive workout plans.

Joint Mobility Exercises

Prior to commencing a full body kettlebell workout – often detailed in PDF programs – incorporating joint mobility exercises is paramount. These movements focus on improving the range of motion in key joints like the ankles, hips, shoulders, and spine.

Examples include ankle circles, hip circles, shoulder rotations, and cat-cow stretches. These exercises lubricate the joints, enhance flexibility, and prepare them for the dynamic movements involved in kettlebell training.

Focus on slow, controlled movements, paying attention to any areas of stiffness or restriction. Improving joint mobility not only reduces the risk of injury but also allows for more efficient and effective kettlebell technique, as emphasized in various workout resources.

Kettlebell Exercises for Lower Body

PDF workout guides highlight lower body exercises like kettlebell swings, goblet squats, lunges, and Romanian deadlifts, building strength and endurance.

These movements effectively target glutes, hamstrings, and quads for a comprehensive lower body workout.

Kettlebell Swings

Kettlebell swings are a cornerstone of many full-body workout PDF programs, celebrated for their high-intensity, low-impact nature. They are a ballistic exercise, meaning they involve explosive movement, engaging multiple muscle groups simultaneously.

Proper form is crucial; the power should originate from the hips, not the arms, creating a dynamic movement that works the posterior chain – glutes, hamstrings, and lower back – alongside the core and shoulders.

Many PDF guides detail swing variations, from American swings (lifting the kettlebell overhead) to Russian swings (stopping at chest height). They are excellent for improving cardiovascular fitness, building strength, and burning calories efficiently. Mastering the swing is often a foundational step in progressing to more complex kettlebell exercises.

Consistent practice, guided by a well-structured program, yields significant results.

Goblet Squats

Goblet Squats, frequently featured in full-body kettlebell workout PDFs, are a fantastic variation of the traditional squat, offering unique benefits. Holding the kettlebell close to your chest – in the “goblet” position – encourages a more upright torso and deeper squat depth.

This positioning naturally promotes better form, making it an excellent exercise for beginners learning proper squat mechanics. It heavily engages the quads, glutes, and core, building lower body strength and stability.

Many PDF programs incorporate goblet squats as a foundational movement, often included in 3-week or 5-day plans. They are easily scalable by adjusting the kettlebell weight, making them suitable for all fitness levels. Proper execution is key to maximizing benefits and preventing injury.

Focus on controlled movements throughout the exercise.

Kettlebell Lunges

Kettlebell Lunges are a staple in many full-body kettlebell workout PDF guides, effectively targeting the legs and glutes while improving balance and coordination. Holding a kettlebell in one or both hands during a lunge increases the intensity and challenges core stability.

Variations include forward lunges, reverse lunges, and walking lunges, each offering a slightly different emphasis. PDF programs often integrate kettlebell lunges into circuits or as part of a longer lower-body sequence.

They are a highly functional exercise, mimicking real-life movements and building unilateral strength – strength on one side of the body at a time. Proper form is crucial; maintain an upright torso and controlled descent. Adjusting the kettlebell’s weight allows for progressive overload.

Focus on controlled movements throughout the exercise.

Romanian Deadlifts with Kettlebell

Romanian Deadlifts (RDLs) with a kettlebell, frequently detailed in full-body workout PDFs, are excellent for strengthening the posterior chain – hamstrings, glutes, and lower back. This exercise emphasizes a hip hinge movement, promoting proper form and preventing lower back strain.

Holding the kettlebell in front of the thighs, slowly hinge at the hips, keeping the back straight and the core engaged. Lower the kettlebell towards the ground, feeling a stretch in the hamstrings. Many PDF guides suggest starting with a lighter weight to master the technique.

RDLs improve flexibility and build strength essential for functional movements. They are often included in programs alongside swings and squats for a comprehensive lower-body workout. Focus on maintaining a neutral spine throughout the exercise.

Controlled movements are key for optimal results.

Kettlebell Exercises for Upper Body

Kettlebell exercises like push presses, rows, curls, and shoulder presses, often found in PDF workout guides, build upper body strength and endurance effectively.

These movements enhance functional fitness.

Kettlebell Push Press

The Kettlebell Push Press is a powerful, compound exercise frequently featured in full body PDF workout programs, targeting shoulders, triceps, and core simultaneously. It builds explosive power and strength, differing from a strict shoulder press by utilizing a slight dip of the knees to generate momentum.

To perform, hold the kettlebell racked at shoulder height. Dip your knees slightly, then powerfully extend your legs and drive the kettlebell overhead, locking out your arms. Control the descent, returning to the racked position.

Proper form is crucial; maintain a tight core and avoid leaning back excessively. This exercise is often included in 5-day workout plans and HIIT routines for its efficiency and calorie burn. Adjust weight as needed for progression.

Kettlebell Rows

Kettlebell Rows are a cornerstone exercise in many full body PDF workout programs, effectively building back strength and improving posture. They target the lats, rhomboids, and biceps, contributing to a balanced physique and functional movement.

To execute, hinge at the hips, keeping your back straight and core engaged. Hold the kettlebell in one hand, letting it hang towards the floor. Pull the kettlebell upwards towards your chest, squeezing your shoulder blades together.

Lower the weight with control; This exercise is often incorporated into 3-week programs and 5-day plans, promoting muscle endurance and strength. Focus on maintaining a neutral spine throughout the movement for optimal results and injury prevention.

Kettlebell Bicep Curls

Kettlebell Bicep Curls are a valuable addition to full body workout PDF guides, targeting the biceps brachii and brachialis muscles for increased arm strength and definition. They offer a unique challenge compared to traditional dumbbell curls due to the kettlebell’s offset center of gravity.

To perform, stand with feet shoulder-width apart, holding the kettlebell with an underhand grip. Keep your elbows close to your body and curl the kettlebell upwards towards your shoulder, squeezing your biceps at the top of the movement.

Slowly lower the weight back to the starting position. These curls are frequently included in 5-day plans and can be modified for beginners by reducing the weight or repetitions.

Kettlebell Shoulder Press

Kettlebell Shoulder Presses are a powerful exercise often featured in comprehensive full body workout PDFs, effectively building shoulder strength and stability. This movement targets the deltoids, trapezius, and triceps, contributing to upper body power and improved posture.

To execute, hold the kettlebell by the horns close to your shoulder, with your elbow bent. Press the kettlebell straight overhead, fully extending your arm, and maintaining a stable core. Lower the weight slowly and controlled back to the starting position.

Variations include single-arm presses for increased core engagement. These presses are commonly integrated into 3-week programs and HIIT routines, enhancing overall strength and conditioning.

Kettlebell Exercises for Core

Kettlebell workouts, detailed in many PDF guides, effectively challenge the core with exercises like Russian twists, windmills, and Turkish get-ups for stability.

Kettlebell Russian Twists

Kettlebell Russian twists are a fantastic core exercise frequently included in full body kettlebell workout PDF programs. They effectively target the obliques, rectus abdominis, and lower back muscles, promoting rotational strength and stability.

To perform, sit on the floor with knees bent and feet slightly elevated. Hold a kettlebell close to your chest and twist your torso from side to side, tapping the kettlebell near the floor on each side.

Maintaining a straight back and engaging your core throughout the movement is crucial. Beginners can start without weight or with a lighter kettlebell, gradually increasing the resistance as their core strength improves. Many PDF guides suggest incorporating this exercise into circuits for a challenging and efficient workout.

Kettlebell Windmills

Kettlebell windmills are a complex yet highly effective exercise often featured in advanced full body kettlebell workout PDF routines. They demand significant core stability, flexibility, and coordination, working the entire body, particularly the obliques, hamstrings, and shoulders.

Begin standing with feet wider than shoulder-width apart, holding a kettlebell overhead with one arm. Hinge at the hips, keeping your back straight and eyes focused on the kettlebell, and lower your body towards the opposite foot.

Maintain a straight arm throughout the movement and return to the starting position. This exercise requires proper form to prevent injury; PDF guides often emphasize mastering the movement with lighter weights before progressing.

Kettlebell Plank Drags

Kettlebell plank drags are a challenging core exercise frequently included in full body kettlebell workout PDF programs, designed to enhance stability and anti-rotation strength. Starting in a high plank position with a kettlebell positioned to one side, the exercise involves dragging the kettlebell across the body to the other side, maintaining a rigid plank.

This movement requires intense core engagement to prevent hip rotation and maintain a straight line from head to heels. It’s a fantastic way to target the obliques, transverse abdominis, and lower back.

PDF guides often recommend starting with a lighter kettlebell and focusing on controlled movements to ensure proper form and prevent lower back strain.

Turkish Get-Ups

Turkish Get-Ups are a complex, full-body exercise often highlighted in full body kettlebell workout PDF guides, demanding coordination, strength, and stability. Beginning lying on your back with a kettlebell extended overhead, the exercise involves transitioning through multiple positions – rolling to one side, posting up on one hand, moving to a lunge, and finally standing.

This movement engages nearly every muscle group, improving shoulder stability, core strength, and overall body control. PDF resources emphasize mastering each segment of the get-up before adding weight.

Progressive overload is key; start with no weight, then a light kettlebell, focusing on smooth, controlled transitions. It’s a cornerstone of functional fitness.

Full Body Kettlebell Workout Programs

Full body kettlebell workout PDF resources offer structured plans, from 3-week programs focusing on swings and get-ups, to 5-day plans for weight loss.

HIIT options are also available.

3-Week Kettlebell Program Overview

This 3-week kettlebell program, often found as a PDF download, is designed to build full-body strength and endurance progressively. The initial week focuses on mastering fundamental movements like the kettlebell swing, goblet squat, and basic Turkish get-up, emphasizing proper form and technique. Workouts are typically shorter, prioritizing learning and muscle activation.

Week two increases the volume and introduces more complex exercises, such as kettlebell lunges and rows, challenging your stability and coordination. Expect longer workout durations and a greater emphasis on cardiovascular fitness. The final week combines elements from the previous weeks, incorporating higher intensity intervals and advanced variations to maximize results.

Core work is integrated throughout the program, utilizing exercises like Russian twists and windmills. The program’s structure allows for adaptation based on individual fitness levels, making it suitable for both beginners and intermediate users.

5-Day Kettlebell Workout Plan

A typical 5-day kettlebell plan, often available as a PDF, structures workouts for comprehensive full-body conditioning. Day one might focus on lower body – swings, goblet squats, and lunges – building foundational strength. Day two shifts to upper body, incorporating push presses, rows, and shoulder presses for muscle development.

Day three is dedicated to core stability, featuring Russian twists, windmills, and plank drags. Day four combines elements from previous days in a circuit-style workout, enhancing cardiovascular fitness. Finally, day five could be a dedicated HIIT session utilizing kettlebell swings and burpees for maximum calorie burn.

Rest days are crucial for recovery. Each workout typically includes a warm-up and cool-down, and weight selection should be adjusted based on individual fitness levels. This plan aims for balanced muscle engagement and improved functional strength.

Kettlebell HIIT Workout

Kettlebell High-Intensity Interval Training (HIIT), frequently detailed in PDF workout guides, is a powerful method for fat loss and cardiovascular improvement. A typical session alternates between short bursts of intense exercise and brief recovery periods.

A common structure involves 30-60 seconds of work, such as kettlebell swings, followed by 15-30 seconds of rest. Other exercises include burpees with a kettlebell, high pulls, and alternating lunges. These circuits are repeated for 20-30 minutes.

HIIT maximizes calorie expenditure and boosts metabolism. Many PDF programs suggest 2-3 HIIT sessions per week, combined with strength training. Proper form is vital to prevent injury, and modifications can be made for different fitness levels.

Workout Variations & Progression

PDF guides often detail how to adjust kettlebell weight and modify exercises for beginners, while advanced techniques challenge experienced users for continuous progress.

Adjusting Weight for Progression

Progressive overload is key to continued improvement with kettlebell training, and adjusting the weight is a primary method. Many full body kettlebell workout PDF guides emphasize starting with a manageable weight, focusing on proper form before increasing the load.

Beginners should master movement patterns with lighter kettlebells, gradually increasing the weight as strength and technique improve. A general rule is to increase weight only when you can comfortably perform all repetitions with good form. Small increments are best – avoid large jumps that compromise technique.

PDF programs often suggest specific weight ranges for different exercises and fitness levels. Listen to your body; don’t force progression if you experience pain or fatigue. Remember, consistent, controlled progression is more effective than rushing to heavier weights.

Modifying Exercises for Beginners

Full body kettlebell workout PDF resources frequently highlight the importance of modifications for beginners. Starting with scaled versions of exercises ensures proper form and prevents injury. For example, kettlebell swings can be modified by reducing the range of motion or performing American swings (between the legs) initially.

Goblet squats can be simplified by using a lighter kettlebell or performing box squats for added stability. Lunges can be modified by shortening the stride or using a chair for balance. PDF guides often demonstrate these modifications visually.

Prioritize mastering the movement pattern before adding weight or complexity. Don’t hesitate to regress to easier variations if needed, focusing on controlled movements and engaging the correct muscle groups.

Advanced Kettlebell Techniques

Full body kettlebell workout PDF programs for advanced users often introduce complex movements beyond the basics. These include advanced swing variations, single-leg deadlifts with heavier weights, and more challenging core exercises like advanced windmills or complex Turkish get-up flows.

Flow drills, combining multiple kettlebell exercises seamlessly, are common in advanced routines. Mastering these requires significant strength, coordination, and body awareness. PDF guides will detail proper technique and progressions.

Consider incorporating plyometric kettlebell exercises, like jump squats or snatches, to enhance power and explosiveness. Always prioritize form and control, even when increasing intensity.

Cool-down and Recovery

PDF workout plans emphasize static stretching and foam rolling post-workout to reduce muscle soreness and improve flexibility, aiding in optimal recovery.

Static Stretching

Static stretching is a crucial component of cool-down routines following a full body kettlebell workout, often detailed within PDF guides. Holding each stretch for 20-30 seconds allows muscles to lengthen and recover, improving flexibility and reducing post-exercise soreness.

Focus on major muscle groups utilized during the workout, including hamstrings, quads, glutes, chest, shoulders, and back. Examples include hamstring stretches, quad stretches, triceps stretches, and shoulder cross-body stretches.

Proper static stretching enhances range of motion, prevents muscle imbalances, and supports long-term joint health. Integrating these stretches, as prescribed in many workout PDFs, is vital for maximizing the benefits of kettlebell training and minimizing the risk of injury.

Foam Rolling Techniques

Foam rolling is a self-myofascial release technique, often included as a recovery method in full body kettlebell workout PDFs. It helps alleviate muscle tension, improve blood flow, and enhance flexibility post-workout. Target major muscle groups like quads, hamstrings, glutes, back, and shoulders.

Apply moderate pressure and slowly roll over each muscle group for 30-60 seconds, pausing on tender spots. Techniques include broad sweeping motions and pinpoint rolling.

Incorporating foam rolling, as detailed in many recovery sections of workout PDFs, complements static stretching, promoting faster muscle recovery and reducing the risk of delayed onset muscle soreness (DOMS). Consistent foam rolling supports optimal performance and injury prevention.

Resources & Further Learning

Explore numerous PDF guides and thriving online communities for deeper kettlebell knowledge, workout plans, and technique refinement.

Access 52 kettlebell exercises and detailed programs to enhance your full-body training journey.

Recommended Kettlebell PDF Guides

Numerous downloadable PDF guides offer structured kettlebell workout programs for all levels. Many focus on full-body routines, incorporating exercises like swings, goblet squats, and Turkish get-ups, providing detailed instructions and progressions.

Look for guides that emphasize proper form and safety, crucial for preventing injuries. Some PDFs specialize in specific goals, such as fat loss, muscle building, or improved conditioning. A 30-day kettlebell swing workout PDF is popular for rapid fat shredding, while others present comprehensive 3-week programs;

Consider resources detailing 52 kettlebell exercises, offering a vast library to build varied routines. These guides often include workout plans, allowing you to tailor your training to your individual needs and fitness level. Always prioritize guides from reputable sources to ensure accuracy and effectiveness.

Online Kettlebell Communities

Engaging with online kettlebell communities provides access to a wealth of knowledge, support, and workout ideas, often complementing PDF guides. These platforms allow users to share routines, ask questions, and receive feedback on form, enhancing learning and motivation.

Many communities feature dedicated threads for full-body kettlebell workouts, with members posting their favorite programs and modifications. You can find discussions on 3-week plans, HIIT routines, and technique tips for exercises like swings and Turkish get-ups.

These forums are invaluable for discovering new exercises, troubleshooting challenges, and staying inspired. Sharing experiences and learning from others fosters a supportive environment, accelerating progress and ensuring safe, effective training. Active participation can significantly enhance your kettlebell journey.

Bylysanne

aastra telephone user guide

Aastra Telephone User Guide: An Overview

This guide details Aastra phone setup, including models like the 6757i, and explores features like call forwarding and voicemail access․
It also covers troubleshooting common issues․

Aastra phones, now Mitel, represent a robust communication solution for businesses, offering a diverse range of IP phones and systems․ This guide focuses on understanding and utilizing Aastra’s features, particularly the popular 6757i model․ These phones are designed for reliability and scalability, integrating seamlessly into various network infrastructures․

Key benefits include advanced call handling capabilities, user-friendly interfaces, and support for unified communications․ The Ericsson Dialog 4223, while a predecessor, shares foundational principles applicable to Aastra systems․ Understanding the keypad layout, display information, and soft key functions is crucial for efficient operation․ Resources like the MX ONE TSE label templates aid in streamlined deployment and management within a business environment․ This overview will prepare you to effectively utilize your Aastra phone system․

Understanding Aastra Phone Models

Aastra offered a variety of phone models, including the 6751i, 6753i, 6755i, M670i, and the widely used 6757i․ Each model caters to different user needs and functionalities․ The 6757i, detailed in its specific user guide, is a SIP IP phone known for its comprehensive feature set․ Older systems, like the Ericsson Dialog 4223, demonstrate the evolution of Aastra’s design philosophy․

MX ONE TSE systems support these phones, with label templates available for easy identification and configuration․ Key components include a speakerphone, line keys, and a handset․ Understanding the differences between models – such as the number of programmable function keys (like the four on the Dialog 7106a) – is vital for optimal use․ These phones prioritize clear audio and efficient call management within a business context․

Setting Up Your Aastra Phone

Initial setup involves activation and network connection (SIP configuration), often via a web interface like http://192․168․0․4/user/․ User login details are essential․

Initial Phone Setup & Activation

Beginning with your Aastra phone requires careful attention to detail․ Ensure the device is physically connected to a power source and network․ The Aastra 6757i, for example, benefits from a detailed user guide for button configuration․ Activation typically involves obtaining necessary SIP credentials from your service provider – a username and password crucial for registration․

Accessing the phone’s web interface, often through a browser using the phone’s IP address (like http://192․168․0․4/user/), is a key step․ Here, you’ll input these credentials․ Correct configuration ensures the phone properly registers with the network․ Following successful registration, the phone will display its status and allow you to begin making and receiving calls․ Refer to the provided documentation, such as the MX ONE TSE label templates, for assistance with labeling and identifying phone features․

Connecting to the Network (SIP Configuration)

Successful Aastra phone operation hinges on correct SIP configuration․ This process establishes a connection to your VoIP service provider․ You’ll need specific SIP parameters, including the SIP server address, port number, and your unique SIP username and password․ These details are provided by your service provider, not pre-configured on the phone․

Access the phone’s web interface – typically via a web browser using the phone’s IP address – to enter these settings․ Navigate to the SIP settings section and carefully input the provided information․ Ensure accuracy, as even minor errors can prevent registration․ The Aastra 6757i user guide offers detailed instructions․ After saving the configuration, the phone will attempt to register․ Successful registration is indicated by a status change on the phone’s display․ Datasheet MX ONE TSE RevL․pdf provides further context․

User Login and Password Management

Securing your Aastra phone requires diligent user login and password management․ Default administrator credentials should be changed immediately upon initial setup to prevent unauthorized access․ Access the phone’s web interface using the administrator username and password․ Navigate to the user management section to create individual user accounts with unique credentials․

Strong passwords – a combination of uppercase and lowercase letters, numbers, and symbols – are crucial․ Regularly review and update passwords to maintain security․ The Aastra 6757i user guide details the process for managing user accounts and permissions․ Consider implementing password complexity requirements․ Remember to document user credentials securely, separate from the phone itself․ Proper management safeguards your communication system and prevents potential misuse․

Key Features and Functionality

Aastra phones offer essential features, including call handling, conferencing, redial, and volume control․ These functionalities enhance communication and streamline daily operations effectively․

Making and Receiving Calls

Initiating a call on your Aastra phone is straightforward․ Simply enter the desired phone number using the keypad and press the send or call button․ The display screen will indicate the call’s progress, showing dialing, connecting, and the call duration․ Receiving incoming calls is equally simple; the phone will ring, and the display will show the caller ID if available․

To answer an incoming call, press the answer or speakerphone key․ You can also answer using a headset if connected․ During a call, you have access to various features, such as hold, transfer, and mute․ The phone’s interface provides clear visual cues for call status․ Remember to consult the Aastra 6757i User Guide for specific button mappings and advanced calling options․ Proper usage ensures optimal call quality and functionality, maximizing your communication experience․

Call Hold, Transfer, and Conference

Placing a call on hold is easily achieved using the dedicated hold button on your Aastra phone․ This allows you to temporarily pause the call while attending to other matters․ Transferring a call involves connecting the caller to another extension․ Initiate the transfer by pressing the transfer button, entering the extension number, and confirming the transfer․

Conference calling enables you to connect multiple parties on a single call․ Typically, you would place the first call, then use the conference button to add additional participants․ The Aastra system supports a defined number of concurrent conference attendees․ Refer to the Aastra 6757i User Guide for detailed instructions and limitations․ Mastering these features enhances collaboration and streamlines communication workflows, improving overall productivity․

Redialing and Recent Calls History

Redialing the last number dialed on your Aastra phone is straightforward․ Simply press the redial button – often labeled with an icon resembling a curved arrow or the number ‘4’ with ‘P2’ – to quickly reconnect․ Navigational keys (6) allow selection from a list of recently dialed numbers․

Accessing the recent calls history provides a comprehensive log of both incoming and outgoing calls․ This history typically displays the date, time, and duration of each call, facilitating follow-up and record-keeping․ The number of entries stored in the call history may be configurable․ Consult the Aastra documentation for specific details regarding history length and management options․ Efficiently utilizing these features saves time and improves call management․

Volume Control and Mute Function

Adjusting the volume on your Aastra phone is crucial for clear communication․ Dedicated volume control keys, often located on the front or side of the handset, allow you to increase or decrease the speaker volume during a call․ Some models also offer volume adjustment for the ringer․ Precise control ensures optimal audio levels for various environments․

The mute function instantly silences your microphone, preventing the other party from hearing your side of the conversation․ This is invaluable for private discussions or minimizing background noise․ A dedicated ‘Mute’ key, often clearly labeled, toggles the mute function on and off․ An indicator light typically confirms when the mute function is active, ensuring privacy and professional call handling․

Navigating the Phone Interface

Understanding the keypad layout, display screen information, and soft key functions is essential for efficient Aastra phone operation and accessing features․

Understanding the Keypad Layout

The Aastra phone keypad is designed for intuitive operation, featuring numeric keys for dialing, along with dedicated function keys․ Key ‘4 P2’ initiates redial, allowing selection of recent numbers via navigation keys (6)․
Line keys (9) provide quick access to frequently called numbers or services․ The keypad also includes keys for common functions like hold, transfer, and conference calling․

Understanding the arrangement of these keys streamlines call management․ The navigation keys facilitate menu browsing and option selection on the display screen․
Refer to the Aastra 6757i User Guide for detailed information on specific button configurations and programmable key assignments․ Familiarity with the keypad layout enhances overall phone usability and efficiency․

Display Screen Information

The Aastra phone’s display screen provides crucial call and phone status information․ It typically shows the current time, date, and dialed or received number․
An indicator (3) displays the phone’s operational state – active call, on hold, or available․
The screen also presents menu options and settings, navigable using the keypad․

During a call, the display shows call duration and available functions like mute or transfer․
It may also indicate incoming calls or voicemail messages․ The screen’s clarity and information density are designed for quick comprehension․
Consult the Aastra 6757i User Guide for specifics on interpreting screen icons and messages․ Understanding the display enhances efficient phone operation and troubleshooting․

Soft Keys and Their Functions

Aastra phones utilize soft keys – programmable buttons flanking the display screen․ Their functions dynamically change based on the current phone state or menu selection․ These keys offer quick access to frequently used features, eliminating complex navigation․
Common functions include call transfer, conference calling, and accessing the phone’s menu․

The Ericsson Dialog 4223, a related system, features programmable function keys for speed dial or service access․
Refer to the Aastra 6757i User Guide for a detailed mapping of soft key functions․ Understanding soft key operation significantly streamlines phone usage․ The Aastra interface is designed for intuitive control, and mastering these keys is essential for maximizing productivity․

Advanced Features

Explore speed dial programming, Do Not Disturb mode, and versatile call forwarding options․ Efficiently manage voicemail and customize your Aastra phone experience․

Speed Dial Programming

Speed dial programming on your Aastra phone streamlines calling frequently contacted numbers․ This feature allows quick access without manually entering digits each time․ To program a speed dial entry, navigate through the phone’s interface, typically using the navigation keys (often labeled as up, down, left, and right)․ Access the speed dial menu, often found within the settings or contacts section․

You’ll then be prompted to select an available speed dial slot – these are usually numbered․ Enter the phone number you wish to assign to that slot․ Some Aastra models allow you to associate a name with the number for easier identification․ Save the entry, and you can now dial that number by pressing and holding the corresponding speed dial key․ Remember to consult your specific Aastra model’s user guide (like the 6757i guide) for precise instructions, as menu structures can vary․

Do Not Disturb (DND) Mode

Activating Do Not Disturb (DND) mode on your Aastra phone silences incoming calls, providing uninterrupted time․ This feature is ideal for meetings, focused work, or personal time․ Accessing DND typically involves navigating the phone’s menu system, often through a ‘Settings’ or ‘Features’ option․ Look for a DND toggle or setting and enable it․

When DND is active, incoming calls will generally be diverted to voicemail or, depending on your system configuration, may receive a busy signal․ Some Aastra models allow customization of DND behavior, such as allowing calls from specific numbers to bypass the setting․ To deactivate DND, simply return to the DND menu and disable the feature․ Refer to your Aastra phone’s user guide for specific instructions tailored to your model, ensuring proper functionality and understanding of its settings․

Call Forwarding Options

Aastra phones offer versatile call forwarding capabilities, allowing you to redirect incoming calls to another extension, an external phone number, or directly to voicemail․ Accessing these options usually involves navigating the phone’s menu, often under ‘Features’ or ‘Settings’․ You’ll typically find options for ‘Always Forward’, ‘Forward if Busy’, and ‘Forward if No Answer’․

‘Always Forward’ sends all calls to the designated number․ ‘Forward if Busy’ redirects calls only when your line is already in use․ ‘Forward if No Answer’ forwards calls if you don’t answer within a specified timeframe․ To configure, enter the destination number and select the desired forwarding condition․ Remember to deactivate forwarding when no longer needed to avoid missed calls․ Consult your Aastra model’s user guide for precise instructions and any specific configuration details related to your phone system․

Voicemail Access and Management

Accessing your voicemail on an Aastra phone typically involves pressing a dedicated voicemail key, often indicated by a cassette icon or a similar symbol․ You may be prompted to enter a password or PIN for security․ Once authenticated, you’ll be guided through a voice menu system for managing your messages․

Common options include listening to new voicemails, reviewing saved messages, deleting unwanted messages, and recording a personalized greeting․ The menu structure can vary depending on your specific phone model and service provider․ Some Aastra systems allow voicemail access via a web interface or a dedicated application․ Regularly check your voicemail settings to ensure your greeting is current and your mailbox is adequately protected with a strong password․ Refer to your system administrator or Aastra documentation for detailed instructions․

Troubleshooting Common Issues

Common problems include no dial tone, poor audio, and network registration failures․ Solutions involve checking connections, configurations, and potentially contacting support personnel․

No Dial Tone Troubleshooting

Experiencing no dial tone with your Aastra phone? Several factors could be at play․ First, meticulously check the physical connection of the telephone line to the phone itself, ensuring it’s securely plugged in․ Verify the cable isn’t damaged․ Next, confirm the phone is properly powered on and displaying a functional screen․

If the physical connections are sound, investigate network connectivity․ For SIP-based Aastra phones, a lack of network access prevents registration and, consequently, a dial tone․ Confirm your network connection is active and the phone has obtained a valid IP address․

Review your SIP configuration settings, ensuring they accurately reflect your service provider’s requirements․ Incorrect settings will prevent successful registration․ Finally, if issues persist, consult your service provider or Aastra support for further assistance, providing details about your setup and troubleshooting steps taken․

Poor Audio Quality Solutions

Experiencing muffled, distorted, or choppy audio on your Aastra phone? Begin by checking your headset or handset for any physical obstructions․ Ensure the earpiece and microphone are clean and free from debris․ Next, verify the volume level is appropriately adjusted – too low or too high can both cause issues․

Network congestion significantly impacts VoIP audio quality․ If using a wireless connection, try moving closer to the access point or switching to a wired connection for improved stability․ Examine your network bandwidth; insufficient bandwidth leads to packet loss and degraded audio․

Investigate potential interference from other electronic devices․ Finally, confirm your Aastra phone’s firmware is up-to-date, as updates often include audio optimization improvements․ If problems continue, contact your IT administrator or Aastra support․

Phone Not Registering to Network

If your Aastra phone fails to register, the first step is verifying its network connection․ Ensure the Ethernet cable is securely connected to both the phone and the network port․ Confirm the port has network activity – a blinking light usually indicates connectivity․

Double-check the phone’s SIP settings, including the proxy server address, username, and password․ Incorrect credentials are a common cause of registration failures․ Access these settings through the phone’s interface or your phone system’s administration portal;

Verify the phone’s MAC address is authorized within your VoIP system․ Some systems require explicit MAC address registration․ Finally, reboot both the phone and your network equipment (router, switch) to refresh the connection․ If issues persist, consult your IT administrator․

Resources and Support

Access detailed Aastra 6757i guides, MX ONE TSE label templates, and relevant Ericsson Dialog 4223 documentation for comprehensive assistance and troubleshooting․

Aastra 6757i User Guide Details

The Aastra 6757i SIP IP Phone User Guide provides extensive information regarding the configuration of its programmable keys․ This documentation details how to customize function settings for efficient call handling․ Users can find instructions on utilizing the phone’s keypad, understanding the display screen information, and mastering the soft key functionalities․

Specifically, the guide explains how to program speed dial entries for quick access to frequently called numbers․ It also covers essential operations like redialing and accessing the recent calls history․ Furthermore, the Aastra 6757i guide offers clear instructions on adjusting volume levels and utilizing the mute function during calls․ The guide also references resources like http://192․168․0․4/user/modules/videosel/aastra․php?uSIPUSERNAME for video tutorials․

MX ONE TSE Label Templates

The MX ONE TSE label templates, available as a downloadable PDF (Datasheet_MX_ONE_TSE_RevL․pdf), are designed for clear phone identification within an Aastra system․ These templates provide printable designation labels specifically tailored for the Aastra 6700i series, encompassing models like the 6751i, 6753i, 6755i, and M670i․

Utilizing these templates ensures consistent labeling, aiding in efficient phone management and troubleshooting․ They facilitate easy identification of phone extensions and assigned users․ The document offers pre-formatted labels, streamlining the labeling process and minimizing errors․ These templates are a valuable resource for system administrators responsible for maintaining a large Aastra phone deployment, ensuring a well-organized and easily manageable communication infrastructure․

Ericsson Dialog 4223 User Guide Relevance

While focused on the Ericsson Dialog 4223 Professional system telephone, this user guide offers transferable knowledge applicable to understanding general telephony concepts relevant to Aastra phone systems․ The Ericsson guide details fundamental features like using the keypad, navigating menus, and utilizing basic call functions – skills universally applicable across most IP phone platforms․

Specifically, the guide’s explanation of mute functions, speakerphone operation, and accessing services provides a foundational understanding․ Although interface elements differ, the core principles of call handling remain consistent․ Users familiar with the Ericsson Dialog 4223 will find the transition to an Aastra phone smoother, possessing a pre-existing grasp of essential telephone functionalities and terminology․ It’s a useful resource for building a broader telephony skillset․

Bylysanne

minky blanket washing instructions

Minky blankets, celebrated for their incredibly soft, velvety texture, are a popular choice for comfort and luxury. Crafted from polyester, these blankets offer a plush feel, ideal for all ages.

What is Minky Fabric?

Minky fabric is a remarkably soft, plush synthetic textile primarily composed of 100% polyester. It’s renowned for its velvety texture, achieved through a specialized weaving process that creates tiny, raised fibers. This results in a luxurious feel against the skin, making it exceptionally comforting. Originally favored for baby items due to its hypoallergenic qualities, minky’s appeal has broadened significantly.

Available in diverse styles – smooth, dotted (cuddle minky), and patterned – it’s a versatile material. High-quality minky blankets are crafted with precision, utilizing superior polyester fibers and advanced sewing techniques to ensure lasting softness and durability. It’s a go-to choice for those prioritizing both comfort and quality.

Why Minky is Popular for Blankets

Minky fabric’s immense popularity for blankets stems from its unparalleled softness and comforting texture. The plush, velvety feel provides a sense of security and warmth, making it ideal for all ages, from infants to adults. Its lightweight yet cozy nature ensures comfortable use year-round. Beyond comfort, minky is durable and relatively easy to care for, resisting wear and tear.

Furthermore, minky is hypoallergenic, a significant benefit for individuals with sensitivities. The luxurious quality elevates the blanket experience, offering a touch of indulgence. Many seek minky for weighted blankets, appreciating its ability to enhance the calming effect.

Understanding Minky Fabric Types

Minky comes in diverse textures – smooth, knitted, and dotted (cuddle minky) – each offering a unique feel, impacting washing needs and overall blanket comfort.

Smooth Minky (Velvet Minky)

Smooth minky, also known as velvet minky, boasts a particularly plush and velvety surface due to its densely packed, raised fibers. This luxurious texture, while incredibly soft, requires gentle handling during washing to maintain its signature feel. Because of the delicate nature of these fibers, it’s crucial to avoid harsh detergents or abrasive washing techniques.

The raised nap can become matted or crushed with rough treatment, diminishing the blanket’s softness. Therefore, a gentle cycle with cool water and a mild detergent is paramount. Regular, careful washing will help preserve the beautiful texture and comforting qualities of your smooth minky blanket for years to come.

Knitted Minky

Knitted minky differs from smooth minky with its distinct, textured surface created by a knit construction. While still incredibly soft, this type of minky can be more prone to stretching or losing its shape during washing. Gentle care is essential to prevent distortion and maintain its cozy structure.

When washing knitted minky, prioritize a cool, delicate cycle and a mild detergent. Avoid vigorous agitation or wringing, as this can damage the knit fibers; Laying flat to dry is highly recommended to prevent stretching, preserving the blanket’s original form and luxurious softness for continued enjoyment.

Dot Minky (Cuddle Minky)

Dot minky, also known as cuddle minky, features a raised, dotted texture that adds extra plushness and visual appeal. This fabric is exceptionally soft and comforting, making it a favorite for baby blankets and comforting throws. However, the raised dots require careful washing to prevent matting or damage.

To maintain the loft and softness of dot minky, use a gentle cycle with cool water and a mild detergent. Avoid harsh chemicals or bleach. Tumble drying on low heat with dryer balls can help restore the fluffiness, but air drying is always the safest option to prevent overheating and preserve the fabric’s unique texture.

Pre-Washing Precautions

Before washing, always check the blanket’s label for specific instructions and perform a colorfastness test to prevent dye bleeding and maintain quality.

Checking the Blanket’s Label

The care label is your first guide! Always meticulously examine the blanket’s label before attempting any washing procedure. Manufacturers often provide specific instructions tailored to the minky fabric and construction of that particular blanket. These instructions might detail acceptable water temperatures, recommended detergents, and drying methods. Ignoring these guidelines could lead to irreversible damage, such as matting, pilling, or color fading.

Pay close attention to symbols indicating whether machine washing is permissible, or if hand washing is required. Some minky blankets, especially those with embellishments or weighted fillings, may necessitate professional cleaning. Adhering to the label’s recommendations ensures the longevity and continued softness of your cherished minky blanket.

Colorfastness Test

Before the first wash, perform a colorfastness test! This simple precaution prevents disastrous dye transfer. Dampen a clean, white cloth and gently rub it on a hidden area of the blanket – a corner or seam is ideal. Observe the cloth carefully. If any color transfers to the white cloth, it indicates the dye isn’t fully set and could bleed during washing.

If bleeding occurs, consider hand washing the blanket separately in cold water with a mild detergent. Alternatively, a color-catching sheet added to the wash cycle can help absorb loose dyes. Ignoring this test risks staining other items and ruining the blanket’s vibrant appearance.

Washing Minky Blankets: Machine Washing

Machine washing is convenient, but requires care! Use cold water, a gentle cycle, and mild detergent to preserve the minky’s softness and prevent damage.

Water Temperature Guidelines

Maintaining the integrity of minky fabric hinges on using the correct water temperature during washing. Always opt for cold water when laundering your minky blankets. Hot water can cause the polyester fibers to shrink or become damaged, altering the blanket’s incredibly soft texture and overall shape.

Warm water, while seemingly gentler than hot, still poses a risk of fading colors and weakening the fabric over time. Cold water effectively cleans the blanket without compromising its luxurious feel. Consistent use of cold water will significantly extend the lifespan and maintain the plushness of your cherished minky blanket.

Detergent Selection (Mild Detergents Only)

Choosing the right detergent is crucial for preserving the softness and quality of your minky blanket. Harsh chemicals and strong detergents can strip the fabric of its plush texture and cause discoloration. Therefore, always select a mild, gentle detergent specifically designed for delicate fabrics.

Avoid detergents containing bleach, fabric softeners, or enzymes, as these can damage the polyester fibers. A fragrance-free and dye-free option is ideal to minimize potential irritation and maintain the blanket’s original color. Using a mild detergent ensures a thorough clean without compromising the luxurious feel of your minky blanket.

Washing Cycle Selection (Gentle Cycle)

Selecting the appropriate washing cycle is paramount when cleaning your minky blanket. A gentle cycle is absolutely essential to prevent damage to the delicate polyester fibers. This cycle uses slower agitation and a shorter spin speed, minimizing wear and tear on the fabric.

Avoid using normal or heavy-duty cycles, as these can cause excessive friction and potentially lead to pilling or matting. Ensure the water level is sufficient to allow the blanket to move freely during washing. A gentle cycle, combined with a mild detergent, will effectively clean your minky blanket while preserving its luxurious softness.

Avoiding Fabric Softeners and Bleach

Fabric softeners and bleach are detrimental to the integrity of minky fabric and should be strictly avoided during the washing process. Fabric softeners coat the polyester fibers, reducing their inherent softness and causing them to become less plush over time. Bleach, even diluted, can discolor and weaken the fibers, leading to irreversible damage.

Instead of fabric softener, consider using dryer balls during the drying phase to naturally soften the blanket and reduce static cling. For stain removal, opt for gentle, color-safe stain removers specifically designed for delicate fabrics, always testing in an inconspicuous area first.

Washing Minky Blankets: Hand Washing

For delicate care, gently hand wash minky blankets in cool water with a mild detergent, avoiding harsh scrubbing to preserve the fabric’s softness.

Best Practices for Hand Washing

Begin by filling a clean tub or sink with cool water and adding a small amount of mild, liquid detergent – specifically formulated for delicates is best. Submerge the minky blanket, gently agitating the water to distribute the detergent evenly. Avoid vigorous scrubbing or twisting, as this can damage the fibers and cause pilling.

Allow the blanket to soak for approximately 15-20 minutes, then carefully drain the soapy water. Rinse thoroughly with cool, clean water until all traces of detergent are removed. To avoid stretching or distorting the blanket’s shape, gently press out excess water – do not wring! Finally, roll the blanket in a clean, dry towel to absorb remaining moisture before proceeding to drying.

Drying Minky Blankets

Drying minky requires gentle methods; tumble drying on low heat or air drying are preferred to maintain softness and prevent damage to the delicate fibers.

Tumble Drying on Low Heat

When tumble drying your minky blanket, always prioritize a low heat setting. High heat can melt or damage the delicate polyester fibers, resulting in a loss of the signature softness and potentially altering the texture. Consider adding dryer balls – wool or plastic – to the cycle.

These help to fluff the fabric and improve air circulation, leading to a more even and efficient drying process. Regularly check the blanket’s dryness, removing it promptly once it’s fully dried to avoid over-drying and potential shrinkage. A slightly damp minky blanket can also be air-dried to finish.

Air Drying Methods

Air drying is a gentle alternative to machine drying, preserving the luxurious softness of your minky blanket. Lay the blanket flat on a clean, dry surface, or hang it over several sturdy clotheslines to distribute the weight evenly. Avoid direct sunlight, as prolonged exposure can cause fading.

Ensure good air circulation in the drying area to speed up the process. Gently fluff the blanket periodically while it’s drying to help maintain its loft and prevent it from becoming flattened. This method is particularly suitable for delicate or heavily textured minky fabrics.

Avoiding High Heat

High heat is the enemy of minky fabric! It can cause the polyester fibers to melt, resulting in irreversible damage to the blanket’s plush texture. Whether tumble drying or using an iron, always opt for the lowest heat setting possible. Excessive heat leads to matting, shrinking, and a generally worn appearance.

Even seemingly low heat settings on some dryers can be too intense for delicate minky. Prioritize air drying whenever feasible to completely eliminate the risk of heat damage, ensuring your blanket remains wonderfully soft and cozy for years to come.

Restoring Minky’s Softness

To revive minky’s plush feel, use dryer balls during drying or gently brush the fabric after washing, fluffing the fibers and restoring softness.

Using Dryer Balls

Dryer balls are a fantastic way to restore the incredible softness of your minky blanket after washing. Unlike fabric softeners – which should be avoided as they coat the fibers – dryer balls physically fluff and separate the fabric as it tumbles. This action helps to revive the raised fibers that give minky its signature plush texture.

Wool or plastic dryer balls are both effective; using several balls (typically 3-6) will maximize the effect. They also help to reduce drying time, which is beneficial for delicate fabrics like minky; Remember to check the dryer balls periodically for wear and tear, replacing them as needed to maintain optimal performance.

Brushing the Fabric

For an extra boost in softness, gently brushing your minky blanket after drying can work wonders! Use a soft-bristled brush – a pet brush designed for long fur works exceptionally well – and brush in the direction of the fabric’s nap. This helps to lift and separate the fibers, restoring that luxurious, velvety feel.

Be gentle; avoid harsh scrubbing, as this could damage the delicate minky fibers. Brushing is particularly effective for areas that may have become flattened during washing or storage. Regular, light brushing will help maintain the blanket’s plushness over time, keeping it wonderfully soft.

Dealing with Specific Issues

Addressing stains and pilling requires gentle methods to preserve minky’s softness. Prompt stain removal and careful pilling management are key for longevity.

Removing Stains from Minky

Immediate action is crucial when dealing with stains on minky fabric. Gently blot – never rub – the affected area with a clean, damp cloth. Avoid harsh chemicals like bleach, as they can damage the delicate fibers. For mild stains, a diluted solution of mild detergent and water can be effective.

Test the solution on an inconspicuous area first to ensure colorfastness. Rinse thoroughly with cool water, and gently squeeze out excess moisture. Stubborn stains might require a specialized fabric stain remover designed for delicate materials, always following the product’s instructions carefully. Remember, patience and a gentle approach are vital to preserving the minky’s plush texture.

Addressing Pilling

Pilling is a common occurrence with minky fabric, resulting from friction during use and washing. It doesn’t indicate damage, but can affect the blanket’s appearance. Avoid pulling at pills, as this can snag the fibers. Instead, use a fabric shaver or a sweater comb to gently remove them.

Regular, gentle washing and avoiding harsh detergents can minimize pilling. Tumble drying on low heat with dryer balls also helps to fluff the fibers and reduce pilling. Consistent care will maintain the minky’s soft texture and prevent excessive pill formation, extending the blanket’s lifespan.

Long-Term Minky Blanket Care

To preserve your minky blanket’s softness, store it in a breathable bag and wash it infrequently, only when visibly soiled or needing freshening.

Storage Recommendations

Proper storage is crucial for maintaining the luxurious feel of your minky blanket when not in use. Avoid storing in airtight plastic bags, as these can trap moisture and potentially cause mildew or alter the fabric’s texture. Instead, opt for breathable storage solutions like cotton bags or storage bins.

Ensure the blanket is completely clean and dry before storing to prevent any lingering odors or the development of mold. A cedar sachet or lavender pouch can be added to the storage container to naturally deter moths and impart a pleasant scent. Avoid direct sunlight exposure during storage, as it can fade the colors over time.

Frequency of Washing

Determining how often to wash your minky blanket depends on usage and individual needs. For light use, washing every few months may suffice, while blankets used daily, especially by children, benefit from more frequent cleaning – perhaps every 2-3 weeks.

Avoid over-washing, as this can contribute to pilling and wear. Spot clean minor spills immediately to minimize the need for full washes. If the blanket is used for comfort during illness, washing after recovery is recommended. Always prioritize gentle care to preserve the softness and longevity of your cherished minky blanket;

Weighted Minky Blanket Washing Considerations

Weighted minky blankets require special care due to their added weight; gentle handling is crucial during washing to prevent damage and maintain functionality.

Special Instructions for Weighted Blankets

Washing weighted minky blankets demands extra attention. Due to the added weight from the filling, standard washing machines may struggle, potentially causing damage to both the machine and the blanket. It’s often recommended to utilize a commercial-sized, front-loading washing machine for optimal results.

Always check the blanket’s care label for specific instructions. If machine washing isn’t feasible, consider professional laundering services. Avoid harsh detergents, bleach, and fabric softeners. When drying, a low-heat tumble dry or air drying is essential to prevent clumping of the weighted material and maintain the minky’s softness.